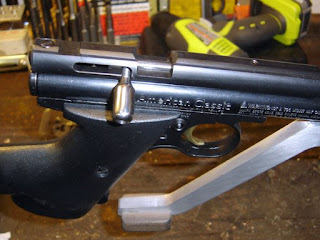
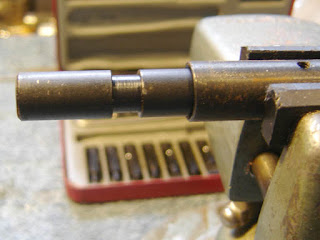
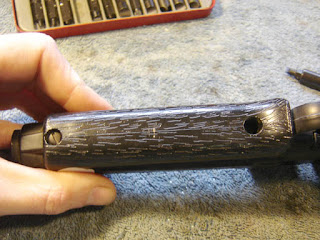
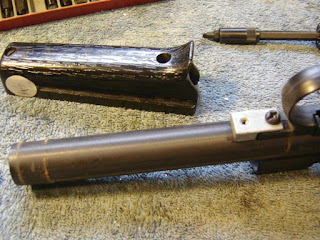
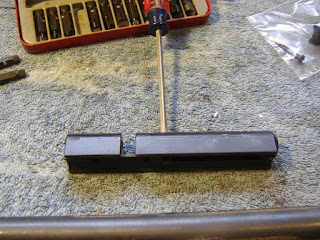
The Crosman bolt handle kept working loose and was a bit small for my fleshy fingers so I decided to make a new one. I say "Temporary" because I think that I'll probably end up making a slightly longer and somewhat more graceful version of the one shown here.
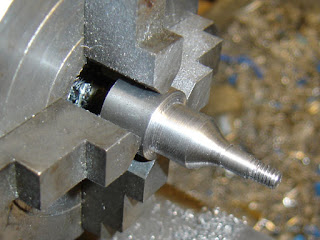
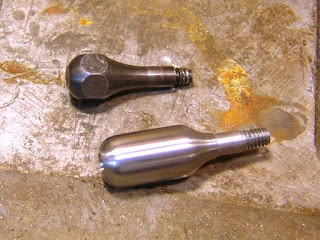
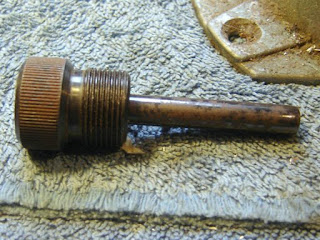
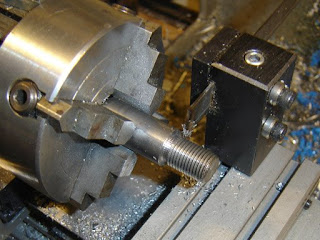
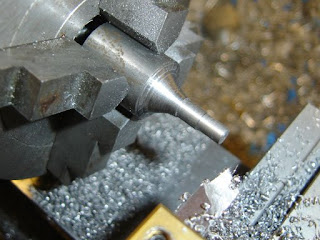
A piece of 5/8" free machining steel, left over from the adjustable piston project, was turned down to 3/16", then a section further to thread #8-32 and a bit roughed out freehand into a curve, and finished with files.
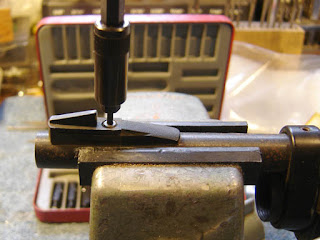
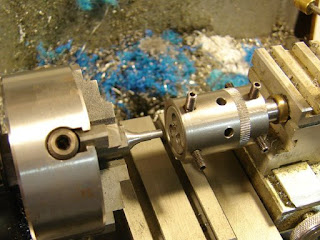
Using the die holder again.
The finished thread.
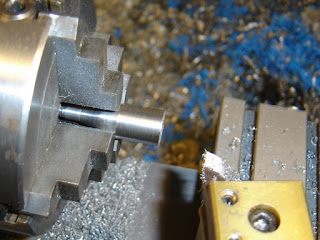
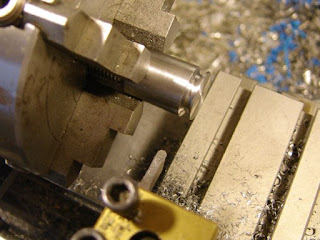
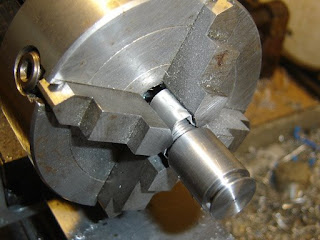
Flipped in the 4 jaw chuck and turned down, I think just a hair over 1/2". I should have just started with 1/2" stock, but it was one of those art projects...
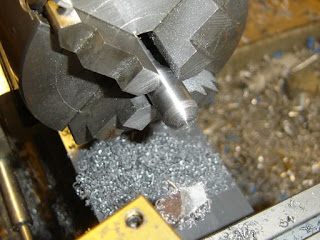
Freehand turned to a rough ball.
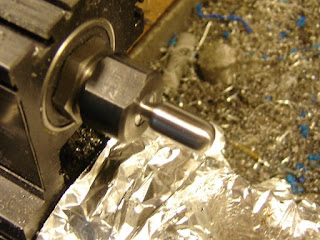
Chucked in a collet, filed and sanded.
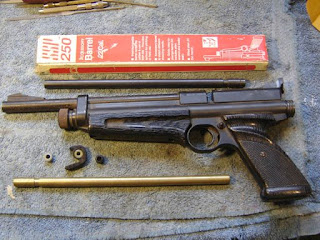
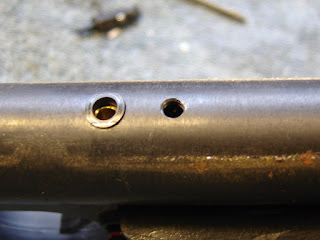
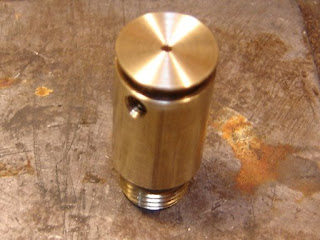
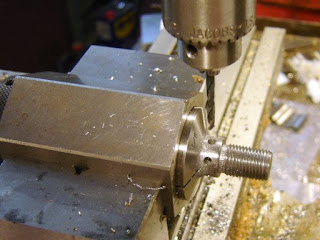
For some perverse reason I decided to drill and countersink the end, similar to an older Sheridan bolt handle. I don't really like the effect. You can see the tinier and less ergonomic handle that came with the steel breech, above. Notice that one thread is deformed, the new handle has far more thread engagement.
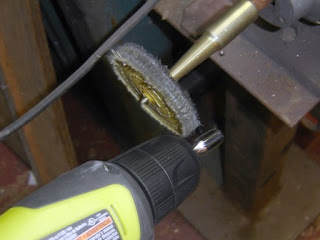
I chucked the bolt in my cordless drill and buffed it with some Fabuluster.
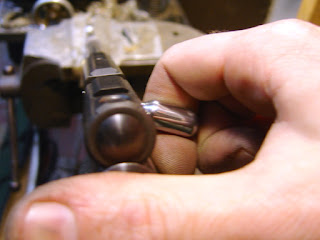
Shiny, blurry (you try focusing on a mirror!) and much better than stock. Not sure what I'll change, but probably a longer transition between the handle and the threads. Or something. Not sure. Like I said, it's "art". Total time was probably around a half hour.
It is long enought to comfortably be actuated by my finger. That I like.
Saturday, May 31, 2008
Thursday, May 29, 2008
The 1377 Carbine Project: An Adjustable Piston
I finally worked up the nerve to modify the internals of the 1377 carbine this week.
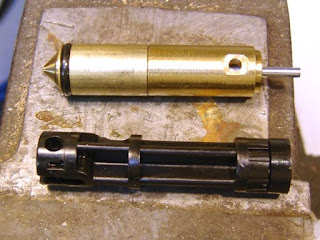
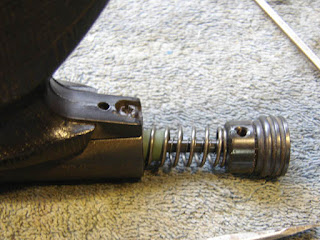
The stock valve assembly and piston.
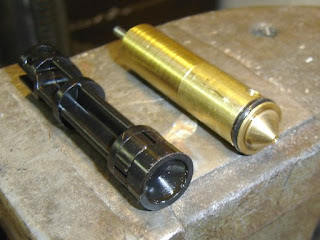
Notice the conical end of the valve body, and the conical seal on the piston.
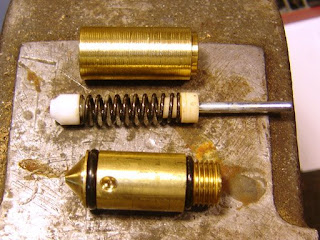
The valve was disassembled. Notice the very rough turning on the valve body!
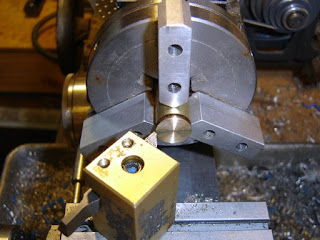
Facing the end of the valve intake end.
Nice and flat with a fine finish.
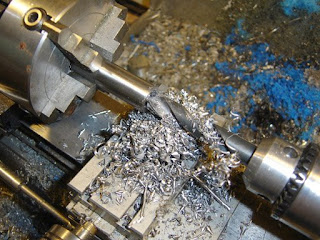
Drilling out a piece of 5/8" free machining steel, after turning it down a few thou.
Tapping it 1/2"-20 by hand, aligned on the lathe.
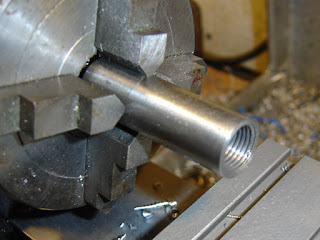
The finished thread. I then flipped it around and finished the other end to the same diameter.
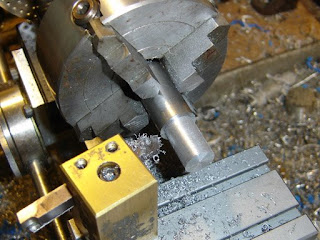
Turning down another piece of steel to 1/2" (minus about 10 thou).
I threaded it by hand using a die. No pics of that as I was cursing and sweating all the while. I now have a note "Buy good quality 1/2"-20 tpi die" on my to-do list. I then made a relief groove with the parting tool. Too much chatter.
I ground a radiused tool to do the o-ring groove on the other end. I found I got the best control by rotating the chuck by hand as I plunged the tool into the work a few thousandths at a time.
I put some aluminum sheet around the threads to protect them from the chuck and turned down the body a few thousandths and deburred everything.
Drilling six radial holes to allow adjustment. This turned out to be wholly wrong, I needed at least eight holes to easily adjust the piston when assembled in the carbine. Live and learn.
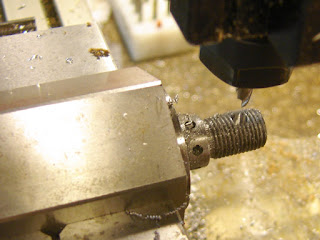
Making a 3/16" dia pocket in the threads.
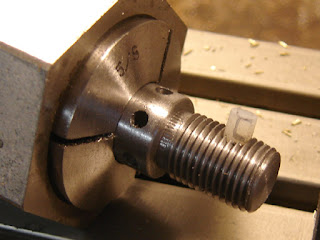
A piece of nylon rod was pressed in and then cut off to the thread diameter. This allows enough interference so that the adjustments don't become undone. The Daisy 717 uses a similar nylon patch.
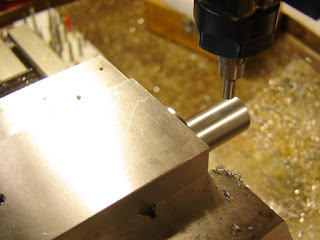
I used an edge finder (I use them often on these projects, did you know that I sell them?) to find the centerline of the rod and the end.
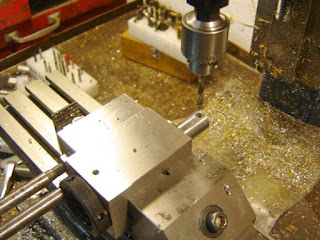
Drilling the pivot hole.
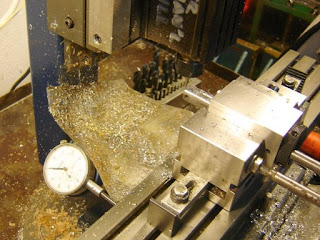
Milling the slot halfway through on each side. Notice the use of a dial indicator to keep the length of the slot consistent.
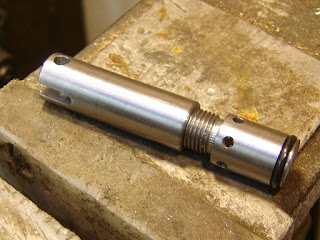
The finished adjustable piston.
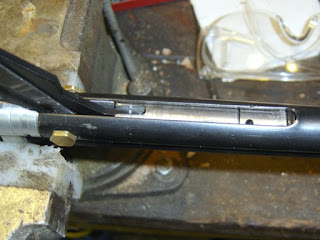
And mounted in the carbine. I only needed to adjust it about 1/8th of a turn to get it to touch the valve face. Notice the adjustment hole problem...
Anyway, the reason for making the new piston was to both increase the rigidity of the piston and to eliminate excess headspace, thus pushing more air into the valve on each stroke, yielding slightly higher pressures. Pumping effort did not increase, although there's a small amount of vacuum that needs to be overcome on the return stroke.
Using the chronograph I found that I got the following averages:
Before:
3 pumps: 421 fps
5 pumps: 523 fps
10 pumps: 645 fps
After:
3 pumps: 450 fps
5 pumps: 568 fps
10 pumps: 724 fps
Crosman Premier Light pellets, 7.9 grains, were used for all tests.
Tuesday, May 27, 2008
I Do Next to Nothing to a Crosman SSP 250
As dedicated readers already know, I purchased a Crosman SSP 250 at a local garage sale for $15.00. It was missing a few important pieces, the loading gate, and the seals for each of the two barrels. Derrick managed to find a spare loading gate, seals for all three possible calibers, and a .20 cal. barrel. Total cost was a paltry $20.00. All I had to do was install the new loading gate and do some cleanup work as the pistol surprisingly had good seals.
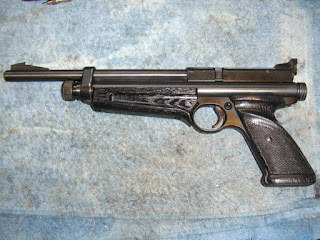
The SSP 250. SSP stands for Silhouette Sports Pistol. The brass barrel is the .20 cal one, the .177 and .22 are both blued steel.
The barrel seals and new loading gate. The loading gate is prone to breakage.
The gas cap. It does not seal the end of the tube, the cartridge seals directly on the valve.
I started by loosening the allen screw in the breech (sorry, forgot to take a pic) and removed the front sight. The front sight is also missing a shroud, but it doesn't need it to function.
I slid the barrel out. The turned down section is so the sight screw can pass through the barrel housing.
The barrel band setscrew is loosened so that the barrel hosuing can be removed.
Two screws hold the forearm on.
One screw goes into a lug on the barrel band, the other a lug attached to the grip frame.
The rear sight and screw was removed.
Then the other screw which holds the breech onto the tube.
A standard Crosman transfer port.
The rear grip frame screw was loosened, allowing the hammer assembly to slide out.
The other grip frame screw was removed and the grip assembly removed. Note the standard tiny little safety spring that can pop out.
Again, a typical Crosman grip frame.
The side plate was removed. Both the hammer and sear were painted that odd shade of green.
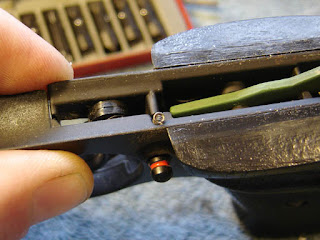
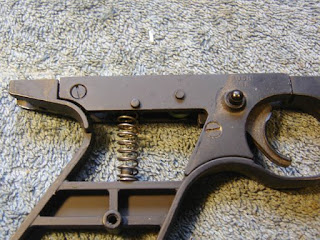
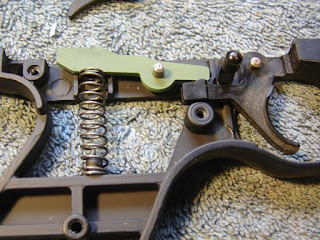
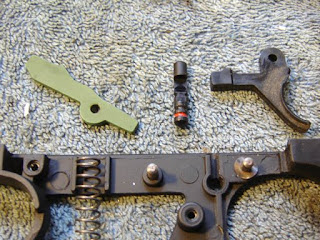
All the parts were pulled out. Notice the small spring washer on the trigger pivot pin. Also note how filty the trigger is.
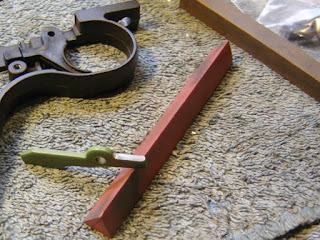
The only work I did (beside a quick cleaning, wire brush and steel wool derustifying and a slathering of cold blue on the tube and housing) was to polish the contact surfaces of the sear. I used the two machinists stones shown and stroked lengthwise. I also lubed that which needed lubing.
The pistol went back together and looks cleaner now. Another kind forum denizen pointed me to the manual which shows the procedure for swapping barrels.
The SSP 250 is fun to shoot! It will make a tin can dance. In .20 caliber I got between 400 and 440 feet per second, depending on how much gas was left in the cartridge.
Sunday, May 25, 2008
2 Months of Blogging!
It's my two month anniversary at this blog. I'm surprised by how much I'm posting, although being a labor of love it's a lot of fun to have the impetus to work on projects. I have a number of new things to work on over the next month, so I shouldn't be slacking off anytime soon.
On my "to do" list:
1) Finish the Crosman 1377 carbine
2) Lube, repair, rehabilitate the Hyscore/Hammerli .22 sidelever
3) Build a shooting bench of some sort, as I need to sight in a number of my scoped air rifles.
4) Reseal/lube my neighbors Winchester 353 (Diana 5)
And that's just what I can remember right now.
As I said before, I can always use free/cheap project airguns if you have any real beaters laying around that aren't worth the time or money to sell or repair. I could also use reference materials, spare parts, etc. But I've managed to lay in quite a few project guns without any help thus far! I am starting to panic somewhat as I'm completely out of storage space.
I'll be posting a blog index post shortly after this one, it should add to the utility of this blog as a reference.
Finally, here are a few links I've collected lately:
How To Make Springs
Airguns of Arizona Blog
Lukens Air Rifle Replica
A Blog Index
Here's a chronological index to all the posts.
To find a specific airgun use the search function of your internet browser, usually hitting the "ctrl" key at the same time as the "f" key, or in the "Edit" menu is the "find" function.
- It's a Start
- Fixing the Predom Lucznik Rear Sight
- Making a Barrel Band/Pivot Plug for the 1377, Part 1
- Making a Barrel Band/Pivot Plug for the 1377, Part 2
- Prototype Cocking Aid for the Predom Lucznik
- The 1377 Carbine Project Continues
- Fixing a Broken Cometa Indian Safety Switch
- 2 Weeks Along
- The 1377 Project Continues: Pump Arm, Part 1
- The 1377 Project Continues: Pump Arm, Part 2
- Saturday Score! Diana Modell 5, "V"
- Chucking a One Piece Sheridan Bolt in the Lathe
- A Rare Sheridan Problem
- Disassembling a Crosman 38T
- Just a Bit of Rambling.
- My New Spring Compressor
- Nygord's Trigger Modification of the Daisy 717
- A Month of Blogging
- The 1377 Project: Pump Arm Pin and Retainer
- Scope Base For the Crosman 187, Part 1
- Scope Base for the Crosman 187, Part 2
- Another pointless ramble.
- The Predom Lucznik Piston, Defeat and Victory.
- Replacing the Broken Crosman Phantom Front Sight
- Ok, I Felt Guilty, Phantom Crowning Part 2
- Friday Yard Sale Score!
- Sheridan Sight Adjustment Knobs
- Fixing the $10 Daisy 722
- New Seals For the Slavia 618, Part 1
- New Seals For the Slavia 618, Part 2
- Disassembling a Webley Hurricane
- Resurrecting A Diana Model 6M Pistol, Part 1
- Resurrecting A Diana Model 6M Pistol, Part 2
- Resurrecting A Diana Model 6M Pistol, Part 3
- Resurrecting A Diana Model 6M Pistol, Part 4
- Resurrecting A Diana Model 6M Pistol, Part 5
- Sunday (Hy-)Score
- Resurrecting A Diana Model 6M Pistol, Part 6
- Resurrecting A Diana Model 6M Pistol, Part 7
- Resurrecting A Diana Model 6M Pistol, Part 8
- 2 Months of Blogging!
- I Do Next to Nothing to a Crosman SSP 250
- The 1377 Carbine Project: An Adjustable Piston
- The 1377 Carbine Project: A Temporary Bolt Handle
- Ted's Sticky Crosman 1600
- Thursday Pointless Ramble
- Hy-Score/Hammerli Air Rifle Part 2
- Hy-Score/Hammerli Air Rifle Part 1
- Manu Arm vs Diana 5
- Diana Model 5 Disassembly, Part 2
- Diana Model 5 Disassembly, Part 1
- A Prototype Barrel Band for Derrick
- The 1377 Project: A New Bolt
- The 1377 Project: Valve and Port Tinkering
- Thursday Pointless Ramble
- A Scope Mount Experiment.
- A Scope Stop for the Original (Diana) 45
- A Small Puzzle
- Covering Up The Front Sight Grooves
- Stock Screw Cups
- Bobbing a Crosman 357 Hammer
- A Longer Barrel for the Crosman 357
- The 1377 Project, A Trigger Job
- Friday Pointless Ramble
- The 1377 Project, The Buttstock, Part 1
- The 1377 Project, The Buttstock, Part 2
- The 1377 Project, The Buttstock, Part 3
- The 1377 Project, The Buttstock, Part 4
- Friday Yard Sale Score, Benjamin 317
- The 1377 Project, The Buttstock, Part 5
- A Quick Job, Daisy 777 Elevation Nut
- The 1377 Project, The Buttstock, Part 6
- The 1377 Project, The Buttstock, Part 7
- Short Wednesday Ramble
- The 1377 Project, The Buttstock, Part 8
- The 1377 Project, The Buttstock, Part 9
- Fleamarket Find: Morgan Adjustable Recoil Pad for my Original (Diana) 45
- Benjamin 317 Rifle Disassembly, Part 1
- Benjamin 317 Rifle Disassembly, Part 2
- Benjamin 317 Rifle Disassembly, Part 3
- Benjamin 317 Rifle Disassembly, Part 4
- Benjamin 317 Rifle, New Seals
- My New Custom Shop 2300
- The Crosman 120, Part 1
- The Crosman 120, Part 2
- Two New Crosman 38's
- Crosman 38C, I Spoke Too Soon...
- My BSA Superstar, Part 1
- My BSA Superstar, Part 2
- My BSA Superstar, Part 3
- My BSA Superstar, Part 4
- Benjamin 317 "Bar-V" Sight Locknut
- New Leather Seals for the Predom Lucznik
- A Crosman 101 Quandary
- Front Aperture Sight Inserts for the Hy-Score Mod SM 810 (Diana Model 65)
- George's Palm Rest and A Friday Ramble
- The 1377 Project, Pivot Washers
- Benjamin 317 "Bar-V" Stock Nut and Washer
- Piston Tuning the Daisy 717
- Derrick's Crosman 357
- Fixing a Benjamin 312, Part 1
- Fixing a Benjamin 312, Part 2
- Fixing a Benjamin 312, Part 3
- A Valve Stem Seal for the Crosman 167, Part 1
- A Valve Stem Seal for the Crosman 167, Part 2
- Cleaning Up a Crosman 66, Part 1
- A Short Monday Ramble
- Cleaning Up a Crosman 66, Part 2
- Resealing a Diana Model 10, Part 1
- Resealing a Diana Model 10, Part 2
- Resealing a Diana Model 10, Part 3
- Resealing a Diana Model 10, Part 4
- Resealing a Diana Model 10, Part 5
- Resealing a Diana Model 10, Part 6
- Derrick Works his Magic on a Crosman 38T, Part 1
- Derrick Works his Magic on a Crosman 38T, Part 2
- Derrick Works his Magic on a Crosman 38T, Part 3
- Derrick Works his Magic on a Crosman 38T, Part 4
- Derrick Works his Magic on a Crosman 38T, Part 5
- Derrick Works his Magic on a Crosman 38T, Part 6
- Getting a Crosman 140 Working, Part 1
- Getting a Crosman 140 Working, Part 2
- Getting a Crosman 140 Working, Part 3
- Getting a Crosman 140 Working, Part 4
- Getting a Crosman 140 Working, Part 5
- Derrick's P17 Pistol
- Getting a Crosman 140 Working, Part 6
- Disassembling a Slavia ZVP
- Mounting a Williams Sight on a Crosman 167, Part 1
- Mounting a Williams Sight on a Crosman 167, Part 2
- Slavia ZVP, Making a Spring Guide.
- Slavia ZVP, Cleaning and the Stock Nut
- Slavia ZVP, Miscellany
- Short Sick Ramble
- Slavia ZVP, Dovetail Math
- Derrick's Xisco/BAM B26-2, Part 1
- Derrick's Xisco/BAM B26-2, Part 2
- Derrick's Xisco/BAM B26-2, Part 3
- Derrick's Xisco/BAM B26-2, Part 4
- Derrick's Xisco/BAM B26-2, Part 5
- Slavia ZVP, Fabricating the Front Sight
- Derrick's Xisco/BAM B26-2, Part 6
- Derrick's Xisco/BAM B26-2, Part 7
- Saturday Hy-Score
- Snowy Ramble...
- Disassembling the Crosman 707 Rifle, Part 1
- Disassembling the Crosman 707 Rifle, Part 2
- Reassembling the Crosman 707 Rifle, Part 1
- Reassembling the Crosman 707 Rifle, Part 2
- Rear Sight for the Slavia ZVP
- Diana Modell 5 Disassembly
- Finishing Up The Crosman 140
- Fixing a Stripped Powerlet Screw Thread on the Crosman 38T
- Derrick Fabricates a Wide Trigger, Part 1
- Derrick Fabricates a Wide Trigger, Part 2
- A Cocking Handle for My RWS (Diana) Model 45, Part 1
- A Cocking Handle for My RWS (Diana) Model 45, Part 2
- A Sight Aperture for a Beeman (Williams) Sport Aperture Sight
- Derrick Lightens His Webley Tempest Trigger
- Sunday Ramble and Miscellany
- Derrick's on a Trigger Frenzy! Part 1
- Derrick's Trigger Frenzy Part 2
- Reanimating a Daisy 230, Part 1
- Reanimating a Daisy 230, Part 2
- Smith and Wesson Model 79G Disassembly, Part 1
- Smith and Wesson Model 79G Disassembly, Part 2
- Smith and Wesson Model 79G Disassembly, Part 3
- Resealing the Smith and Wesson Model 79G, Part 1
- Resealing the Smith and Wesson Model 79G, Part 2
- Resealing the Smith and Wesson Model 79G, Addendum
- Disassembling a Crosman Model 130 Pistol, Part 1
- Disassembling a Crosman Model 130 Pistol Part 2
- Reassembly of the Crosman Model 130 Pistol
- Derrick's Vintage Crosman Grip Frame Information
- Disassembling a Sheridan Model C, Part 1
- Disassembling a Sheridan Model C, Part 2
- Resealing the Sheridan Model C
- Derrick's on a Beeman P17 Overhaul, Part 1
- Derrick's Short List for the Beeman P17
- Derrick's Beeman P17 Overhaul Finale
- Short February Ramble
- Resealing a Crosman 2100, Part 1
- Resealing a Crosman 2100, Part 2
- Derrick's 22XX Steel Breech Install & Barrel Change
- Disassembling the Daisy Model 200 Pistol, Part 1
- Disassembling the Daisy Model 200 Pistol, Part 2
- Derrick's Crosman Adapter for AR Muzzlebrakes
- Grip Stippling on the Diana Model 6M
- Partial Resoldering of a Benjamin Model 310 Air Rifle Barrel
- Notes on Cleaning and Resealing the Benjamin 310, Part 1
- Notes on Cleaning and Resealing the Benjamin 310, Part 2
- Magnetic Derrick's Crosman Bolt Hold Open
- Early Crosman Model 101 Disassembly, Part 1
- Early Crosman Model 101 Disassembly, Part 2
- Early Crosman Model 101 Disassembly, Part 3
- Muzzle Weight For Derrick's Buddy, Joe, Part 1
- Muzzle Weight For Derrick's Buddy, Joe, Part 2
- Early Crosman Model 101 Resealing, Part 1
- Early Crosman Model 101 Resealing, Part 2
- Early Crosman Model 101 Resealing, Part 3
- Early Crosman Model 101 Resealing, Part 4
- Early Crosman Model 101 Resealing, Part 5
- Derrick's IZH 61 Sight Upgrade
- A Mid April Ramble
- A Prototype Adjustable Aperture Disk, Part 1
- A Prototype Adjustable Aperture Disk, Part 2
- A Prototype Adjustable Aperture Disk, Part 3
- Derrick's IZH 61 Tune Part Uno
- IZH 61 Tune Part Deux
- Fabricating a Replacement Sight for a Crosman 101, Part 1
- Fabricating a Replacement Sight for a Crosman 101, Part 2
- Fabricating a Replacement Sight for a Crosman 101, Part 3
- Resealing a Crosman 101, valve body gasket
- Derrick's Crosman 180 Repair Part 1
- Derrick's Crosman 180 Repair Part 2
- Derrick's Crosman 180 Repair Part 3
- Derrick's Crosman 180 Repair Part 4
- Making a Steel Breech for a Crosman 2240, Part 1
- Making a Steel Breech for a Crosman 2240, Part 2
- Making a Steel Breech for a Crosman 2240, Part 3
- Messing With a Crosman Model 70, Part 1
- Messing With a Crosman Model 70, Part 2
- Messing With a Crosman Model 70, Part 3
- More Crosman 180 -- A New Bulk Fill Cap
- Weekend Yard Sale Scores
- Crosman 180 Stock Refinish Part 1
- Crosman 180 Stock Refinish Part 2
- Disassembling an early Crosman Model 760, Part 1
- Disassembling an early Crosman Model 760, Part 2
- Benjamin Marauder
- Disassembling an early Crosman Model 760, Part 3
- Crosman 180 Stock Refinish Part 3
- Crosman 180 Stock Refinish Part 4 Finale
- Bolt & Barrel for the 2240 Steel Breech
- Muzzle Weight and Trigger Job for the 2240
- Short Note on the IZH61
- Benjamin Marauder Scope Mounting Thoughts
- Aperture Disk Extension Tube for the Williams Sight
- The Crosman LPA Mim Sight
- Modified Piston for a Beeman P17
- Slavia Model 630 Disassembly, Part 1
- Slavia Model 630 Disassembly, Part 2
- Prototype Roll Pin Pusher
- Installing a Morgan Adjustable Recoil Pad on a Baikal 513M Air Rifle
- Crosman 600 Bulk-Fill / Barrel Extension
- Slavia 630 Piston Seal, etc.
- Crosman 147 BP Stock Refinish, Part 1
- Crosman 147 BP Stock Refinish, Part 2
- Disassembling a Gamo Hunter 220, Part 1
- Disassembling a Gamo Hunter 220, Part 2
- Crosman Mark 1 / RB Grip refinish
- Walther Aperture Sight Disassembly
- Crosman 147 BP Stock Refinish Part 3 Final
- Hammer Spring Adjuster for Crosman 22XX
- Fabricating a Replacement Front Sight for the Slavia 630, Part 1
- Fabricating a Replacement Front Sight for the Slavia 630, Part 2
- George's Sheridan Stock
- Match Grips for a Crosman 22XX Part 1
- Match Grips for a Crosman 22XX Part 2
- Disassembling an IZH Baikal 513M, Part 1
- Disassembling an IZH Baikal 513M, Part 2
- Disassembling an IZH Baikal 513M, Part 3
- Match Grips for a Crosman 22XX Part 3
- Match Grips for a Crosman 22XX Part 4 Final
- A Word From Our Sponsors
- Reassembling an IZH Baikal 513M, Part 1
- Reassembling an IZH Baikal 513M, Part 2
- Screw Cups for Gamo and BAM B3-1
- Tweaking the IZH513M Rear Sight, Part 1
- Tweaking the IZH513M Rear Sight, Part 2
- Crosman 600 Grips Part 1
- Crosman 600 Grips Part 2 Final
- Terrible Stock Repair of a Diana Model 45
- Gamo PT-800 Pistol Disassembly (Daisy 1140)
- Gamo PT-800 Pistol Reassembly (Daisy 1140)
- Modified Mount for Crosman Steel Breech
- BAM B3-1 Tune Up Part 1
- BAM B3-1 Tune Up Part 2
- Slavia 630/631 Miscellany, Part 1
- Slavia 630/631 Miscellany, Part 2
- BAM B3-1 Tune Up Part 3
- Slavia 630, Snatching Defeat from the Jaws of Victory
- Disassembling & Resealing the Crosman Model 73 "Saddle Pal", Part 1
- Disassembling & Resealing the Crosman Model 73 "Saddle Pal", Part 2
- BAM B3-1 Tune Up Part 4
- Roger Mondial Pistol Disassembly, Part 1
- Roger Mondial Pistol Disassembly, Part 2
- BAM B3-1 Tune Up Part 5
- Roger Mondial Pistol, Finishing Up
- Rambling, Probing
- BAM B3-1 Tune Up Part 6 Final
- Daisy Model 188 BB Pistol Disassembly, Part 1
- Daisy Model 188 BB Pistol Disassembly, Part 2
- BAM B3-1 Addendum--End Cap Back Up
- Crosman 622 Disassembly, Part 1
- Crosman 622 Disassembly, Part 2
- Morgan Adjustable Pad - A Bolt for an Old Model
- Fixing the Crosman 622, Part 1
- Benjamin Marauder Baffle Modification
- Fixing the Crosman 622, Part 2
- Installing a Morgan Adjustable Pad on a Beeman R1
- Haenel 310 Disassembly, Part 1
- Haenel 310 Disassembly, Part 2
- Some Notes on Reassembly of the Haenel 310
- Haenel 310 Rear Sight Elevator
- Derrick's Two-Tone FWB 124
- Haenel 310, Trigger Cutoff Spring
- Haenel 311 Disassembly
- Trigger Shoe for a Crosman 13XX/22XX or...
- Trigger Shoe Update
- Short Saturday Ramble...
- Crosman 150 Service
- Haenel 311 Aperture Sight Disassembly
- Derrick's Daisy Powermaster 1200 find
- Daisy 717 Repair Part 1
- Daisy 717 Repair Part 2
- Daisy 717 Repair Part 3 Final
- Haenel 311 Sight and a Small Problem After Reassembling the Rifle
- Finishing Up the Haenel 311
- Benjamin Model 132 Pistol Disassembly, Part 1
- Benjamin Model 132 Pistol Disassembly, Part 2
- Benjamin Model 132 Pistol Disassembly, Part 3
- Benjamin 312 Leather Seal Shenanigans
- Finishing up the Benjamin 132
- Daisy 717 Trigger Refinement Part 1
- Daisy 717 Trigger Refinement Part 2
- Taiyo Juki (EIG) Junior Disassembly, Part 1
- Taiyo Juki (EIG) Junior Disassembly, Part 2
- Taiyo Juki (EIG) Reassembly
- Crosman MK2 Small Mystery--Solved!
- A NOS Weihrauch 35 E Gets an Overhaul Part 1
- A NOS Weihrauch 35 E Gets an Overhaul Part 2
- A NOS Weihrauch 35 E Gets an Overhaul Part 3
- Sidetracked on Paintball Auto-Cockers
- A NOS Weihrauch 35 E Gets an Overhaul Part 4 Final
- Crosman Model 140 Disassembly, Part 1
- Crosman Model 140 Disassembly, Part 2
- Some More Notes on Reassembling a Crosman 140
- A Rear Sight Plate for the Weihrauch 35E
- Crosman Model 600 Disassembly, Part 1
- Crosman Model 600 Disassembly, Part 2
- Crosman Model 600 Disassembly, Part 3
- Crosman Model 600 Disassembly, Part 4
- Getting One Crosman 600 Back Together
- Front Sight Adapter for the QB77
- Fitting the old Morgan Butt Pad to the QB77
- Trigger Shoe for a QB77
- Pile of Benjamin Parts
- BSA Meteor Disassembly, Part 1
- BSA Meteor Disassembly, Part 2
- BSA Meteor, Back Together
- Aperture Retrofit for the QB77
- A New 2250 Gas Tube
- BSF S20 WCM Pistol
- Another Crosman 180, Part 1
- Another Crosman 180, Part 2
- Another Crosman 180, Part 3
- An Interesting Muzzle Weight for the HW35
- A New Crosman 22XX--Making a Hammer Part 1
- A New Crosman 22XX--Making a Hammer Part 2
- Getting that Beater Crosman 600 Working, Part 1
- Getting that Beater Crosman 600 Working, Part 2
- A New Crosman 22XX--Breech Cap and Cocking Pin
- Blogiversarry
- A new Crosman 22XX--Bolt and Gas Tube End Cap
- Butt Plate For the Crosman 180
- Milling Scope Mount Grooves In The Crosman 180 Receiver
- A New Crosman 22XX--Finishing Up
- Reanimating a HW80K, Part 1
- Reanimating a HW80K, Part 2
- Reanimating a HW80K, Part 3
- Toys That Shoot Airgun Show Findlay, Ohio
- Reanimating a HW80K, Part 4
- Reanimating a HW80K, Part 5
- Reanimating a HW80K, Part 6
- Quick Fix--The Smith & Wesson 78G from the Findlay Show
- Match Grips for a Daisy 7X7 Part 1
- Match Grips for a Daisy 7X7 Part 2
- Match Grips for a Daisy 7X7 Part 3 Final
- Gecado Diana Model 5 Pistol Disassembly, Part 1
- Gecado Diana Model 5 Pistol Disassembly, Part 2
- Gecado Diana Model 5 Pistol, Fixing The Piston Head
- Old Style Benjamin Stems from New Sheridans
- A Weihrauch Rear Sight Screw for Alan
- Gecado Diana Model 5 Pistol, Fail Whale
- Fitting A New Rubber Band To A Slingshot
- Haenal 303-Super Stripping the Stock Part 1
- Cleaning Up A Thrashed Diana Model 5 Pistol End Cap
- Haenal 303-Super--Still Stripping the Stock
- Gun Toys RO71 Air Pistol Overhaul
- Finally Getting Around To That Diana 5
- Cleaning Up the Diana 5 Sight
- BSF S20 WCM Rear Sight Project
- The 1377 Project, MKII Piston, Part 1
- The 1377 Project, MKII Piston, Part 2
- The 1377 Project, MKII Piston, Part 3
- The 1377 Project, MKIII Piston
- Failure/Redemption Staining the Haenel 303-Super
- Walther LG55 Quick Stock Fix
- Crosman Single Action 6 Disassembly
- Crosman SA6 Reassembly & Repair
- Haenel 303-Super Finished Stock
- Yet Another Crosman 600
- Still More Crosman SA6? Refinish and Refurb
- Spinning the Wheels on the SA6
- Another Sheridan Blue Streak, Part 1
- SA6 Refinish Complete--???
- New to Me Crosman 160
- Canton McKinley Regional Pistol Match
- Another Sheridan Blue Streak, Part 2
- Making a Bulk-Fill Cap for a Crosman 160--Part 1
- Making a Bulk-Fill Cap for a Crosman 160 Part--2
- Making a Bulk-fill Cap for a Crosman 160 Part--3
- Spiffing Up My Old Crosman 150
- Making a Bulk-Fill Cap for a Crosman 160--Part 4 Final
- On the Level--Part 1
- On the Level--Part 2 Final
- BSF S20 WCM Pistol Disassembly, Part 1
- BSF S20 WCM Pistol Disassembly, Part 2
- Magazine for a Crosman 118--Part 1
- Rebuild of Joe's Crosman 454
- Magazine for a Crosman 118--Part 2 Final
- Some Notes on Reassembling the BSF S20
- Dilemma: Anschutz Palm Rest #4841/2
- Labor Day Ramble
- Marksman Mod. 70 Disassembly
- Removing a Crosman 101 Forearm From the Pump Arm
- Marksman Mod. 70 Forward Progress
- Feinwerkbau Palm Rest
- Umarex Walther PPK/S
- Finishing up the Marksman Mod. 70
- The Rather Unique FB Record Champion
- Gamo PT-80 Disassembly, Part 1
- Gamo PT-80 Disassembly, Part 2
- Gamo PT-80 Disassembly, Part 3
- Gamo PT-80 Disassembly, Part 4
- Gamo PT-80 Disassembly, Part 5
- Gamo PT 80 CO2 Cartridge Seal
- Benjamin 3030 Disassembly, Part 1
- Benjamin 3030 Disassembly, Part 2
- Benjamin 3030 Disassembly, Part 3
- Benjamin 3030 Disassembly, Part 4
- Recessing the Stock Screw on the Sportsman QB77
- Benjamin 3030 Reassembly, Part 1
- Just some of this and that
- Grips for the Crosman 150 Part 1.5
- Still Messing With the Benjamin 3030
- Grips for the Crosman 150 Part 2
- Grips for the Crosman 150 Part 3
- Crosman Model 99 Rifle Disassembly, Part 1
- Crosman Model 99 Rifle Disassembly, Part 2
- Crosman Model 99 Rifle Disassembly, Part 3
- Crosman Model 99 Reassembly, Part 1
- Grips for the Crosman 150 Part 4 Final
- Crosman Model 99, Driving Me Nuts, Part 1
- Anti-Glare Tube for a HW Front Sight
- Trigger Blade for IZH 61
- Rochester Air Rifle Disassembly, Part 1
- Rochester Air Rifle Disassembly, Part 2
- Rochester Disassembly, Part 3, Valves #2-#5
- Insane Weights for the Aeron
- Jeffrey Corton’s Diana Seal Tool
- Updates and More IZH 61 Sight Stuff
- Anti-Glare Tube for the Rear Sight
- Emergency Christmas Repair on a Crosman 38T
- Diopter Sight Disassembly and Modification
- Rochester Disassembly, Part 4
- Gamo V-3 from Mike
Subscribe to:
Posts (Atom)