Friday, August 29, 2008

New Leather Seals for the Predom Lucznik

So I finally decided to try my hand at making leather seals.

As I related before, the seals on the Predom worked ok, but were really nasty looking.
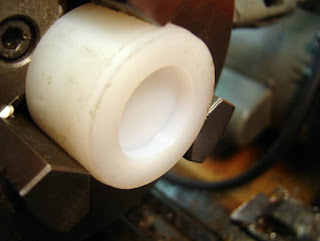
So I turned up a form from some UHMW scrap.

And pressed a piece of wet leather in, leaving it clamped for 24 hours.

Then I trimmed away the excess.

I finished up with a very sharp xacto.
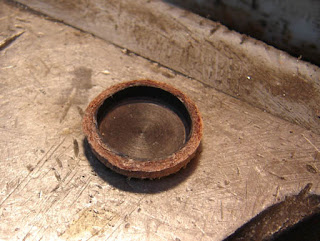
Doesn't look bad.

I made the inner washer by stamping with an arch punch.
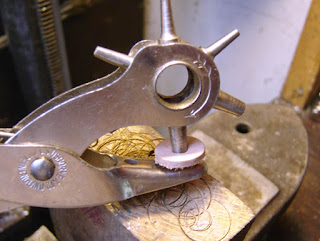
Then punching the hole. I knew all my leatherworking tools would come in handy someday.

Exciting!

Old and new seals.

I soaked them in oil for 24 hours.

The inner leather washer had to have the countersink for the screw head. I basically just carved it out with the xacto before soaking..

It sort of wiggled around a bit when I screwed down the screw, but I was able to massage it back round. I inserted it into the pistol and reassembled.

Well, it hasn't made any difference in velocity, although I'm hoping as it wears in it will become more efficient. We'll see. I had a hard time deciding between hair out and hair in, but the original seal seemed to have the hairy side out, so that's what I went with.

Wednesday, August 27, 2008

Benjamin 317 "Bar-V" Sight Locknut

Since I resealed the Benjamin 317, there's been one little detail left to finish...

The "Bar-V Rear Sheave Sight" is supposed to have a lock nut, not a cheap looking hex nut. So as I thumbed through my copy of DT Fletcher's "The St. Louis & Benjamin Air Rifle Cos" book, I found a few line drawings of the nut in various advertisements that conveyed how it should look.

Drilling some 1/4" stock for a #4-48 tap.

Straight knurling. Notice my crude knurling tool. This isn't ideal on the Taig lathe, due to the force needed. But I didn't feel like setting up another tool on my South Bend.

Tapping the nut.

Parting off. Usually for parts like this I'll hit the outside edge with a file to chamfer, then part halfway through, hit the inside edge with the file, then finish parting off.

Screws right on.

I hit it with some "perma blue", which is neither perma nor blue...

Of course I decided to search for the patent on this sight, and found it, so I may have to see whether the production sight used the toothed spring washer described in the patent.

Monday, August 25, 2008

My BSA Superstar, Part 4

So I asked around on the two main U.S. and U.K. airgun forums about my rifle. The answers came down to "you have a poorly done conversion" and from the "Ben" in Theoben, "Thats how they were 10 years ago!" So it is likely a Theoben setup, but that doesn't mean I have to like it. So I decided to put the original BSA coil spring back in.

I found some o-rings that fit the rotary breech and slid it in first, then tapped the handle on.

I put the spring guide in the piston.

And slid the piston in. The slot on top clears the scope rail feet.

You can't slide the piston in if the breech is open, so I closed it...but it was a good seal test!

Slotting a pusher so that it will clear the cross pin and bear on the spring guide washer.

I drifted the scope rail back on.

Pushing in the spring and guides.

Once the end of the guide is past the crosspin hole, I pushed the crosspin in and aligned it.

All the force is now bearing on the cross pin.

I used the conversion end cap because I had to tap the hole for the stock screw out to #10-32. Figured I'd keep the stock end cap stock...

I pushed in the sear and the pin that it pivots/slides on.

I glued together the plastic cap.

And inserted it into the end of the tube.

Finally I attached the stock to the rifle.

I checked to make sure the rifle functioned, and it did. So I put some shots over the chronograph. With Crosman Premier Lights I was getting around 840-860 f.p.s., or just over 12 ft/lbs. This is just fine, and about 100 f.p.s. faster than it was shooting before. Whether it was the new breech seals or replacing the Theoben ram, I don't know.


Now what am I going to do with this Theoben pump?