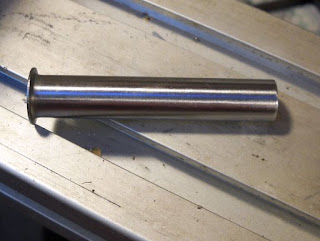
Still plugging away on this one.
Another go with the Cratex wheel. Removed the high spots from the remnants of the spot welds previously milled away. Goodbye old miserable sight.
Opted to mount a Weaver-type scope base. I looked around for a couple days and bought a couple $8 candidates for the parts box before settling on the Weaver #88 base (for Mosberg shotguns). The bottom of the #88 is curved and a very close match to the B3-1 tube. It's taller than I'd like, but the extended length is a big plus as it will provide correct eye relief with most scopes as well as fit red dots. Downside? It's got that hi-gloss finish.
I painted the top of the receiver with some Dykem layout fluid and scratched a centerline, but it just made me nervous. I looked critically at the BAM receiver/barrel assembly and can tell it's not what you'd call 100% aligned. It's not off much, but the parallel line on the receiver didn't look parallel to the bore line. I removed the layout fluid and gave it some more thought. I finally decided to use the base itself to spot the holes. I mixed some 5-minute epoxy and put a small amount on the base. Let it tack, then pressed it onto the receiver. Aligned it by eye until it looked "right". I know, boo hiss. No drama yet. We'll all see much later if I got it right.
With the base glued, I spotted the 4 holes with a transfer punch then pulled the base off the receiver. The epoxy, fortunately, didn't put up much of a fight and peeled right off. Deepened the marks with a spring loaded center punch then found the drill bits.
Almost forgot. One of the other major points favoring the #88 base are the #6-48 mounting screws. The BAM receiver tube wall is about 0.0770" thick. The 48 threads per inch on the mounting screws allow for something like 3.6 threads in the tube wall. (Nick should check my math here) Anyway, I need thread contact to make this hold together and a finer thread gets more of them when there's no wall thickness to work with. I used a #31 (0.1200") as the tapping size drill. Had to make a run to Kromhard Twist Drill company to get a #6-48 tap.
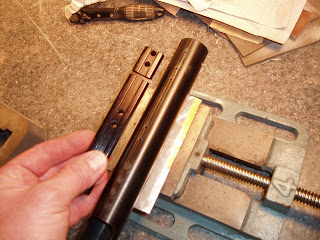
Serious sigh of relief when I saw that the holes lined up.
Not shown: Chucked the #6-48 tap in the drill press and started all the holes to ensure they were vertical. Finished to full thread depth by hand.
Base mounted.
Next problem: Screws protrude into the receiver tube. These need to be flush with the inside wall to allow the sliding compression tube to actually slide.
I thought about hand filing, but that'd take forever. Measured the thread protruding from the bottom of the base and added the receiver wall thickness. Tapped a brass nut to #6-48 and added washers until the numbers worked.
The washers, plus the nut thickness is exactly the amount of thread needed. All exposed thread is excess and can be cut off.
Mounted the nut into the 3-jaw chuck and faced off the threads with a carbide knife.
Screws started at 0.3085" OAL. Ended at 0.2480" Bolted the mount down and the screw depth was spot on. Of course, there were still burrs inside the tube at each hole from the drilling and tapping procedure.
Chucked a flex-hone into a cordless drill and coated it with oil. (the flex hone, not the drill)
A quick, light pass deburred the tube.
Took a few minutes to clean out all the oil and metal debris, but the inside is smooth.
Removed the base from the receiver and set it up in the horizontal milling attachment on the Taig. Adding more cross slots seems somehow, um, appropriate to the project. I hesitate to utter the overused term "tactical"...
Anyway, what I'm trying to say is that I decided to make the rail look less "sporty" and more "tactical". You know, because this is a $60, 550 fps "tactical" air rifle. Uh huh.
So, I did some of this...
and some of that...
And since glossy isn't tactical, it got painted "flat military tactical spec-ops Navy SEAL black" from Rustoleum. Seriously, that's what the can said.
Still more in few days.
Friday, September 25, 2009
Tuesday, September 22, 2009
Slavia 630/631 Miscellany, Part 2
Since I had the 631 apart I figured I'd clean and lube it.
Nasty red grease...
My sister up in Canada bought me some 630/631 piston seals from D&L airguns for my birthday. They won't ship to the states and I'm not selling them!
Not the best finish on the piston.
Polished it on the unitized wheel.
Same for the spring guide.
Much better.
I had a moment of genius and decided to bear against a bearing when reassembling.
Allows you to more easily thread the end cap into the tube. I think I'll make a better fixture in the future.
I had to release the tension on the barrel latch when inserting the pivot screw.
I don't know what the white stuff is (cocoa butter? soap?) but it was caked up on the spring that holds the cocking assembly against the tube.
I spray painted the plain aluminum muzzle break I made two years ago.
Finished flat black. Looks much better.
Monday, September 21, 2009
Slavia 630/631 Miscellany, Part 1
I needed to measure the barrel pivot lock screw, safety and trigger spring on the Slavia 631 so I could make replacements for the other beater Slavia 630 I bought. Disassembly is identical, almost, to the 630 (pt.1, pt.2)
My Slavia 631. The previous owner had chopped the barrel and did a terrible "stippling" job on top of the factory checkering.
The lock screw.
It's pretty tiny.
Measuring the thread length.
Using feeler gages to measure the slot width.
When it fits snugly you have the proper stack, in this case the .018" and .017" together.
I just couldn't see the thread gage at the fine pitch - I think it's .5mm pitch as that's standard for a 3mm screw.
So I dragged out my 10x toolmakers scope and checked the fit. Glad I was able to shoot this pic through the eyepiece.
Here's a sketch of the dimensions. The rounded head isn't critical and will be done with files. I won't bore you with the making as I already posted the operations for a screw here.
The Slavia 630/631 safety. Yikes.
The straight shoulder bits were easy to measure.
The centers of the angled bits? Had to eyeball them.
That's a seriously messed up set of dimensions in this uber-sketch. The rifle works without a safety so I don't know if I'll attempt making it. But if I do I'll need to make multiple prints with different dimensions for the various operations. I have no idea how critical the tolerances are.
The trigger spring? It's .552" overall length, .123" diameter, .0185" wire diameter and has about 12 coils with each end closed neatly. I couldn't find anything close in my drawers of springs so I'll have to make one I suppose.
Subscribe to:
Posts (Atom)