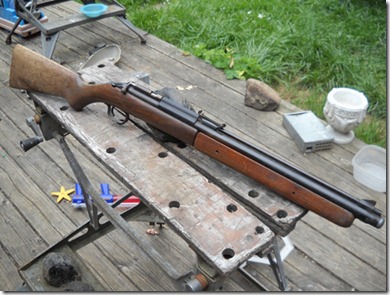
Figured it was time to get this Sheridan Blue Streak working. The serial number, 243730, shows it was made in 1978. The stock is beat up and needs refinishing. The inlet valve is toast. It will hold one pump of pressure and that’s it. There’s some rust, etc.
The rifle.
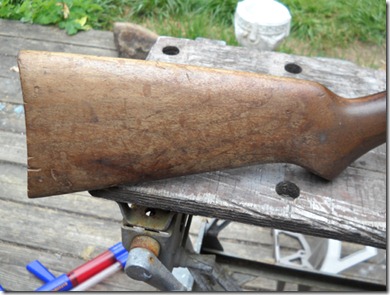
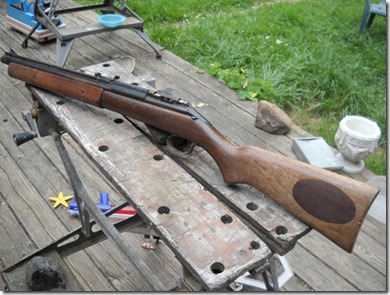
You can see the buttstock is bleached and chipped. Not sure if I can work all the chips out…
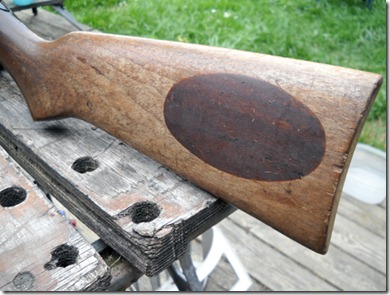
Sheridans of that era had a big sticker on the buttstock, must have been removed after all the wear occurred.
Even before bleaching the stain was heavy and masked the grain.
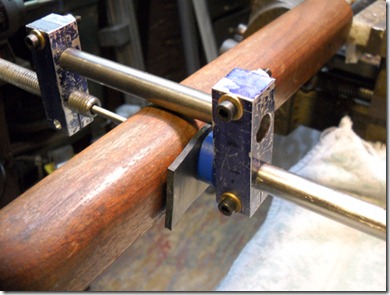
Using my fancy roll pin extraction tool. Notice the rubber to prevent marring the forearm.
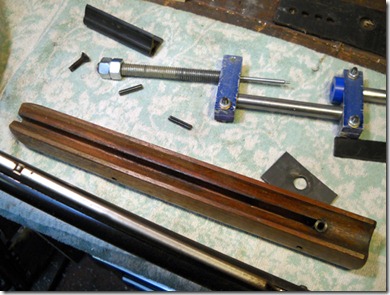
The forearm removed. The rubber bumper tube is in place.
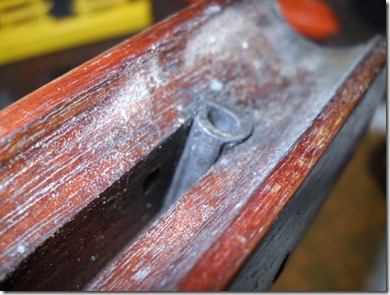
Rubber bumper.
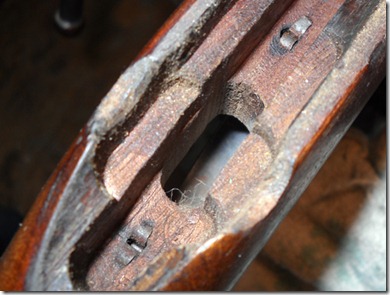
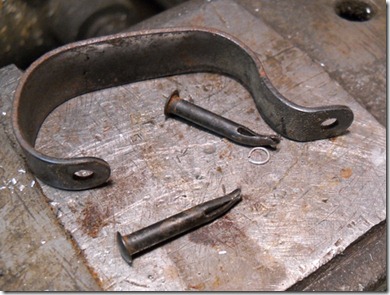
Since I’m going to sand the stock, I need to remove the trigger guard. Held by tubular split rivets. Some careful prying got them out.
The rivets are malleable and can be restored.
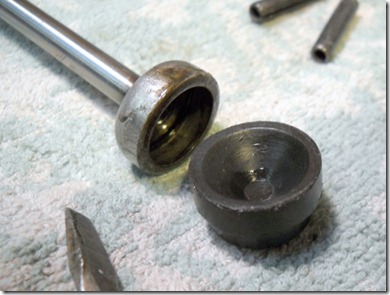
The pump cup was ok, but I have a new replacement.
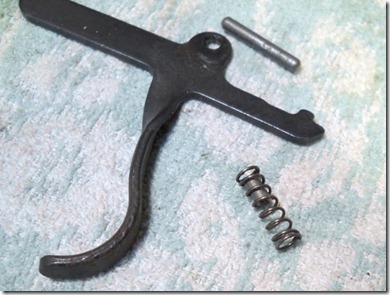
Trigger spring with guide pin.
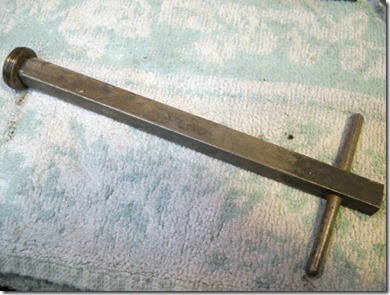
Using the antique wrench on the valve.
Worked well.
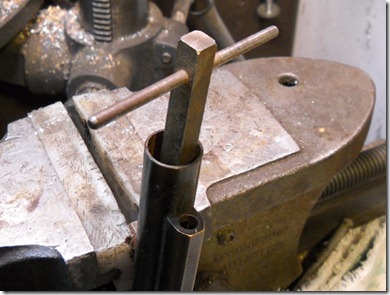
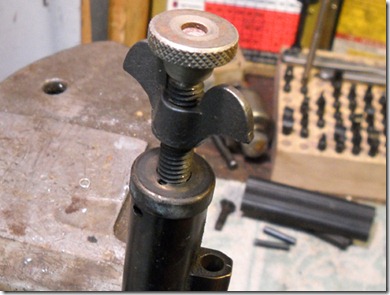
The antique puller in use. I like the brass cap that slips over the end of the tube.
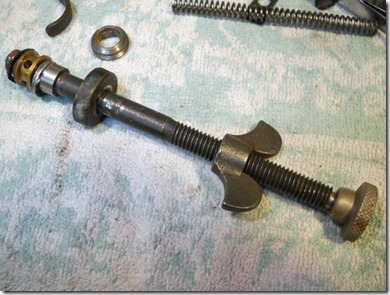
Valve removed.
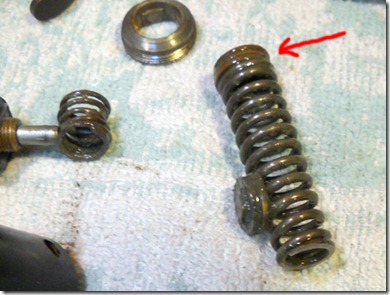
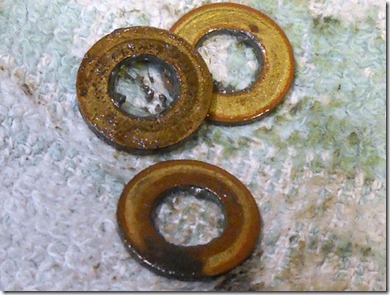
Rather than one washer there was a stack between the valve spring and the inlet spring. This also marks the first time the inlet valve was not stuck at the bottom of the valve. Small miracles.
Three washers? Was this a mistake at the factory or just one of many variations over the years?
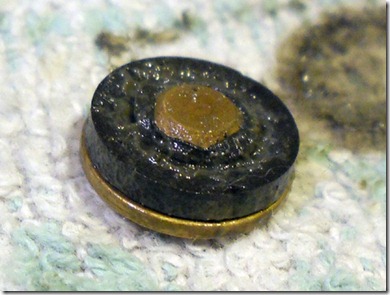
Inlet valve was toast. I’ll make a teflon replacement as I have on so many other pumpers.
Now to get to the hard work…

39 comments:
Nick,
Looking forward to this one, as the last pumper I "worked on" was when my friend and I tried to resuscitate his dad's old Benjamin, with hilarity ensuing. We were twelve or so, with the only good result being we didn't do any further or lasting harm:).
Ahh, the Master at work once again!
I am envious of you ability to create the tools you use, not to mention just whipping out a seal out of raw stock.
Do keep us posted.
KidAgain
How can you tell the year of manufacture, from the serial numbers?
I know it may be a silly question, but...
Crosman has an online table listing the dates.
http://www.crosman.com/airguns/service/dates-benjamin
hello Nick Carter, can you tell me the diameter of the tool is inserted through the tube from the pump to repair the internal kit, thanks
http://anotherairgunblog.blogspot.com/2008/08/benjamin-317-rifle-disassembly-part-2.html
http://anotherairgunblog.blogspot.com/2008/08/benjamin-317-rifle-disassembly-part-3.html
Shows the two tools you need to make.
I have a Sheridan Blue Streak 5mm pellet rifle left to me by my father. It appears to be an older one with serial #080457. It no longer works but seems to be in great condition. There is no rear sight on this one and does not appear to ever have been one.
The pump is very hard to work and holds no pressure. Can you recommend a good place to send it in for repairs? Thank you!
For reseal kits, parts and service you can try Bryan and Associates, Mac1, Precision Pellet or JG airguns.
http://www.bryanandac.com/
http://www.mac1airgunstore.com/
http://www.airgunshop.net
http://www.jgairguns.biz/
In the UK: Lawrie Amatruda, lawrieandpat@talktalk.net
Chambers Gunmakers
http://www.gunspares.co.uk/shopdisplaycategories.asp?id=23960&cat=Airgun+spares
Tell them I sent you.
Thank you for sharing this information. My 1960's Blue Streak was mechanically rebuilt a few years ago, but the stock could use refinishing. Same thing for a B397 Benji-Sheridan we have. Question: does removing stocks and forearms mess up any delicate mechanicals, or as a novice should I refinish with stocks attached (not my 1st choice). Again, THANKS!
Removing the stock is easy and doesn't mess anything up. Removing the forearm is difficult as you have to punch out the roll pins without accidentally chipping out the wood.
Great, thanks.
thank you for the info, when i was a kid this was the air rifle. i could only dream of. now many yrs later i own one that needs this repair. ,, before the seal went i could hit a bottle cap at around 70 ft' or so.
I'm working on my first Sheridan blue streak teardown and have it to the point where the square drive nut is out of the breach but I need to make a tool to fit the threaded stem to pull the guts out. Any chance you could tell me what size the threads are? Can't find that info anywhere.
Thanks
9/32"-32 tpi, AFAIK:
http://anotherairgunblog.blogspot.com/2008/08/benjamin-317-rifle-disassembly-part-3.html
hey Nick carter, You said You can make your own intake check valve seal. What do you use for the teflon button or do you use like a faucet type seal over the original brass back side of the factory one? My email is yamajo242@gmail.com name is Joe. Would really appriciate this info.Thanks.
Yes, I just turned some from Teflon barstock on the lathe.
http://anotherairgunblog.blogspot.com/2009/02/resealing-sheridan-model-c.html
And
http://anotherairgunblog.blogspot.com/2008/08/benjamin-317-rifle-new-seals.html
Question: I am installing a kit from Pyramid for my old Blue Streak but the check valve at the bottom of the line of springs did not come out. Also, mysteriously, there appeared on my bench while I was tapping out the springs, a very small diameter threaded screw having no head but a screwdriver slot in its end. Don't see it anywhere on the Pyramid diagram.
I reassembled the gun on the theory that the old check valve might be OK in any event, but the gun does not take pressure.
Any suggestions?
thanks? loeks@northwestel.net
You need to remove and replace the check valve. The screw is likely the one that allows the bolt to cock the hammer.It's possible you sheared it off removing the hammer and valve with the bolt in the cocking position.
Thanks Felice,
The set screw is figured out .... it dropped out of the rear sight. But I am still flummoxed about how to get the check valve out.
The check valve did not come out when I slid the line of parts and springs out of the tube. It is hard for me to see the bottom of the tube and how the check valve sits. Can you advise how to get it out? The diagram from Pyramyd doesn't show this.
Put the pump back in and pump the gun, that should dislodge the seal. If it doesn't then you'll have to do something more destructive and dig it out.
Nick, does the check valve simply sit in an opening in the bottom of the tube? I am having problem visualizing this without a cutaway diagram.
Yup, although sometimes it decays to the point it's glued to the bottom.
OK the pumping trick did the job wonderfully, great tip, thanks! Got everything back together ... but it still won't take pressure. Could they have sent me the wrong size piston head? (it fit the cup fine).
puzzled..
Dave
It should work. Can you feel resistance when pumping? Could be the pump cup or the valve could be open or leaking. There shouldn't be the possibility of a wrong sized piston head, but you can just measure the bore and the cup and see if they are the same size.
I stripped everything out again , cleaned the pressure chamber with solvent and compressed air, and ensured all the seals had clean seats. But it still will not take pressure.
Now that I understand (and could see) the size of the intake valve aperture, I think I should feel more resistance than I do when I pump.(but maybe not)... It is odd, the rubber piston head feels like it goes in tightly. and the measurement seems right (I have only an egineer's rule to eye it with). Might the piston head a reasonable hypothesis? What is left to look at?
I got this when I was 11 in 1964 and it worked fine until two years ago. Would be great to get it going again.
I would look at the inlet and exhaust valves again. You should feel resistance when pumping, although it's a highly subjective feeling. Did you oil the pump cup?
Success!
There was some crud still in the valve tube that got loosened by the carb cleaner yesterday. Took a gun cleaning rod and then the air hose to it, and then kneaded the pump piston head a bit. Great to have the old girl sounding sassy again.
Thanks Nick and Felice! I appreciate your advice and encouragement. If you ever come up to the Yukon drop me a line.
Dave
Hey Guys, nice to see that there is still alotta knowledge availible about the Sheridan Blue Streak and Silver Streak for all that matters.
Anyway, I get the impression that this Solid Aluminum Silencer Adapter / Muzzle Brake is made for Sheridan C9 Silver Streak Blue Streak Benjamin 397 392 models. But how about my 1976 Sheridan Blue Streak?
Does anyone have experience with this combination?
Regards, Jerry
Ok I am not sure you guys know exactly where I am talking about but pure for reference, this is a website on which you can purchase such a Sheridan Muzzle Brake:
http://www.alchemyairwerks.com/store/c8/Muzzle_Brakes_%2F_Strippers.html
So curious to know wether this thingy will fit my old 1976 Sheridan Blue Streak.
Regards, Jerry
Where can i get a repair kit for my 1969 sheridan blue streak
Where can i get a repair kit that will fix the pump on my 1969 sheridan blue streak
Need a pump repair kit for a 1969 sheridan blue streak .Where can i get one that will work for that age of rifle
Read the comments, I already posted where to get repair/reseal kits.
Nick
My father recently passed and I now have his 1965 blue streak. I drooled over this gun as a child but never got to shoot it before it lost pressure. It is in beautiful shape with a nice coat of oil. I will have this gun shooting soon. I just finished a crossman 1377 he had. The seals and cup were shot. I ordered seals and a new barrel for it and clamped a golf ball in the cup heated it and let it cool expanded the cup and it works great. Thanks for all your great info. It's nice to keep the old guns alive
In 2011 I bought the 2 Benjamin & Sheridan Repair Kit from PyramidAir for when I needed it. I am the happy owner of a Sheridan C9. Now the air rifle does not keep the compression and I have decided to use them.
The problem is presented with the tool to remove the valve, necessary to remove the parts of the welded valve body, it does not fit perfectly and I deform the piece 29, could you please recommend how to extract piece 29 (diagram BAT-034), I think It is the valve body gasket
In case, I can send you only the body of the rifle (not wood) to repair it (I see that you have original factory tools) and how much would the repair cost?
Thank you
Very good job I'm glad to have found this Sheridan blog
We at JGAirguns just wanted to say thank you for including us on your blog. We appreciate the kind words and sending other gun lovers our way. Heather and John
I have a '75ish Sheridan C9 series. Original and still firing very well. Can anyone tell me how Sheridan finished the stock? Stained then varnish? Just varnish? My stock is really good bit thought I'd make it nice-nice
I have a '75 Sheridan C9 series
Want to possibly clean up the stock. How was it done from the factory? Stain and varnish? Just varnish? Just trying to get it close to original
I just replaced the orings, springs, inlet valve, plunger, pump cup on my pre 1960 sheridan. I used to be able to pump it without cocking it first but for some reason after I assembled everything back together i have to cock it first before it builds pressure. It does pump sometimes without cocking first.
Post a Comment