An old friend of mine asked whether I could fix his Benjamin air rifle, "bought with my own money", new, when he was 12. The
main complaint was that it lacked power (more on that in another post) but there was also the issue of the front section of the barrel being loose.
Being a paranoid sort of guy, I reasoned that if I tried to fix his barrel without any experience I would end up destroying the gun. So I asked around on the forums to see if anyone had a beater gun that I could practice on, with the understanding that I would probably ruin it. A kind gentleman sent me one, and I did a marginal job. The front section of the barrel was
resoldered, but I ended up
globbing a large amount of solder on and the finish was completely ruined. I'm not even going to post pictures of the results, it was that humiliating. It'll look
ok if he polishes it up though.
Oh, o
k, here are two pictures of the loaner rifle.
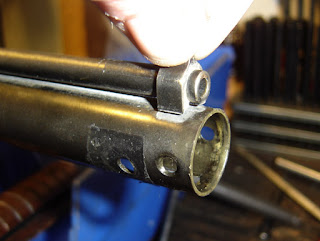
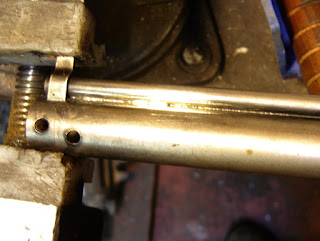
Here you can see that there are some large solder blobs (the gun was pretty chewed up and I think had already be
resoldered partially so at least the front sight isn't my fault), and that I've had to buff the metal down to the bare brass.
After cleanup it wasn't so bad, but you can see gaps in the solder line. This is entirely down to poor preparation.
In any case, I had some data about what not to do, but still felt that I didn't have enough of a plan. I decided to peruse some
gunsmithing books and read everything I could on
resoldering shotgun ribs, which is an analogous problem. So I read what I could and felt much more confident. At least soldering gave Dunlap some fits: "I either spoil the bluing and get a good soldering job or am so careful about the finish I get a lousy sweat joint." (
Gunsmithing by Roy Dunlap)
The last part of my puzzle had to do with getting over my fear of
desoldering the rest of the gun. I bought some
"Tix" solder from
Brownells. It has a very low melting
point of 275 deg. F so I could in theory would not need to heat the gun up too much.
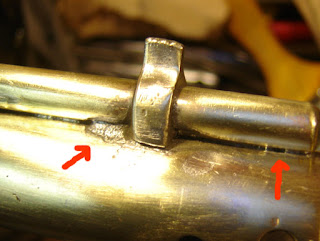
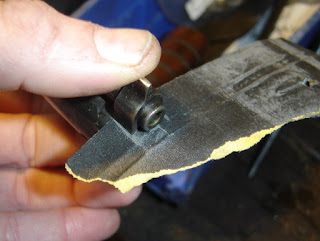
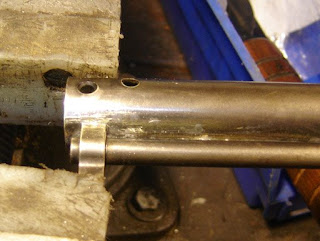
Here you can see the problem.

It's separated by about 4" from the front.
I used some sandpaper to clean the join area on the tube as far back as I could go.
And lightly holding the barrel against the paper sanded the other surface.
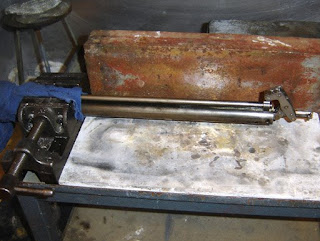
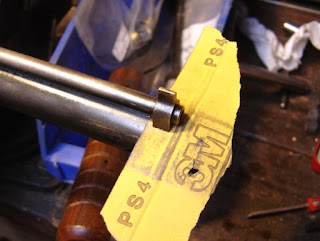
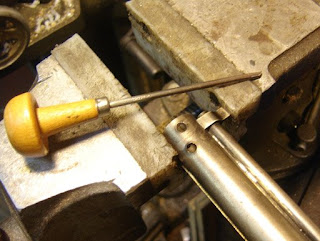
This is my setup. A moist towel around the tube, with it clamped in a vise. If the towel starts steaming I would be getting it way too hot. A
kant-twist clamp holds the barrel to the tube. That front sight is soldered to the barrel and could become
desoldered easily.
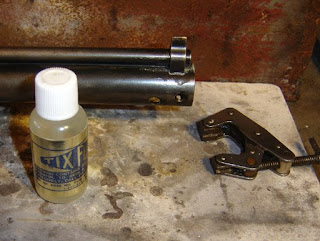
I fluxed with
Tix flux. Next time (Oh, how I hope there isn't a next time) I will be even more careful about fluxing. You really only want flux on the joint.

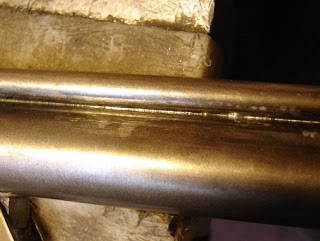
I carefully heated the barrel and tube for just a few moments with a torch and touched the solder to the join on both sides. Here you can see that it did blob up a bit but it also shows a nice shiny line along the join. I may get a non-contact thermometer if I do this again so I can better gauge the temperatures.
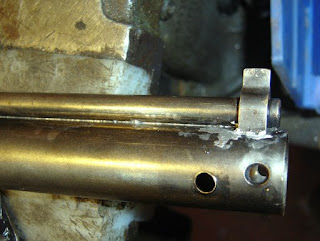
Remember what I said about fluxing? The areas on the tube that had flux on them ended up having solder flow...but again you can see an unbroken solder line where the barrel and tube join.
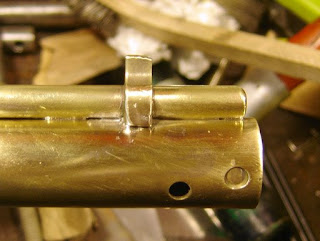
This is how I wish it all looked. That small blob just picked free.
I used a graver,
riffler files and a scraper to gently scrap the excess solder. Then I polished with steel wool. The original finish is pretty tough so I didn't expose the brass (much).
The graver.
A poor picture, I'll take some others when I'm done with the rifle. The blobs are far less noticeable now though.


