Much cleaning later...
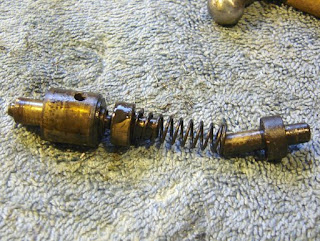
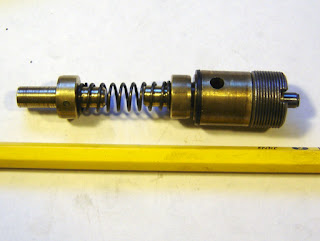
The valve reassembled.
When screwing down the valve nut you have to make sure the port aligns. There's a hole opposite that lines up in this hole. What goes in the hole, if anything? I don't know.
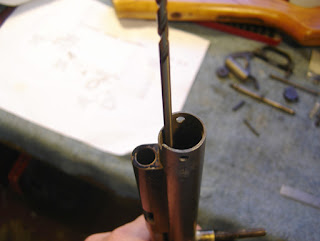
I used a dowel pin to hold the valve, but removed it when the valve was tight. It shouldn't slip out of alignment?
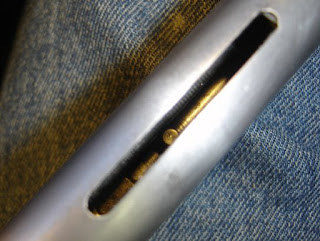
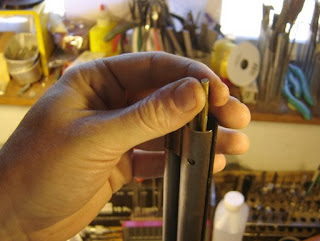
A dowel pin is inserted through the tube into a hole in the bolt for cocking the hammer. It wasn't that hard to get it in using pliers.
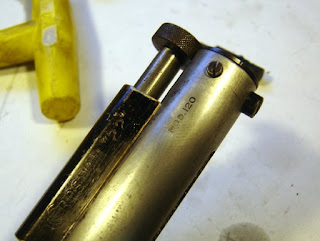
The hammer, spring, spring guide and end cap were stuffed in. The hammer has a keyway that the dowel pin in the bolt rides in. Three screws hold the cap on.
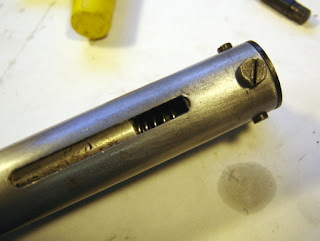
Hammer and spring.
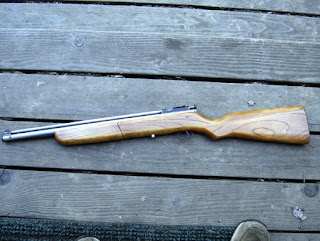
I reassembled it and tested to see if it worked. It did.
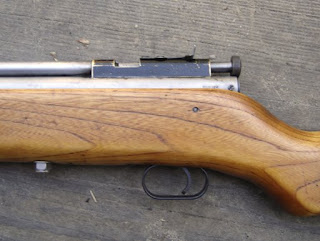
You can see how I used a hex nut to hold the action on the stock.
This is the bolt open. Notice the missing sight elevation screw.
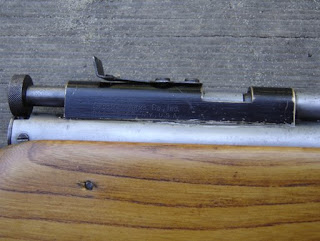
The bolt closed, the bolt knob has a pin that enters a cam in the end cap to lock the bolt.
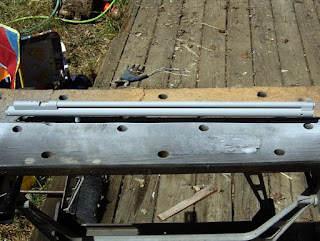
I stripped the rifle again and painted the action and barrel.
Drilling #3 for the knurled nut to hold the action on the stock.
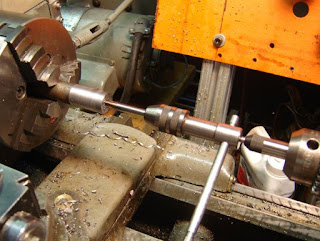
Tapping 1/4"-28. As always, I used the Fisher Micro Tap Guide.
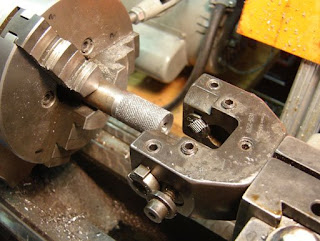
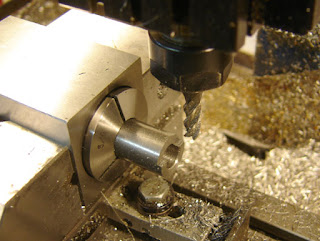
Knurling. I should have put in a set of finer knurls...and those of you who know knurling, know it double tracked....but whatever, it's fine.
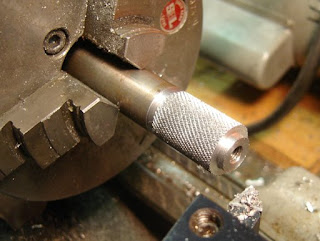
Turning the boss.
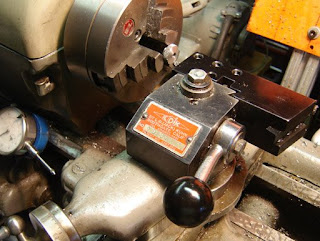
Turning the angle on the knob.
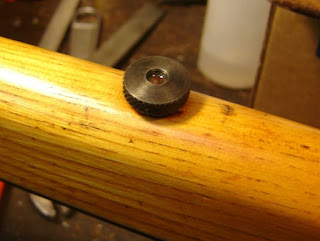
Blued and oiled.
All done!
Trust me, it wouldn't stand up to close scrutiny, and the wood is terrible. Not going to waste time refinishing, there are some deep stains and such. Besides it has character...
With Crosman .22 Premiers:
8 pumps, 630 fps w/ 14.3 gr. 12.6 ft/lbs
5 pumps, 535 fps w/14.3 gr. 9 ft/lb
3 pumps, 430 fps w/14.3 gr. 5.8 ft/lb
It's fun to shoot, and accurate!
Thursday, August 14, 2008
Tuesday, August 12, 2008
The Crosman 120, Part 1
As I mentioned in July, I bought two air rifles in pieces.
Here's the Crosman 120. It's a .22 caliber pneumatic rifle.
Making the valve nut tool.
I used a some of my long drill bits to gage what width to make the slots on the wrench.
Milling the end.
The finished tool.
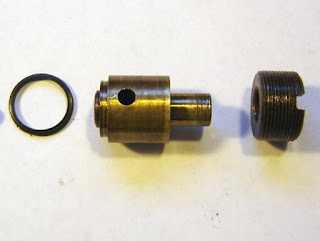
The valve nut.
The valve wouldn't fall out so I gently pounded on the end of the inlet valve with a brass rod and an 8 oz. ball peen hammer.
The valve came out of the valve body. Just a little oily and dirty...
I used the lathe to unscrew the exhaust valve assembly which wouldn't come apart easily. The tailstock wasn't clamped and I rotated the chuck by hand to unscrew. Then I finished unscrewing it manually.
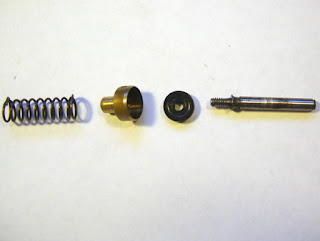
The valve components.
The inlet valve. I like the use of a flat seal. Although replacement seals came with the rifle when I purchased it, it would be easy to make them from rubber sheet.
The exhaust valve. The spring is odd, the way the ends are turned back on themselves.
The exhaust body.
Sunday, August 10, 2008
My New Custom Shop 2300
Derrick and I have been trading objects back and forth in a sort of mutual destruction potlatch lately, but even so I was extremely surprised to see this show up in the mail:
A Crosman 2300! Engraved "Carter Mk 1"
With Red Dot scope and grips that at first I thought were from the Custom Shop...but Derrick had made them just for the gun.
Unfortunately he had fitted them to a different grip frame, so they stuck out proud by a small amount.
The reason was the bezel around the safety.
But a little filing on the grips where they contacted and they sat flush. Beautiful grips and very comfortable.
I was surprised that the pistol came with a trigger spring adjuster. Of course one would just adjust it down to the minimum weight possible, but it shows that Crosman is at least thinking about those of use who don't like to use all our force just to shoot the darn thing.
Derrick suggested that it would benefit from some trigger/sear work so I stripped down the grip frame. You can see that the side plate does not sit flush.
And just as on the 1377, the sear can wobble on its pin, and a spring washer takes the slack out of the trigger pivot.
Again, just as I did on the 1377, I replaced the Crosman pins (.123") with dowel pins (.125" and polished much better than the Crosman pins)
I replaced the stock spring (L) with a shorter and lighter spring (R).
Crosman just assembles the guns with the bosses in the as die cast state, which is why the grip frame plate doesn't sit flush.
Again, you can see how the boss pushes the plate outwards.
So some light filing on the plate and the frame bosses.
Which removed any flash and allowed flat contact areas.
Now you can see how the plate is straight and flush.
Checking the width for the spring cap.
Turning a cap from Delrin.
The finished spring cap.
As on the 1377 I added thin shim washers to take up any slack in the sear and trigger.
I stoned the sear where it contacts the spring. Both the make it smoother and to provide a square contact. The part is stamped and not smooth as supplied.
And where it contacts the trigger. I made sure to polish along the axis of the sear.
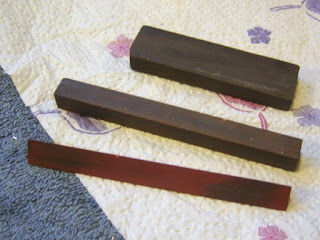
The stones I used, a fine oil stone, a finer machinist's stone and finally a ruby hard stone to polish.
I put it all back together with a thin smear of moly lube on all sliding, rotating and contact surfaces.
The trigger is much smoother and just a little lighter. It isn't as distracting when shooting. The pistol is quite accurate! At 10 meters I can hit the small 3/4" targets on the Gamo Rocker Pellet Trap I have out in the backyard, which is no mean feat for me.
Beyond all that, the 2300 is just fun to shoot. The .22 caliber impressively smacks tin cans, it's quick to load and pretty economical with the CO2.
A Crosman 2300! Engraved "Carter Mk 1"
With Red Dot scope and grips that at first I thought were from the Custom Shop...but Derrick had made them just for the gun.
Unfortunately he had fitted them to a different grip frame, so they stuck out proud by a small amount.
The reason was the bezel around the safety.
But a little filing on the grips where they contacted and they sat flush. Beautiful grips and very comfortable.
I was surprised that the pistol came with a trigger spring adjuster. Of course one would just adjust it down to the minimum weight possible, but it shows that Crosman is at least thinking about those of use who don't like to use all our force just to shoot the darn thing.
Derrick suggested that it would benefit from some trigger/sear work so I stripped down the grip frame. You can see that the side plate does not sit flush.
And just as on the 1377, the sear can wobble on its pin, and a spring washer takes the slack out of the trigger pivot.
Again, just as I did on the 1377, I replaced the Crosman pins (.123") with dowel pins (.125" and polished much better than the Crosman pins)
I replaced the stock spring (L) with a shorter and lighter spring (R).
Crosman just assembles the guns with the bosses in the as die cast state, which is why the grip frame plate doesn't sit flush.
Again, you can see how the boss pushes the plate outwards.
So some light filing on the plate and the frame bosses.
Which removed any flash and allowed flat contact areas.
Now you can see how the plate is straight and flush.
Checking the width for the spring cap.
Turning a cap from Delrin.
The finished spring cap.
As on the 1377 I added thin shim washers to take up any slack in the sear and trigger.
I stoned the sear where it contacts the spring. Both the make it smoother and to provide a square contact. The part is stamped and not smooth as supplied.
And where it contacts the trigger. I made sure to polish along the axis of the sear.
The stones I used, a fine oil stone, a finer machinist's stone and finally a ruby hard stone to polish.
I put it all back together with a thin smear of moly lube on all sliding, rotating and contact surfaces.
The trigger is much smoother and just a little lighter. It isn't as distracting when shooting. The pistol is quite accurate! At 10 meters I can hit the small 3/4" targets on the Gamo Rocker Pellet Trap I have out in the backyard, which is no mean feat for me.
Beyond all that, the 2300 is just fun to shoot. The .22 caliber impressively smacks tin cans, it's quick to load and pretty economical with the CO2.
Subscribe to:
Posts (Atom)