With the tune up finished on the B3-1, I turned my attention to the bare muzzle. When the front sight was removed, the gun looked unfinished. In keeping with the tactical black gun theme, I thought I'd make a muzzle weight.

Found this scrap aluminum tube in my scrap metal box. It's about 1.130" in diameter.

It was too long, so I chopped the ends off with a hacksaw.

Just a hair over 5.5" long now.

Chucked in the Taig four-jaw chuck and installed a
steady rest. Faced off both ends.

The outside of the tube was a bit banged up cosmetically, so I took a skim cut across about 4.5" of the tube's length. Reduced the diameter by several hundredths and got a nice finish.

A scotchbrite pad held against the spinning work left it uniformly matte.

Found a piece of aluminum rod. The OD is 0.885"--just slightly larger than the tube's ID.

Cut a piece off to make an end cap.

Using a
telescoping bore gauge to measure the ID of the tube. These gauges typically come in sets to cover a range of hole sizes. The ends are spring loaded and expand inside the hole. (The ends pieces are domed so they seat fully to the ID of the wall) Then they are locked in place...

...and transfered to a micrometer or caliper to measure the amount of extension. Tube ID is 0.8629".

Faced the aluminum rod ends off and turned the entire piece down to 0.8626" to fit inside the tube.

...and center drilled. Looks like I forgot to show that I first cut a beveled face into what will be the muzzle end.

Through drilled with sucessively larger bits. Ending with a 0.250" Big enough for a .22 cal pellet to clear. When in doubt, drill larger.

Flipped around. Drilled about 3/4 of the way through with a 0.500" bit. Didn't want to punch all the way through and lose the front of the end cap.

Switched to a small homemade boring bar mounted in a modified tool post. A quick measure on the B3-1's barrel at the muzzle showed it to be 0.554". Counterbored the hole to about 0.560".

For some sick reason, I decided I wasn't happy with the slip fit of the cap alone. I took a 1/4" blank lathe tool bit and shaped it on the grinder until it was profiled as you see above.

Used it to cut an internal groove for a #A015 o-ring. Took a couple test fits, but eventually it was a snug push fit over the barrel.

Cut off and faced another piece of the aluminum rod. Longer this time. This will be the rear end cap. Has to fit inside the tube and the barrel has to pass completely through.

Again, spotted with a center drill and successively drilled through to 0.500". About 0.750" of the OD was turned down to 0.8626'--again, to fit inside the tube.

Then back to the boring bar. The barrel is tapered slightly toward the muzzle. My measurements showed that the ID at the rear of the cap needed to be pretty close to 0.627" to clear the barrel.

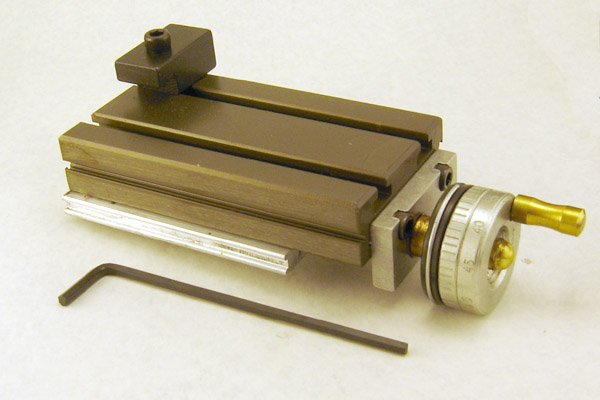
Wanted a transition from the barrel to the weight. Set up the
compound slide to cut a taper on the outside of the rear end cap.

Just eyeballed the angle set-up. When finished, the taper ended up exactly 1" long--from 0.711" to 0.821" at the front.

Plugged the end caps into place and mounted everything in the drill press. This gets a bit complicated to explain. I need to secure the end caps to the tube, and the whole thing to the barrel. Just to keep this interesting, I opted to use four setscrews to secure each end cap, then though drill the tube for an allen wrench to pass through and tighten four additional hidden setscrews to secure the whole mess to the barrel. You know, just for....fun.

The caps were first installed in the tube before drilling since it would be easier to drill the tapping holes and spot the caps at the same time. Since the B3-1 uses metric fasteners, I opted to use M4 x 0.7mm set screws. I spotted and drilled the 12 holes with a #30 bit.

Removed the caps and deburred. The 8 outermost endcap holes in the tube were then tapped. A M4 x .7mm tap was mounted in the drill press, I hand tuned the chuck to start the threads straight. Finished by hand with a normal tap handle.

The four extra though holes spotted the caps for the hidden set screws (two in each cap) -these were drilled out with a #20 bit then tapped M5 x 0.8mm. The M5 set set screws will hold the caps to the barrel. And the caps are held in the tube with the M4's.

Played with the setscrew lengths a bit. The tricky ones were the M5's. They had to be short enough to be flush with each end cap's OD so they would slide into the tube. They also had to be short enough to fit over the barrel.

Here's the front cap with the o-ring groove.

O-ring installed. No particular reason I used a HNBR ring--I just had one handy in the size needed.

The M5 setscrews are installed into the caps. Then the caps are pressed into the ends and the holes aligned. The M4 setscrews are installed to lock the caps in place at each end of the tube. Once the piece is assembled, it's slid over the muzzle into location. A 2.5mm allen wrench is passed through the 4 unthreaded holes in the tube and into the heads of the M5 setscrews below that are installed in the caps. Only half a turn of each M5 setscrew locks the weight securely to the barrel.

Final test fit.

Then sprayed it with the same Rustoleum as used on the modified Weaver rail for consistency.

A few views.

Here's what I was badly describing earlier. The 2.5mm allen wrench goes through the hole and contacts the set screw hidden underneath.

There are 4 of these set screws. 2 up front on each side. 2 in the back on each side.


It would really be interesting if I could attach a magazine well to the underside of the sheet metal "receiver" and use an empty AK-47 mag to carry extra pellets... Nah, I'm calling it quits on this one for now. Other guns beckon.