Saturday, May 17, 2008

Resurrecting A Diana Model 6M Pistol, Part 5

Let me just state up front that I have developed a profound respect for people that make custom pistol grips.

I sawed apart a flintlock pistol stock blank I bought from a friend and marked out the general shape.

I did label each one. It's pretty wood.

I used the Taig mill to thickness each piece and remove the bandsaw marks.

The LH grip is thicker than the RH one.

I then sawed closer to the line. In the case of the RH grip, you can see I got a little too close at the bottom. Sigh.

I used a router bit to remove most of the waste.
On the RH grip I also used a ball end mill to generate a rough curved section.

I then drilled the mounting holes for the screws.

Tons of work with chisels, rasps, burs and files to generate the basic shape. Then sanding, sanding, sanding...

Well, they're done for now, but I'm going to refine them further. There's a lot of thickness to them so I can keep removing material until they either fit me like a glove, or I screw them up totally...

You can see I trimmed a little too much up near the top corner.

You can see some tearout near the bottom screw hole. Good thing I have more to remove as I fit them to my hands.

There are a lot of rough spots left as well. But hey, it's my first attempt at making grips. In hindsight, a pair of target grips is definitely not a good starter project.

Labels: ,

Thursday, May 15, 2008

Resurrecting A Diana Model 6M Pistol, Part 4

The rest of the pistol was then assembled.

The cocking link was slid into place and the pin punched back in.

The barrel pivot and lock screw was replaced.

Remember the trigger and spring? The long arm of the spring will be bent downwards inside the action.

You can see that it is put in place against the action.

And the pin pushed back in.

The trigger catch bar was put back in place.

You can see how it looks in an uncocked state.

The spring is replaced.

The grip frame screwed back onto the action.

Last screw. I need to do some more research on setting the trigger adjustment screws.

The shroud pin.

The shroud was placed on the barrel with the setscrew just in the pin.

And then when the groove it rides in (I'll have to take a picture of that...) is found, the screw is tightened just enough to let the shroud rotate easily around the barrel. The spring and setscrew for the pin is screwed back in.

The front sight drifted back into the dovetail (I should note that I used a brass drift).

And the variable width sight and locking setscrew, as well as the sight lock screw (in the u-shaped cutout in front) replaced.

I shot the frame with black paint, as well as the grips. I did a little work on the shroud to clean up the melty bits.

Unfortunately I used some old spray paint on the frame and it was still sticky days later...Also I find the grips incredibly ugly. So there will be some more work done in those areas, as well as possibly making a new shroud?

Next up, the rear sight...

Labels: ,

Wednesday, May 14, 2008

Resurrecting A Diana Model 6M Pistol, Part 3

So, having cleaned everything thoroughly, I commenced reassembly.

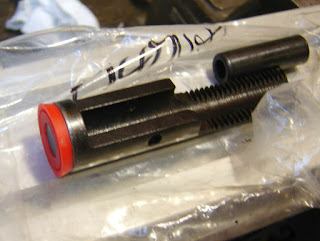
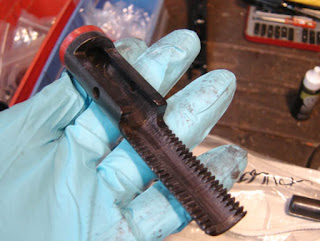
The front and rear piston seals were snapped on. This was a tad difficult and I had to use a lot of force to get them on the dovetail buttons.

A thin coating of moly. I wasn't sure how much or what to lube but figured a thin coat wouldn't hurt.

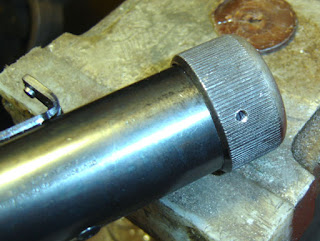
The front piston is pushed all the way forward into the tube, then the right hand pinion is inserted and the cap screwed down.

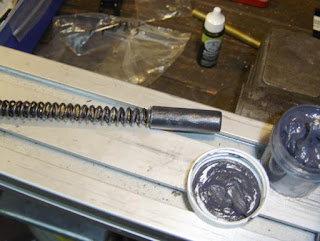
Some Maccari "tar" for the spring and spring guide. Not too much though.

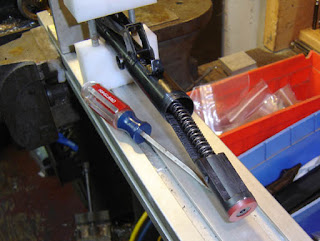
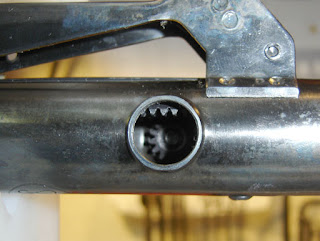
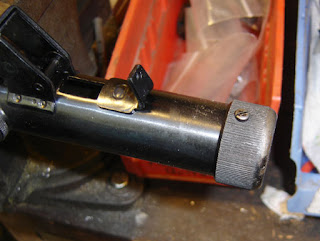
The spring and the rear piston were inserted and then compressed. This time the piston was inserted at an angle and then turned counter clockwise to engage the right hand pinion. Then the left hand pinion was inserted.

This was the end state. Now we enter some murky waters...

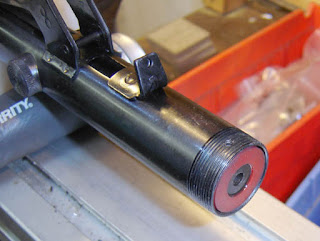
The instructions say that the gap should be .7mm from the edge of the tube to the rear piston face. However I could only get either about .3mm or about 2mm (corresponding with the now locked rack pitch?)
The instructions make no mention of the thickness of the step on the washer, however I heard that there were many different thicknesses used in servicing dependent on the gap.
Finally, I was pointed at the manual for the Diana Model 75 rifle, which uses the same system, that says with the correct washer installed, there should be a gap of .3mm between the washer step and the tube end. However the dimensions of the Model 75 are different than those of the Model 10 pistol.

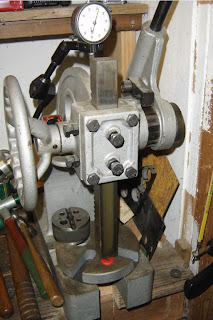
At this point I became curious about how much the piston seal could be squished.

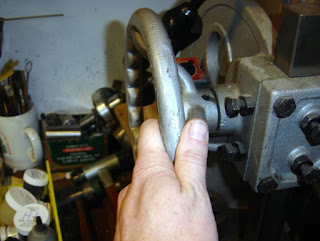
With hand pressure only on the arbor press, but certainly a comparable amount of force to the spring load, going by the feel when pressing in the rear piston against the spring slightly by hand.

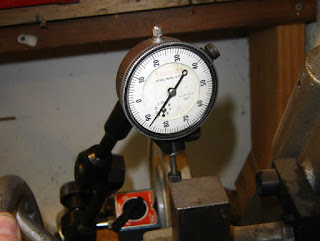
I measured .007" "squish" (.18mm).

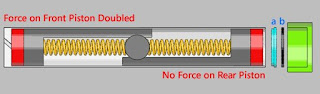
With no load on the rear pinion, the force from the spring is not equalized, and 2 times the normal force is on the front piston? I need to think more about this...
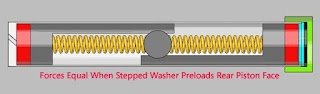
With the correct preload, the forces are equal. Presumably this is desireable.

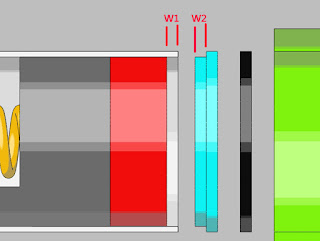
So, assuming the .3mm figure for the Diana 75 is correct, W2-W1=.3mm
Putting on the stepped washer (remember, it was stamped ".8") that was installed in the piston, I measured a gap between the end of the tube and the washer step of .38 mm. So if I made a new washer with a step thickness of .72mm (.028"), that should result in a gap of .3mm
Again, this is assuming that the .3mm figure is correct.

Returning to the "squish" test, this means that preload is .3mm for the two seals combined, or .15mm per seal of preload. This amount is pretty darn close to the .18mm of "squish" for one seal, within about .001" which is about as fine a tolerance as I want to work to.

I am just pretending that washer "b", in the above drawing, has a negligable effect on preload and merely takes up the shock of the rear piston that is cushioned in the front piston by the air compression before the pellet leaves the bore. But who knows?

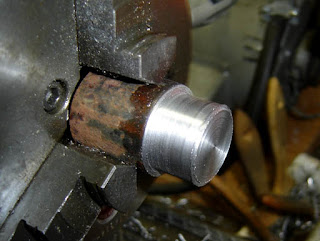
A new stepped washer was turned up.

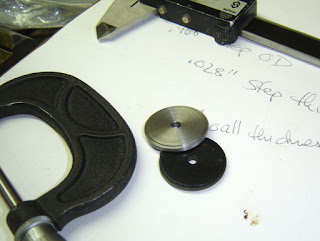
Deburred and checked.

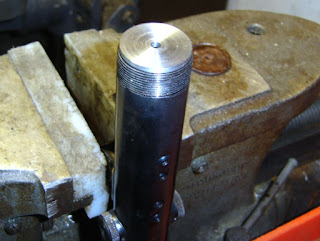
I found that having the tube vertical was helpful.

I made washer "b" from some 80 durometer urethane sheet.

Unfortunately the cap wouldn't screw all the way on.

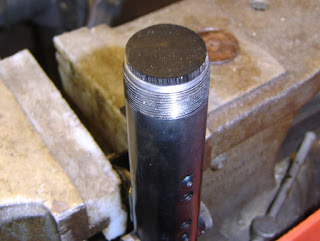
So I carefully sanded down the thickness of the rubber washer until the cap would screw on to where the screw holes lined up. I then reinstalled the screw.

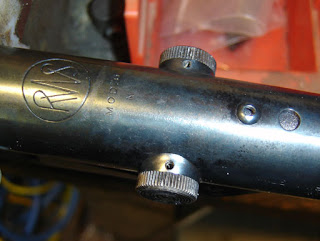
Then the pinion caps were checked to see that the holes lined up and the lock screws were installed.

Next installment: some more installment...

Labels: ,

Tuesday, May 13, 2008

Resurrecting A Diana Model 6M Pistol, Part 2

And on we go...

The pivot and pivot lockscrews.

It's a good idea to break the action slightly to relieve stress on the pivot from the ball detent.

Hmmm, nice pivot washers.

Shiny!

One pair of washers (one of which is a spring washer?) and one washer for the other side.

Removing the pinion cap screws.

I should note at this point that every single assembly of parts I removed got its own ziplock baggie. This was a great help in remembering what goes where, and those screws are tiny!

Normally this is where I make a special tool, but the instructions said the tang of a file could be used, so that's what I used...A slight amount of spring tension was taken up with the spring compressor.

And the left hand (with the action upside down in the compressor) pinion cap was removed, revealing the pinion gear. I fished it out with a dental pick.

I can't tell you how happy I was to not see any broken gear teeth.

At this point the file is pressing slightly forward.

And then turned to rotate the rear piston away from the right hand pinion.

And then the rear piston is removed along with the springs.

The other pinion, similarly intact!

The front piston is removed. But I think I need a new front seal...

Notice the spring guide, shown assembled into the piston.

An empty action...

I fished the rear piston washer/spacer out of the cap.

It has a hole through it.

The two parts cemented together from age and pressure. Notice the small step on the right. This is important later. The washer was stamped ".8" which is the thickness of that stepped section.

An Xacto knife removed the seal/washer/thingy from the metal spacer washer.

Finally the sight was dismantled. First the c clip is removed.

Then the washer.

And the windage screw, um, unscrewed.

There is a tiny ball bearing that goes where the arrow is pointing. I did manage to preserve it, just forgot to take a picture...

The rear sight unit was pulled out of the body.

Then the metal housing with the windage scale and spring were pulled out.

After this I spent a day or two cleaning every part...it was a pain and a half. There was grit and grease and decomposed seals. I used 5 pipe cleaners, a roll of paper towels, copious WD-40, soap and water, steel wool and a toothbrush.

More to follow in a day or so...

Labels: ,

Resurrecting A Diana Model 6M Pistol, Part 1

What can I say, I have a masochistic streak. So when I found this Diana Model 6 M pistol for sale on Gunbroker I knew I had to buy it.
"THIS PISTOL HAS SOME FIRE DAMAGE TO PLASTIC STOCKS AND BARREL SHROUD.IT COCKS AND FIRES BUT AT SOME TIME HAS BEEN NEAR HEAT.THERE IS SOME BLUEING AND PAINT LOSS."
He wasn't kidding...

I've always been fascinated by the Giss contra piston recoiless action but didn't want to learn on and possibly destroy a better quality airgun. I received the pistol in exactly the sort of condition I expected (although the seller also shipped the gun with the action "broken" which is a really bad idea). I prepared by buying a new set of seals from James Maccari and hunting up any references to rebuilding I could find. I found an excellent guide in one of the forum archives which guided me through the disassembly and resealing without a hitch, although I had to do a far more extensive teardown and cleaning than the article covers.

The pistol.

Doesn't look too bad?

The grips are melted and partially bubbled...

The barrel shroud is similarly damaged.

RWS MOD 6 M

First up was removing the rear sight.

Doh! I turned the elevation screw and it snapped right off.

Stupid plastic. It's a left hand metric thread, but more on that later...

Well, now to remove the two screws and remove the sight.

The beautiful variable width front sight.

I removed the screws and had to drift the sight out of the dovetail.

I loosened this screw which caused the shroud to shoot forward, and bind the screw...

I should have removed this setscrew first, which releases the spring tension on the shroud locking mechanism. No problem, got it all apart and slid the shroud off the barrel.

Removing one grip frame screw

And the other grip frame screw.

Now what?

Remove the end cap screw.

A strap wrench removed the end cap. I was prepared to use pump pliers, luckily it didn't come to that...

The end cap, spacer washer and for lack of a better term recoil washer seal thingy...

The rear piston looked ok. just a tad dirty?

I removed the trigger catch arm spring.

Then the trigger catch arm.

I drifted the trigger pivot pin out.

This is a helpful picture.

The instructions said "punch out the cocking lever pin 6 (this is a loose fit so a punch is not needed)." This was untrue. My pin had a knurled center section and was quite tight and required considerable persuasion.

The cocking lever arm was pushed forward in the slot and removed.

Labels: ,