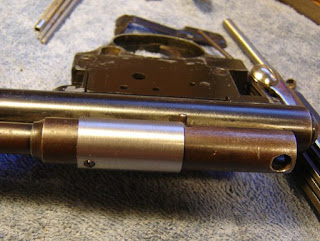
I had to cut down a screw to hold the trigger group in the front. Threading a nut on the screw above the cut allows you to reshape the threads after sawing and deburring.

The bolt will get replaced (due to the front end being broken), but I wanted to test the valve first...so I have to remove the broken screw in the bolt.

I spot drilled the screw.

And drilled it out.

My Crosman 130, which also uses a sliding breech cover. I decided to use it for the appropriate dimensions on a temporary breech cover.

A piece of 3/4" steel cleaned up.

Drilled out to 5/8" and then bored a few thousandths.

Tube and the 130 cover.

I haven't had a gratuitous edge finding picture in a while. I found center and then the location of the hole for the breech screw.

Spot drilled and then drilled.

Milling away a little under half of the cover.

A line was scribed to show where to mill away the cover so it would rest on that pin.

Milled and reassmbled with a new bolt o-ring. A lot of work for a temporary fix, but it didn't take that long, and I didn't want to do a lot of work before I tested the function of the valve...

1 comment:
I need A screw to attach the breech cover to the bolt, also what is the thread size for the nut on the stock bolt. I have just bought some pro Blox block scope mounts from Axxxxxn the fir fine but the scope is a little far forward.
Dave York.
Post a Comment