The gun needed a new piston seal put in. Unlike Derrick I decided to use my spring compressor. It worked well but it is difficult to hold due to the odd angles of the receiver and stock.

There's the beartrap piece, can't hurt to have another picture showing where it goes. The gun needs deburring & polishing inside and out.

The spring guide. I used the stock one but smoothed the flash left from the forging .(see red arrow).

The old spring up top, with the new one below. The rifle ships with an extra spring and seals. My used one came with them as well which was nice.

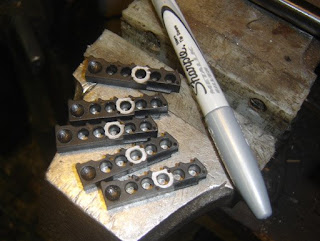
If you mark the third hole with a sharpie (I used silver, but bright metallic red would be good too) then you'll always know when you're on the last shot.

You see the markings when the magazine is at shot 5.

No comments:
Post a Comment