Saturday, October 24, 2009

BAM B3-1 Addendum--End Cap Back Up

A quick safety upgrade to the BAM B3-1:

I was never 100% comfortable with just the single cross pin holding the endcap against the mainspring. The peen on the pin is minimal and made me nervous that it might eventually vibrate out of position--firing the endcap back at my skull in the process. Ow. While I've never heard of that happening, a bit of extra retention would certainly bolster my confidence when using the rifle.

First, minimal disassembly: I removed the action from the stock, pulled the red dot and removed the cocking lever. Then, I looked at the endcap and found the thickest part where it slid inside the receiver tube--about 3/8" to the rear of the pin on the left side of the gun.

Cap still in place, I spotted the receiver tube with a center drill.

Followed up with a #19 drill bit. Drilled right through the receiver tube and into the cap.

With an M5 x 0.8 mm tap, I cut threads into the receiver and cap.

Found a button head M5 hardened bolt and some medium strength threadlocker. I cleaned out all the metal chips from the drilling and tapping steps before installation.

Installed. I'd like to have another bolt on the other side, but there's no metal in the end cap on the right side--it's relieved to accommodate the cocking lever. I feel better knowing that the retention pin now has some redundancy for safety's sake.

Thursday, October 22, 2009

Daisy Model 188 BB Pistol Disassembly, Part 2

On I go...

The pin that retains the seal on the piston is pushed out.

There's a metal washer and a felt oil retainer inside. No worry about dieseling with the low velocity of this pistol?

A closeup of the felt and the washer.

The piston, spring and lever parts. The orientation of the linkage is important...I put it back together upside down and had to do what I show twice...

The loading port for the BBs also retains the barrel. Notice the band-aid on my thumb. The compression tube has sharp edges...

I slipped the barrel out from the front.

The parts...

You can see the channel for the BBs that leads to the bolt.

The ends of the spring were crudely ground. I polished them up.

The compression tube cap & port seal.

I polished up the piston for the heck of it. Then I used a pin punch to align everything so I could push the pin back in. The felt is a pain to get around.

I used a spring compressor to push everything together, not that the force was high but it made a good third hand.

With the cocking linkage pushed clear of the spring I reattached it to the lever. (Upside down the first time...)

My new favorite old tool...these parallel jaw pliers were just the thing to push that roll pin back in. Anyway the reast of the pistol went back together in reverse of disassembly. It's a bit weak, although I have no idea what the velocity is supposed to be. Nor do I care.

Wednesday, October 21, 2009

Daisy Model 188 BB Pistol Disassembly, Part 1

I've been a bit busy lately but decided it would be fun and quick to take apart my Daisy model 188 BB pistol and see what makes it tick. Mine is the metal bodied but BB only version.

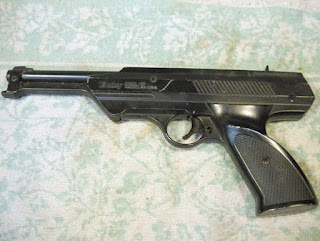
The pistol.

The loading port, you can see the BBs being picked up by the bolt here. On the earlier model you could also insert a pellet but the casting was changed to prevent that.

4 screws, 3 of which are identical.

The halves separated.

The sear was heavily crusted with dried grease. Note the spring.

The bolt. The tip is a magnet.

The cocking lever slips off of the post and the wire rod.

That wire rod opens the bolt when the pistol is cocked.

The sear and trigger.

The wire rod.

The compression tube, spring and lever can be removed as a unit. It's under a bit of tension inside the pistol even uncocked.

The piston slides out of the tube.

The end of the compression tube is injection molded plastic and also has the transfer port seal.

The piston seal. Pretty much conventional parachute type seal.
More to come...