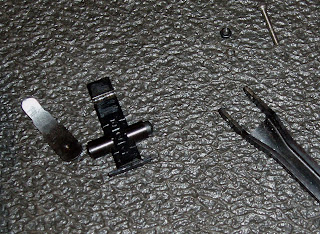
I'm back at it.
The forward end of the piston has a cupped washer that retains the piston seal. It's held to the piston body with an M5 phillips head bolt.
I was a bit surprised that it was not much more than finger tight. I replaced the phillips head with a low profile torx fastener. The threading is metric: M5 x 0.8mm.
Applied a medium strength thread locker and torqued it down with a T25 torx wrench. I figured the torx would allow more torque with little chance of damaging the head of the fastener. Deep inside the gun is about the last place you'd want something to come loose.
The original spring is up top. Dimensions of the original BAM spring: 8.563" OAL. 0.1215" diameter wire, 0.725" OD, 0.482" ID. The small amount of cant didn't particularly bother me. The deep rust pits did. I hit the parts box and found a likely candidate. No idea why I didn't label it, but it's probably the mainspring from a Crosman/Remington Summit. It's obviously too long, so I cut the spring down leaving it 2 coils longer than the stock spring. It's most likely still too long and will need further shortening. Deal with it a bit later. The new spring measures: 0.124" wire diameter, 0.733" OD, 0.485" ID. As of right now, it's 8.888" OAL.
Turned my attention to making a new spring guide. Kinda amazed that the factory guide was actually a tight fit to the factory spring. It was quite a bit too short though and that likely caused the cant in the original spring. I cut a 0.500" steel tube down to about 4" for a new guide.
Chucked the tube into the Taig and set up the steady rest. Opened up the ID of the tube to 0.400" to allow the piston rod to pass through. The piston rod is 0.391" in diameter.
I turned the OD of the tube to 0.481". A slip fit for the new mainspring. Here, I've just finished the last pass with a fine file. Normally, I'd have gone for a tighter fit to the spring, but my experience with that IZH-61 makes me leery of tight fitting guides on low-powered guns.
Cut about 0.75" off. I'm just winging the numbers for the guide length. It's easy enough to shorten later if I made it too long.
Slotted the end of the spring guide.
Turned 90 degrees and slotted again to the same depth.
Made a bushing to fit over the guide.
Like so.
The bushing acts as a stop at the base of the slots.
The end of a drift gets things started.
Belling the end open.
Getting there...
And peeled it open like a flower.
Hammered the tabs flat and trimmed them down in length.
Old guide on the left. The original sheet metal guide diameter varies from 0.465 to 0.482". It's 1.827" OAL.
My new guide on the right with a washer added. The tabs act as a stop to retain the washer. The older Weihrauch spring guides in the Beeman R-series guns look similar to this.
Set all that spring stuff aside for a few minutes and grabbed the cocking lever and some heat shrink tubing.
Some of that vinyl tool handle dip would also work well for this.
Three layers of heat shrink later. This'll be more comfortable and non-slip. I'm sure I've seen something similar. Maybe Steve at Archer Airguns?
Dropped the cocking lever into a vise and hammered out the latch pin.
The latch was removed and the angle cleaned up and polished. In theory, it should snap closed a bit easier.
I'm working all over the place on this thing. The rear sight was a mess. It was loose, it shifted when the gun fired... Really a challenge to hit the same thing twice. Actually, it was a challenge to hit anything once. The sight base was spot welded to the receiver tube in four semi-random locations. I center-punched what looked like the middle of each spot weld then center drilled each.
Followed up with a 1/8" end mill. I set the depth stop to just pass through the sight base.
A sharp smack popped the base off. The bare spots on the receiver will be cleaned up a bit later. I keep telling myself that it's still not too late to just throw it all in the trash.
Still more to come later. Unless I come to my senses.
Wednesday, September 16, 2009
Sunday, September 13, 2009
BAM B3-1 Tune Up Part 1
Nick sent this to me several months ago in a box that must have been wrapped in about 1200 feet of clear packing tape. I'm still not sure if he was trying to make the box airtight or protect me from the interior contents. He remains silent on that question. Inside I found an AK-47 lookalike BAM XS-B3-1 air rifle from Xisico.
Depress the button at the rear of the receiver...
And the stock pivots to the right and locks securely in place.
It cocks via a sidelever located on the right side. Push the latch downward and pull completely to the rear. The entire compression chamber retracts in the same manner as the just slightly more upscale HW-77/97s and TX-200's.
Pellets load directly into the exposed breech. The first pellet loaded fell right through the barrel to the ground. What? As did the second. It finally occurred to me that this was a .22 cal and not a .177. Takes me a while sometimes...
Anyway, before I tear into it and screw it all up, I tried thinking ahead for a change and shot it over the chrony with .22 cal RWS Hobbys.
Here's the shot string:
555.2 fps
552.9
555.0
554.3
555.1
553.0
557.6
558.6
558.1
559.7... The max velocity spread was 6.8 fps for 10 shots. ??? I wondered momentarily if Nick or another previous owner had tuned the powerplant, but no, the shot cycle was too brutal. The gun was gritty, rough, and noisy in no particular order. Then there was the vibration and recoil--all the more pronounced because of the steel buttplate. Oddly, the velocity numbers were not only very consistent, they're also anywhere from 50 to 140 fps faster than the gun is rated depending on where you find the data.
The single-stage trigger pull weight varied from 8.5 to 9.5 pounds. It builds, peaks, then drops almost a full pound as it goes through the rest of the travel before firing at an indiscriminate point. It is perhaps the worst trigger I've ever shot in an adult air gun. Oh, the front sight also pivots on the barrel with each shot and the rear sight moves randomly.
Of course, Nick also mentioned that every time he fired the gun he envisioned the steel endcap blasting out the back of the gun and into his skull. Yep, this one's a real confidence builder.
So I've got all that going for me. It's probably no big wonder that it stood in the corner next to the workbench for several months while I wondered what to do with it.
I've got the time to get to it now and I'd like to smooth out the powerplant, get the trigger under 5 pounds and come up with either a way to secure the sights or mount a low powered scope or dot sight. While I have no doubt that all this can be done, I may also throw it in the recycling bin out of sheer frustration.
So, uh, here we go.
I believe that I swapped the top allen bolt shown here when the gun arrived. It was probably a phillips head. Either way, it's an M6 x 1mm thread.
Here's the front stock securement screw and the screw cup previously blogged in August.
Removing the two bolts allows the action to separate from the receiver.
I decided to take the rear sight off as well. One bolt at the rear and a cross bolt up front. Comes right off, really.
The ramped sight blade is then pulled out.
Used a dental pick and fished out the trigger return spring. Note: The stock spring is likely black color. I previously swapped to this spring in an attempt to lighten the trigger pull as it was over 10 lbs. Note: it worked! I got the pull down to 9.5 lbs. Release the doves!
Unscrewed the pivot pin for the cocking lever.
The lever with some struggle, pulls out of the endcap at the rear and can then be unhooked from the sliding compression cylinder up front.
Like so.
Safety first. Dropped it into my medieval spring compressor.
Punched out the trigger pivot pin. This proved to be problematic. Both ends of the pin were slightly peened and the pin did not want to push through the holes in the sheet metal trigger blade. Eventually, it came out, but it was a real pain and left some lovely marks on the trigger blade.
Trigger pin, blade and the sear. I may get a replacement blade, maybe not. It cleaned up later and looks OK. More importantly, the sear is perfectly fine, so I'm not concerned.
Unhooked the spring on the anti-beartrap mechanism.
Stuck the end of a 10" crescent wrench into the endcap slot and gave it a few twists to loosen it. It's not threaded, just stuck. A couple twists and it popped loose.
There's the spring preload. Looks like under 2"of free travel. Pretty minimal.
Spring guide is a piece of rolled sheet metal. A tight, press-fit in the spring. Appears to be about an inch too short to properly support the spring. Note the spring is slightly canted at the left-most end.
Then the piston can be slid out.
Piston seal is unscarred. I'll check the seal against some others in my parts box. Maybe Crosman uses a gun with the same seal. That could be helpful info for sourcing a replacement.
The rear pin on the anti-beartrap mechanism was also peened on both ends. Punched it through slightly, then used a small file and removed the peen on exposed end. Reversed the direction on the punch and it came right out.
The anti-beartrap catch drops into a slot in the sliding compression chamber, holding it open when the cocking lever is pulled completely to the rear. Don't retract the cocking lever partially and attempt to load the gun--or you have defeated this safety feature.
There's the slot. It's pretty substantial, given the relatively low power the rifle generates.
With the rear pin removed, the lever can be pulled out of the notch freeing the compression chamber. The compression tube then slid right out.
Compression tube, piston, mainspring and the spring guide.
and the endcap, too...
Up top, a better pic of the slot the anti-beartrap lever sits in.
Middle, the piston has some scuffing from contact inside the compression tube.
Bottom, the spring has a slight cant.
Cocking notch on the piston is rough. This will get polished in an effort to smooth and lighten the trigger pull.
Sear goes inside the trigger blade like this.
Sort of how it all interacts. Trigger sear holds the notch on the piston rearward when cocked. The spring guide and spring will be installed inside the piston which sits inside the silver compression tube. Ah, I'm getting ahead of myself. These parts all need some clean up and fitting first.
Removed the piston seal. This was a surprise that the end of the piston was a bolted on flange. I expected it to be turned as one piece. The seal was a very loose fit on the piston. I'm considering tightening the fit.
Polished the ends of the piston body on a buffing wheel. Also polished the cocking notch for the sear as well as the sear itself.
The rough inside edge of the square hole in the compression tube could potentially damage the piston seal on reassembly.
A cratex rubberized wheel on a Dremel tool made the burr removal effortless. Be careful to not remove metal any deeper in the compression tube.
More to come in a few days...
Subscribe to:
Posts (Atom)