So many of these modification projects are based on fixing perceived shortcomings. When I load the CP1-M using the single-shot tray--especially with wadcutters--it helps to point the barrel downward, then drop the pellet directly into the breech. This is helpful because it gets the flat-headed wadcutter pellet past the barrel o-ring. But every time I tipped the barrel downward to load the pellet, the retracted bolt handle slid forward partially closing under it's own weight. And yes, while a spot of thick grease on the bolt will solve the problem of the bolt closing on it's own accord, at least for a shooting session or two, I wanted a real fix.

Did a quick tear down and took a look at my options. If this was a Crosman 22XX or 13XX, it would be easy to add a small magnet to the rear of the loading bolt and use the cocked hammer pin to hold the bolt to the rear.

I remembered having an assortment of small metric spring plungers. They're essentially set screws with a small spring loaded ball tip. The ball bearing is captive. Snugging the screw puts spring pressure on the ball bearing tip. Benjamin Marauder rifles use one of these for the same application.

A better look at the spring loaded ball tip.

Rather than drill and tap a hole in the breech, Realized that since I'm running a red dot sight, I can simply use the existing M4 x 0.7mm rear sight mounting hole.

Want to figure out where the ball makes contact on the bolt when retracted

Sharpie marker layout.

Transfer punches. A fine Harbor Freight purchase.

Botched the picture. The bolt should be pulled to the rear...

And a light tap with a hammer will mark the spot.

Like so.

Could make a small dimple with a drill. I'll use the Taig benchtop lathe and cut a shallow groove instead. Chuck and center the cutter at the mark. Hey, no measurement machining!


Just enough width and depth for the ball tip to engage.


Deburred and polished.


Always one more thing.

Made this small knurled M4 nut.
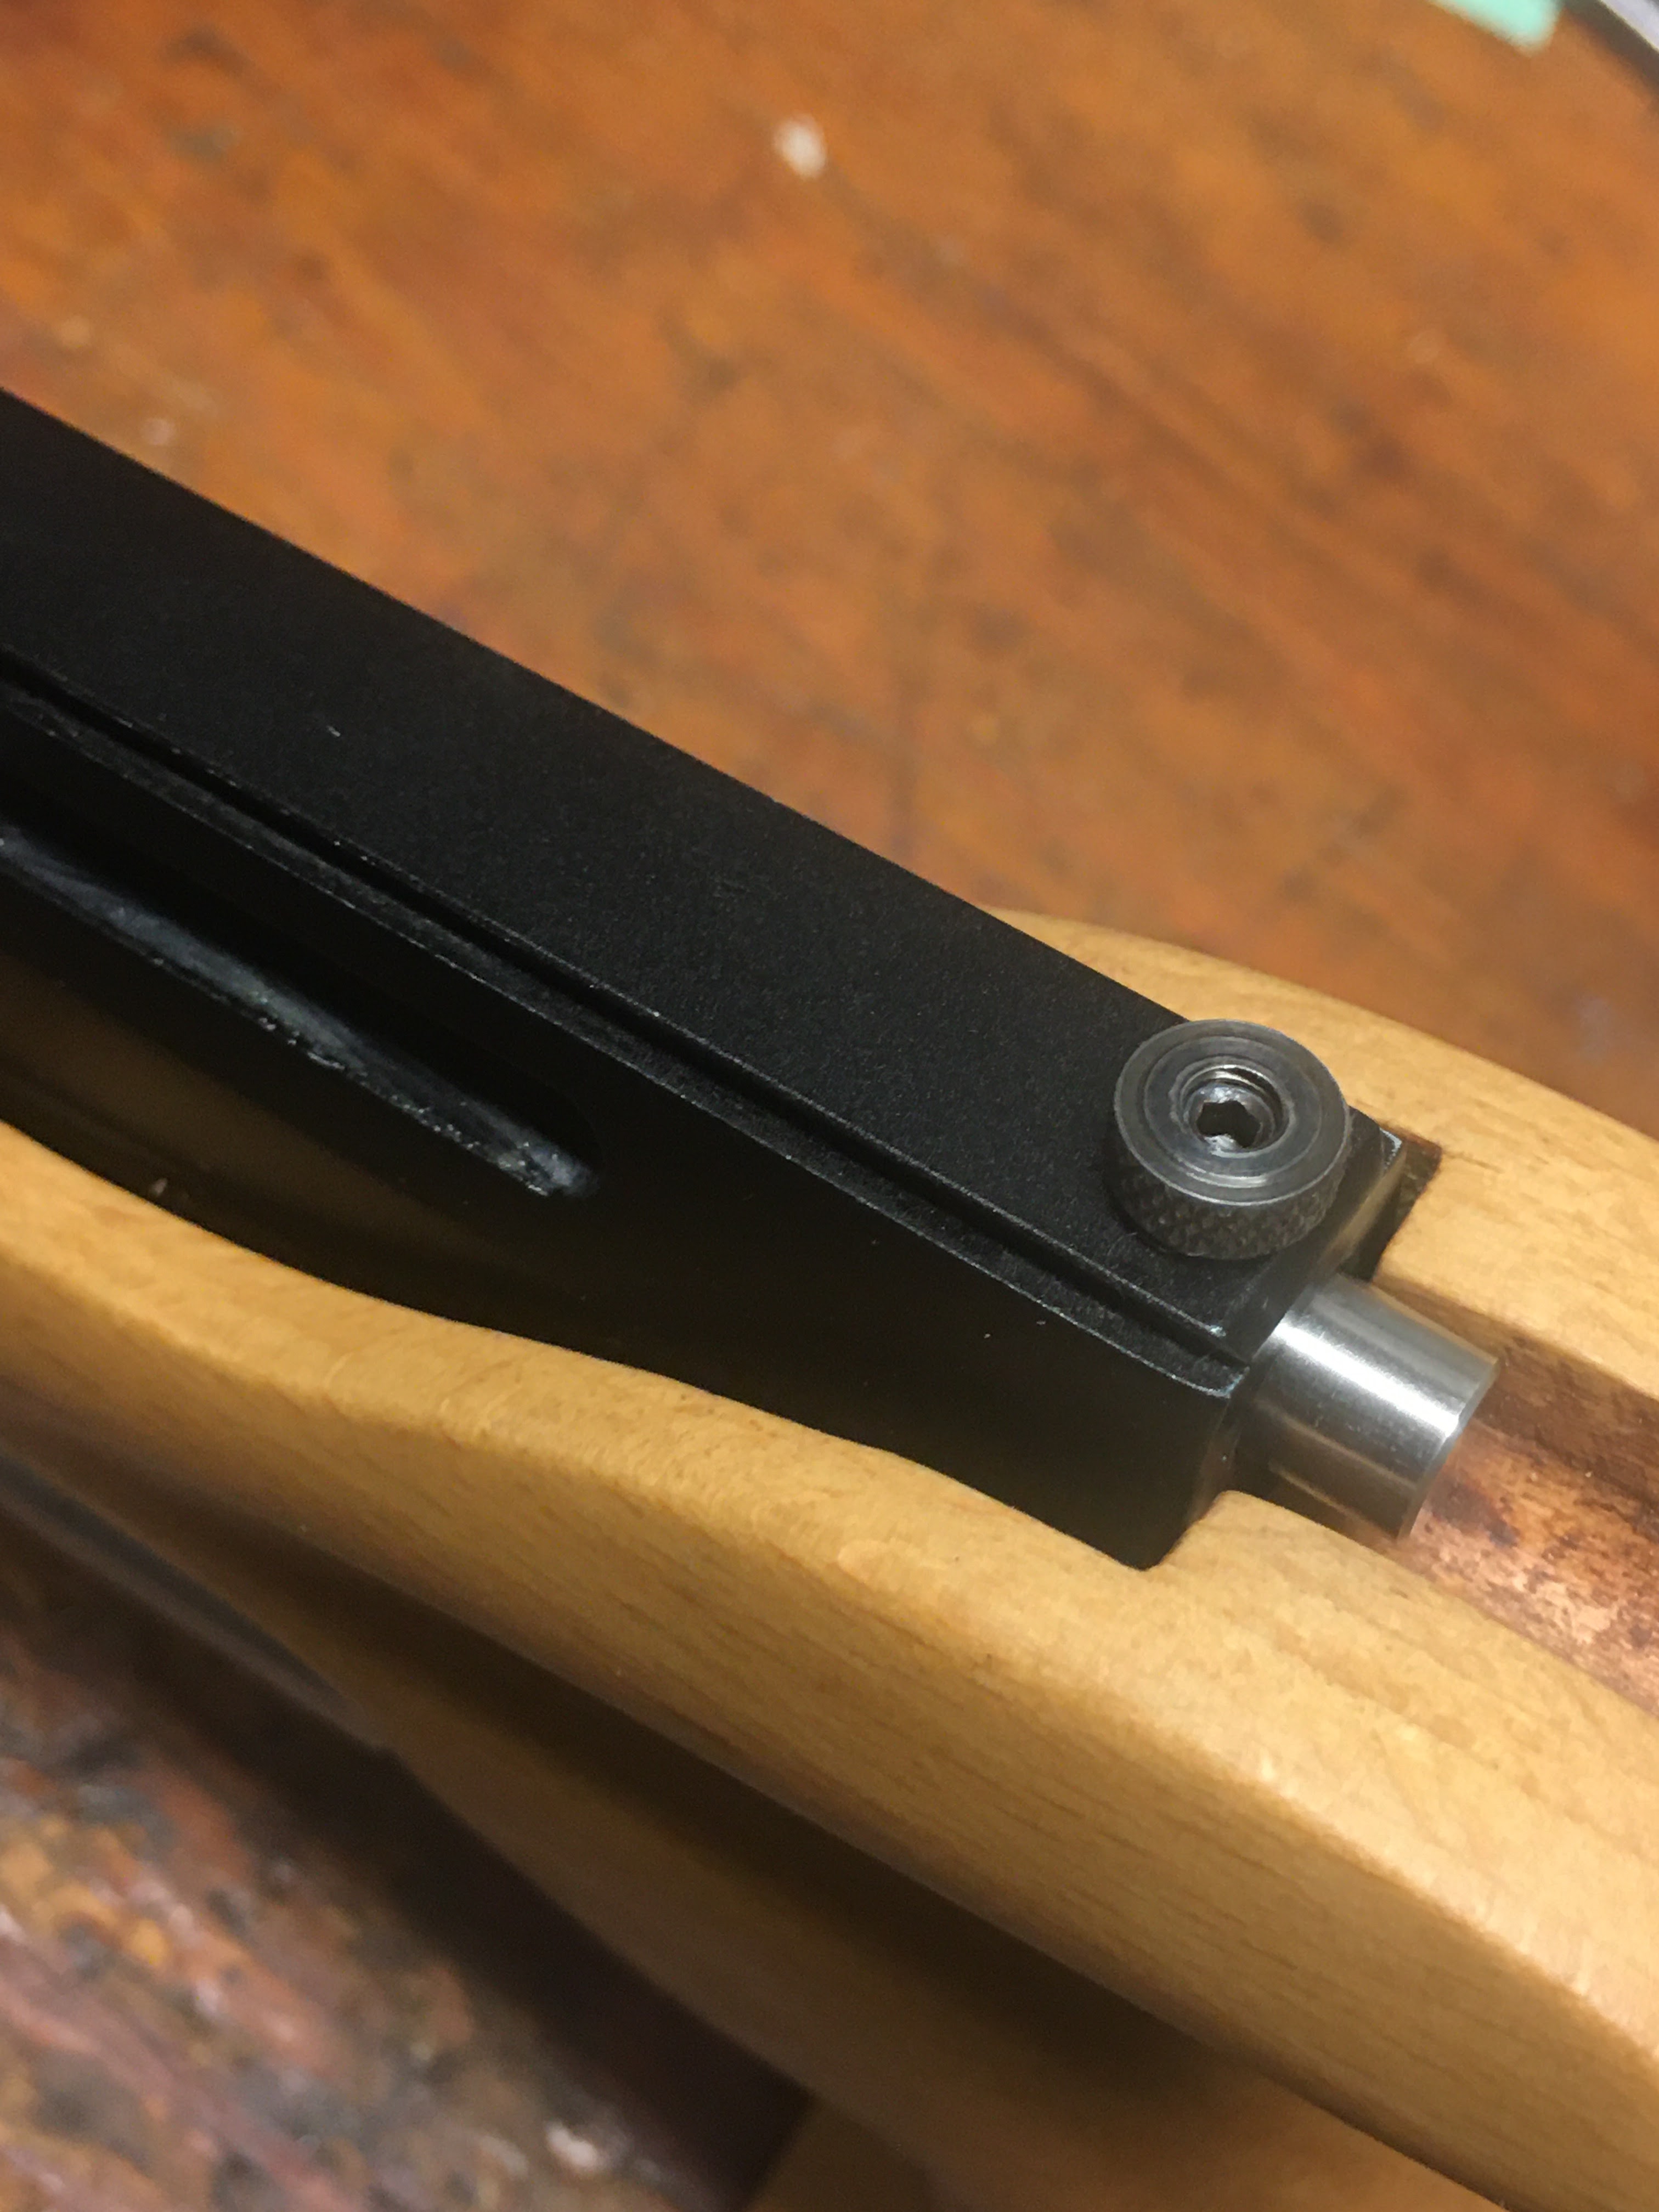
Adjusted the plunger for spring pressure, then snugged the locknut down to hold it in place.

Back in business. I can feel the bearing tip engage the groove in the bolt when cocked. Holds perfectly. Think I'm done with the CP1-M for now. Got several other projects in mind. We'll see what rises to the top.
More soon.


