Showing posts with label Crosman MK2. Show all posts

Wednesday, April 10, 2013

Crosman MK2 Modifications -- Part 5 Final

Quick note:  The EIGHTH annual Flag City, Toys that Shoot Airgun Show is this coming Saturday, April 13, at the Lighthouse Banquet Facility in Findlay, Ohio at 9AM. 

Special thanks to Dan, Angie, and Dave and everyone else for bringing this great event to the Midwest for almost a decade.


Almost done with the Crosman MK2.  The pistol needed a front sight, and I couldn't find a suitable piece of flat stock in my scrap box.   Eventually, gave up and used a piece of round free machining steel.  Need to turn it into a rectangle, then into a sight. 


Faced the ends in the Taig lathe.


Clamped it in the mill on parallels and milled the top flat. 


Here it is after a few rotations in the milling vise.


Final pass and I had a rectangle.


Found center.


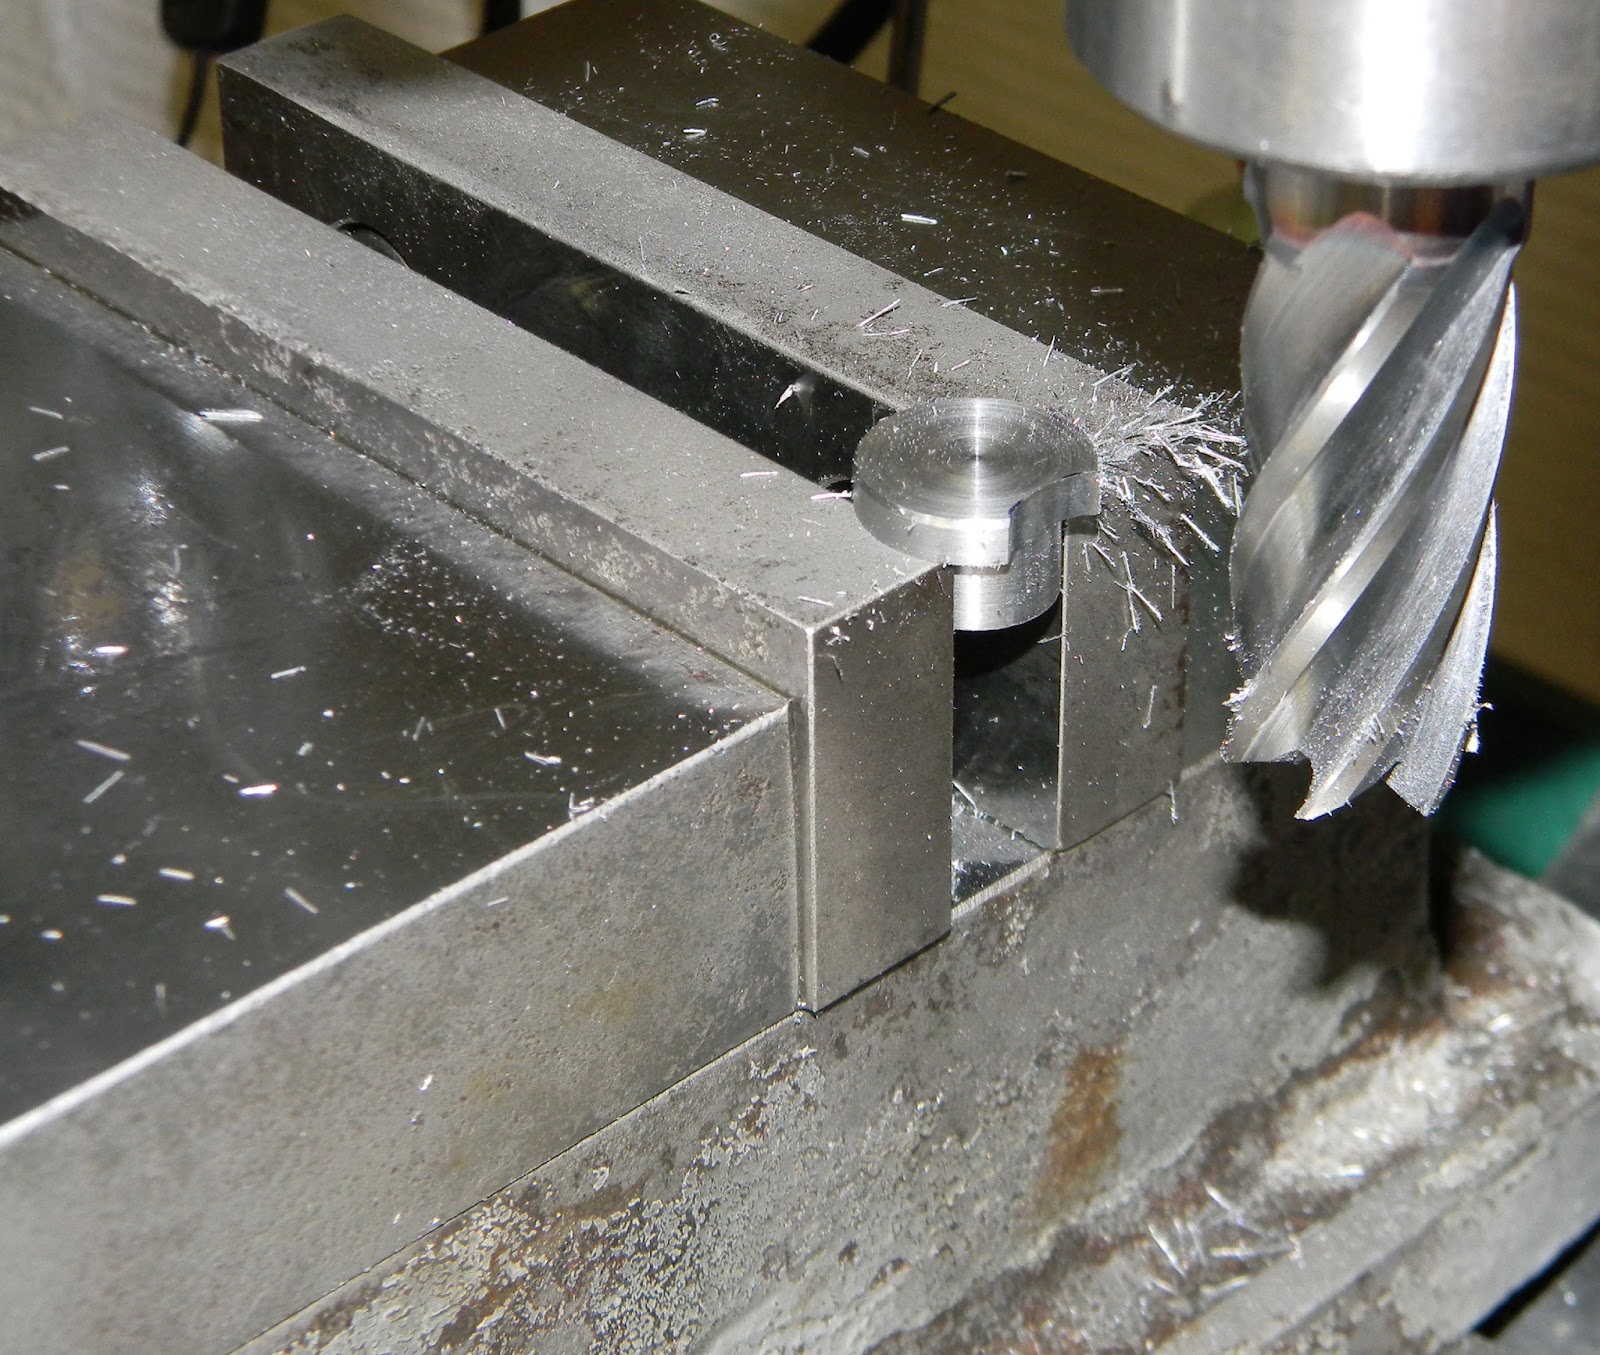
A couple passes with a 7/8" ball mill gave the correct radius to fit the shroud.


Wanted the width of the sight blade to be around 0.150"-- or roughly 3.8mm.  Figured I'd use the gun on 10-meter pistol targets and 3.8 to 4mm is usually in the ballpark for me.


If you can cut one side to depth, turn the work around in the vise and cut the opposite side, there's no need to touch the Y-travel on the machine.  Can't do this on heavy cuts, but it worked here.  Gonna leave the blade absurdly tall and cut it down after doing some shooting.


Milled the back edge of the blade.  Just stuck the sight in the vise and eyeballed an angle and the depth of the cut. 


Still too tall, but I cleaned up and finished the base with various hand files.


Found center and spotted for a mounting screw.


Through drilled.


Countersunk.


Found center of the shroud as well as the amount of setback from the front edge (including the thickness of the endcap) and spotted.


This drill bit is about 0.098"--roughly 2.5mm.  I first installed it in a pin chuck.


The pin chuck is then held in the larger chuck.


Tapped the shroud M3 x 0.5mm.  As much as I hate to mix imperial and metric thread on a gun, the wall thickness of the shroud dictated a finer thread pitch than I had on hand (or wanted to attempt to track down) in imperial.  Metric was the logical choice as I had both the tap as well as an assortment of suitable screws.  Had I gone with imperial, I'd have needed something like a #5-40 or #5-48.  There's nothing available at any local hardware store in those fastener sizes.


Took off most of the blade height, but that's easier than starting from scratch.


The procedure is simple:  Shoot the gun, look how low the POI is, file (or mill) the sight down and shoot some more.  When the POI is centered on the aim point, it's done.


Blued the blade.  A 10-shot quick group confirms the height is correct.


Above a Ruger MK2 Government.  The Crosman is a touch longer, but the balance is about the same due to the MK2's hollow shroud vs. the Ruger's solid bull barrel.


A coat of black gloss epoxy paint on the shroud.  Blued the endcap.


A few parting shots.


Next up:  Rebuilt a co-worker's Crosman Quest 1000 spring piston rifle.   Should have the post ready in a few days.

Tuesday, April 2, 2013

Crosman MK2 Modifications -- Part 4

Since the plug base for the hammer spring is part of the Crosman MK2 factory shroud, I'm on my own for a replacement.  Initially, I had visions of silver brazing the plug to the new shroud, but my actual solution was pretty mundane.


Found a scrap of 0.750" steel rod.  Dunno what it's from, but it looks like a slice of a low carbon steel.  Based on how it cut, it's probably a "free-machining" steel like 12L14.


Cut it to shorter length and took a couple passes to get the small diameter to slip fit into the hammer spring tube.


Thinned the outer face.


Milled some clearance for the radius of the shroud. 


The only "difficult" part was deciding to drill a hole in the MK2 frame to add a cross pin for the plug.  I've got the gun clamped by the shroud--the shroud is seated against the bed of the milling vise.  Used a surface gauge to indicate several spots on the flat of the grip frame.  This sets the grip frame parallel to the surface of the mill table and perpendicular to the spindle.  While I know it's not going to be perfect, it's much better than just eyeballing it.  Also added a jack screw under the grip frame to prevent deflection from the drilling.


Lined up with the slot for the cocking knob and spotted the hole with a center drill.  The plug, by the way, is installed in the gun along with the spring sleeve--minus the hammer and hammer spring for the drilling. 


(Very slowly) Through drilled with a 0.125" bit.


Vaccumed the chips and was careful to keep them out of the gun's action.


0.125" pin made from O-1 installed.  Heat blued the ends of the pin with a small torch.


Doesn't look out of place.


Removed everything for deburring. Here's some of the parts.


Going back together.


The hammer spring pressure alone against the plug wasn't enough force to hold the cross pin in place.  Removed the cap and spotted...


Drilled into the cross pin hole...


and tapped #8-32 for a set screw.


Blued the plug and installed.  Filed a flat on the cross pin for the setscrew to bear against.


A new front sight and some color on the shroud should finish this one up.

Check back soon.

Tuesday, March 26, 2013

Crosman MK2 Modifications -- Part 3

Next up on the MK2 is end cap for the shroud.   Essentially, it's a glorified nut.  It will thread to the muzzle end of the barrel and support the front of the shroud.


Dug though my metal stock looking for a piece of 7/8" OD rod to match the OD of the shroud.  No luck, but I did find a piece of 1" stock.


Faced the end.


Turned the OD down to 7/8" then cut a step to slip fit into the shroud's bore.


 Center drilled.


 Through drilled 21/64".


Countersunk.


Started the 3/8"-24 thread with the tap held in the tailstock for alignment, then finished by hand. 


Parted off the endcap.


Needs some clean up.


In a fit of insanity, I decided to make a fancy interface and special wrench for the cap.


The cap was held in a 5C collet and the collet went into a six-sided (hex) collet block.


This was then set in the milling vise and a hole was drilled, then the block was rotated 1/6 of a turn (60 degrees) re-clamped and another hole drilled...  A work stop was used to get the block clamped in the same location in the vise each time.


Eventually, I had six evenly spaced holes.  Removed the collet block--being mindful to not move the X or Y position of the mill table.


For the wrench, I faced a thin slice  of 1.125" round stock. 


Rebated to fit over the end cap.


And it went into the same hex block using a larger collet.


Back to the mill and the work stop where it was drilled six times.  In theory, the holes in each of the two pieces line up.  


Turned down some thin brass rod and made six pins.


Found center and through drilled the wrench with a 3/16" bit.


The (freshly blued) wrench, brass rod cut into small pins, and the end cap.


The brass pins were pressed into the body of the wrench.  Used some Loctite 680 bushing retaining compound to help keep them in place (probably forever).  Chucked the wrench and faced the pins down to the same height.  Not shown:  Cut a handle from a piece of 3/16" drill rod.


Along the way, I added a groove to the cap for an o-ring and used a boring bar to remove about four or five of the 3/8"-24 threads from the muzzle end.  Also chamfered the pin holes and generally cleaned things up.


Wrench and end cap. 


 They practically press fit together.


The end cap threaded into place.  Nice, clean fit with the OD of the shroud.


Here's the new business end of the MK2.  By removing those forward end cap threads, it looks like a deeply recessed crown.


Still need a new plug for the hammer spring tube.  Oh, and probably a front sight.

More soon.