Tom Gaylord also reviewed one of these years ago and had similar thoughts. And like Tom, I can just barely reach the trigger and make it work, but it's just not right on what is otherwise such a lovely air rifle displaying such fine craftsmanship.
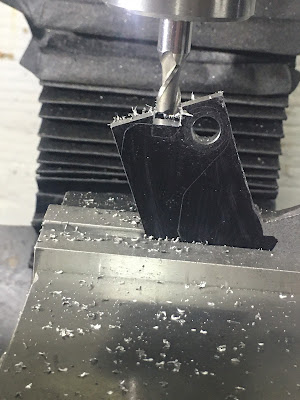
And we're off to the races--or at least the milling machine. Spotted the hole.

Jumping right in, I separated action from lumber.
That single cross pin holds everything together.
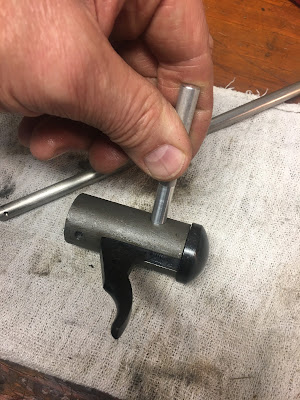
The trigger "unit".
A quickly turned aluminum sleeve pusher
Counterbore for the trigger spring.
Traced the original trigger outline onto a piece of 4130 steel. A transfer punch marks the pivot location.
And we're off to the races--or at least the milling machine. Spotted the hole.

Through drilled.

I don't necessarily just copy hole sizes. Here, I'm using the trigger bushing/sleeve to check the hole clearance.
Used it to locate off the top of the vise jaws to rough away material from the radius.
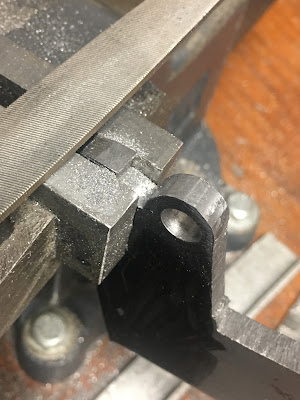
Filing the sear height.
Rather than use the original steel trigger bushing for an endless amount of test fits, I cut a piece of 5/16" aluminum rod.
No wear or tear to any of the old parts.

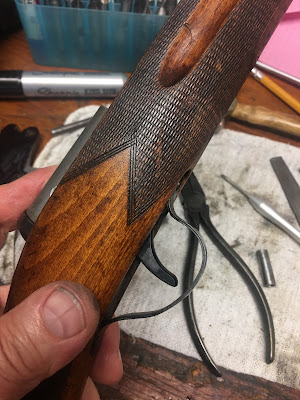
Looking at that original trigger position again.
Milled and drilled away material.
A small machinist jack to counter downward flex while drilling.
A few hacksaw cuts and it's starting to look like there's a trigger in there.
The Hy-Score's end cap is notched for the trigger--except the notch is about 0.025" smaller than the 0.250" steel plate I used.
Side-milled to fit.
When I was tired of filing, I took material off with the bench grinder.
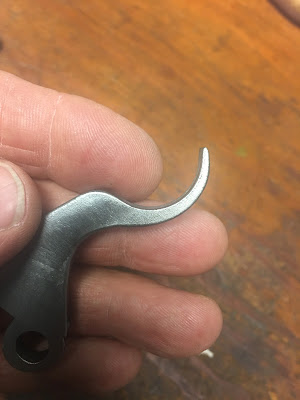
Not done, but good enough for a test fit to the rifle.
Drags a little bit on the sides. Back to the files and grinder.
After a couple evenings.
How much set-back? Overlaid on the original trigger with the sear notches lined up.
Yep. Test fitting. Direct sear triggers pivot rearward when the piston rod moves backward during cocking. The piston rod notch and the notch on the trigger overlap then the trigger spring pivots the trigger forward catching the piston rod "cocking the trigger".
Installed the original trigger guard.
Then it came to a full stop. The trigger bottoms out on the inside of the guard before the rifle cocks.
Thanks for checking in. I'll have more up soon as I make a new trigger guard and do some finish work to the trigger.


