First a quick word and rant about o-rings and our occasional lapse in mentioning sizes or screwing them up altogether.
As I received the old 160, the o-ring in the cap was a replacement and wasn't exactly CO2 friendly. It's on the right and has swelled with absorbed CO2 gas. The one in the middle has also absorbed some CO2. The o-ring on the far left is new. I kinda hate to measure o-rings from old guns. The one in the gun has obviously been replaced and who's to say that it was the correct size? It sure wasn't the correct material.

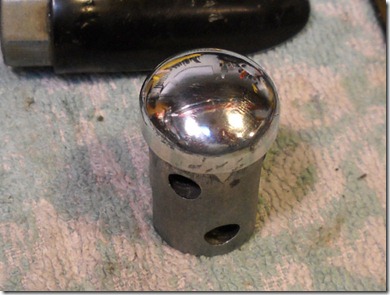
OK, so this bulk-fill thingy... It was 9:00 PM and I didn't have a tap to match the Crosman gas tube thread size. So, I looked through my magic parts box and found something useful. Up top is the original cap from the 160. Below is a spare cap from a model 600 semi-auto pistol. I think I can use the retaining ring to mate an otherwise homemade bulk-fill adapter to the 160 rifle. The snap ring has been removed.

Pulled the knurled retaining ring off the cap body. The retaining ring is the key piece as the gas tube thread size is the same on the 600 pistols and 160 rifles.

Gonna start by making a plug to seal the gas tube. Cut a piece of 0.750" tool steel. It's about 1.7" long.

Faced the ends down.

Used a Taig parting tool (Taig part number 1173) to cut a groove 0.100" wide. Slow turning speeds and lots of cutting fluid are needed or the edge of the blade will be destroyed almost instantly and need to be resharpened.

Helps to have minimal blade protrusion from the holder. This stiffens the set up. Flex is not advantageous. OK, the groove diameter is 0.600" at the bottom.

Cut a second groove as a back up. Overkill is OK here. There's plenty of room inside the bore of the gas tube and I need the machining practice.

These will hold the o-rings to seal the 160's gas tube.

Test fit of the o-rings.

Need to make the front of the plug small enough so the retaining ring from the 600 fits over it.


Cleaned up the shoulder that the retaining ring will bear on.

Turned down to 0.579".

Another view.

The long end will be the front.

Ring slip fits. Barely.

Pressure testing. One, two... The first cartridge is new. Second, empty.

One

Two

Plug

Almost seated.

Snugging down the retaining ring seals the deal. Cocking and firing the gun pierces the first cartridge. The replacement plug held pressure! The plug was left long to allow enough room for the 1/8" NPT fitting I have yet to make. In the next few days, I'll need to make that fitting, connect it to the plug and make a simple valve that will seal the cap as the paintball tank is removed after filling.
