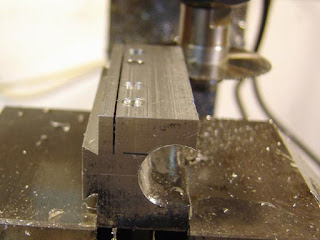
The second cut was taken with a slitting saw, unfortunately it wasn't large enough in diameter to complete the cut.
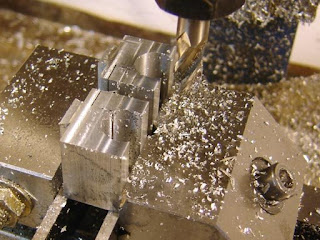
I then sawed the base into two parts and milled them so they were of equal length.
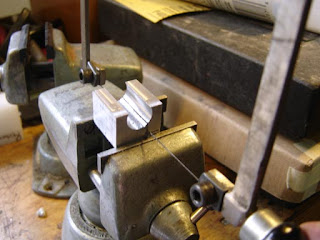
I finished the saw cut with a jeweler's saw.
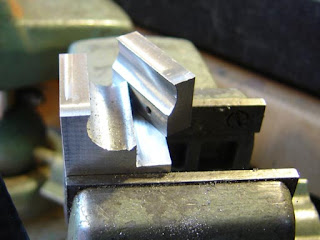
The two pieces are now separated.
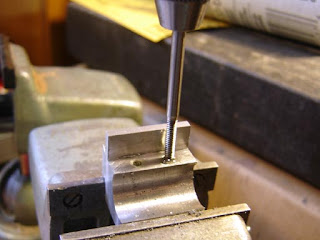
I used a form tap for the #6-32 thread. Form tapping is wonderful for smaller screw threads in soft material. The tap is much stronger, being fluteless, and the threads are cold forged rather than cut, imparting greater strength.
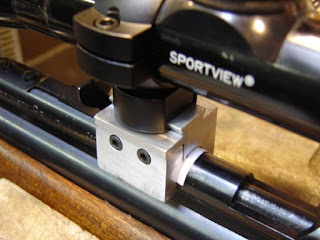
I mounted the bases, rings and scope. Abject failure! I could easily twist the mounts from side to side. I tried putting a paper shim between the barrel and base, thinking that it would add more grip, but no such luck.
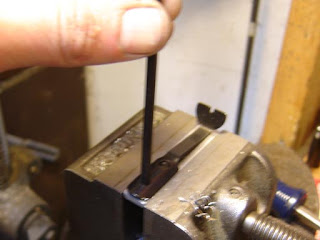
So I used the old sight to spot two holes on a piece of aluminum.
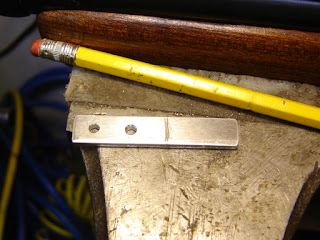
This screws to the existing sight mounting holes.
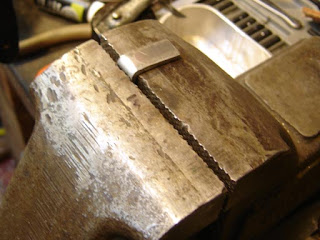
The end was bent using a hammer and the vise.
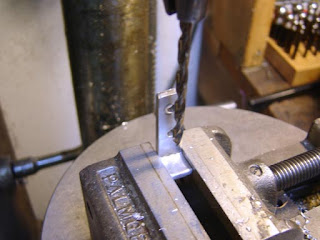
Drilled...
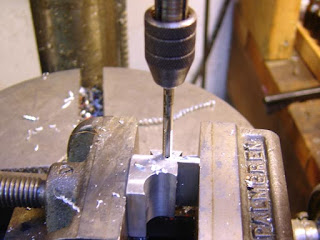
One of the bases tapped on the face...
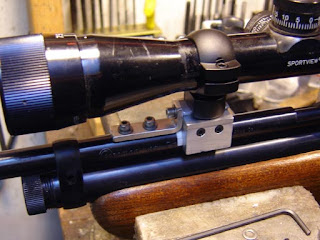
This coupled the front base to the two tapped holes in the barrel. It did work, but still wasn't nearly as rigid as I would have liked. The rear base was not mechanically fastened to the barrel and the whole thing could be pushed with moderate force from side to side. Not good. I was going to just post everything up to this point and move on, instead I spent a couple of weeks mulling it over. I knew it would work if I just figured out what was wrong with the design.
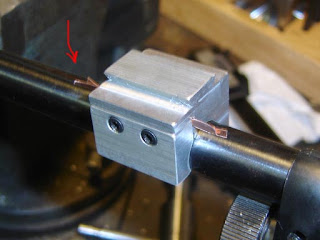
I realized a few days ago that the base clamping force was not being applied in the correct direction. So I cut several thin shims to act as a fulcrum at the top of the base clamping plate (as opposed to the base body) out slightly. Notice I ended up with two .010" thick shims. The base was now solidly clamped to the barrel! If I make another set, I may drill lengthwise for small dowel pins at the corner where the saw cuts meet, to act as a fulcrum.
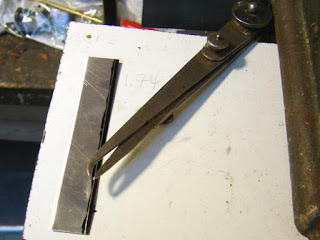
I used the hermaphrodite calipers to scribe a line on some .020" thick aluminum sheet.
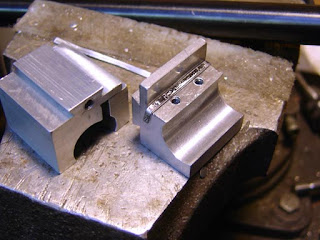
Which were sheared to the proper width and both ends bent to keep the shim in place.
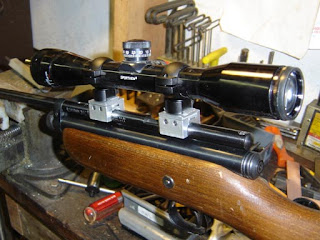
Rock solid! The scope base is rigidly mounted and all is well.
The rifle is a joy to shoot with a scope.

6 comments:
Nick, your blog is very informative. While I lack the tools and shop that you have, I've learned valuable methods from watching your projects progress. Please continue, it's very helpful to your fellow airgun tinkerers.
I have a question, I have recently tried to make some round shims/washers to reduce sideplay in a trigger assembly. I see that you sheared some shims for your scope mount. I purchased a hand punch to punch the shim stock, but the result is non-flat, burred shims. Do you have similar problems, and if so what is your solution?
Please keep up the good work...
TC
First off, is the punch set a gasket punch (hollow punch hammered into a soft block of wood) or a punch with a solid punch and die?
I have struggled with the problem myself. Ideally punches are made for a particular thickness of sheet, which allows a good sheared edge. In the case of punches that have to accept different size sheet, they have to fudge the clearances, so sometimes you get a burred edge. And burrs are a fact of life anyway with sheet metal.
Anyway, I usually use a file to remove the burr, which is a tad tedious but works well. For thin sheet you want a fairly fine file (like jewelers files), hold it at around 45 degrees to the edge and file around, removing the burr and as little of the actual material as possible. After a while you develop a feel for this, and you've gained a valuable skill!
You can also lap the burrs off by rubbing the washer flat against a piece of sandpaper on a flat surface (table saw top, piece of glass, etc) Then go around the periphery with a file.
Finally, use fine sandpaper to rub the edges smooth, so they aren't sharp.
If the washer isn't just burred, but also somewhat cupped from the deformation of the punch, hammering it between two flat pieces of steel will flatten it somewhat. It gets a little complex as there are all sorts of stresses and strains, but you should be able to get it reasonably flat.
Some people will mount the washer on a bolt, captured by a nut, chuck it in an electric drill and spin the edge against sandpaper, etc. This can work, however you are creating a tiny sawblade and must be careful! Make sure the edge is being evenly dulled all around.
Nick
This is the punch that I used.
http://www.harborfreight.com/cpi/ctaf/Displayitem.taf?itemnumber=44060
Some of the shims that I've cut aren't burred, but all are cupped. I've tried clamping them in a pair of vise grips between two flat sheets of steel, but they're still a little cupped.
Oh well, I've put it back together and it has improved the slop in trigger quite a bit, so I'll try it for a while and see how it does. It's not as elegant as I imagined, but it seems to work pretty well.
Thanks for your reply.
TC
Rather than pinching, try hammering it on a flat steel block. Basically you need to "shrink" the cupping as the metal has stretched at that point. So you sort of need to force all the molecules back together a bit...this can drive you crazy and it's why people pay huge amounts of money for autobody work.
That type of punch is handy, but not meant for very thin sheet, hence the cupping. I have had success with using a unibit type drill in the past for holes in thin material.
Hi,
This my first time responding to a blog. Just thought you would like to see how I mounted a scope on a Crosman 101. These pics have been up for a couple of years. Basically, we used the same method. An even earlier mount was used on a Tempest pistol.
http://www.pbase.com/packrat/image/92506035
Poke around all you want. Quite a bit of airgun related stuff.
Packrat1947
I know, this is a very, very old post to be commenting, but...
I've recently been wanting to mount a red-dot sight (which I already have -- eventually, I'll upgrade to a scope) and Picatinny style rail with flat bottom on my Crosman 160 (apparently the low-price variant -- one-piece trigger-sear, rear self-setting safety, and no provision for either scope or receiver sight). I don't want to mill a flat on the receiver, though I'd be willing to drill and tap -- but I can't seem to find a base that will fit Weaver scope rings and the .746" diameter receiver.
Your post here has given me an idea: I can make a clamp-on adapter for the flat-bottom rail I have, that won't require any modification to the rifle, and I can do all the machine work in my 7x12 lathe (using facing to "mill" off the base to open the bore) and drill press. This is simplified, since I just need a flat top and the mounting holes on center line; I'll use a saw cut from the interior of the bore, leaving a "hinge" uncut at the top, to make the mount clamp on the receiver. The end product will essentially be a slightly simplified version of your mount, but flat on top instead of dovetailed (if I had a mill, I'd dovetail to fit Weaver rings and eliminate the Picatinny rail).
Post a Comment