Showing posts with label predom lucznik. Show all posts

Sunday, February 4, 2018

A Simple Cocking Aid for the Predom Lucznik Pistol

Several years ago, Nick made a cocking handle for his Predom air pistol.  I wanted to make something for mine, but other projects were taking precedence at the time and it was simply forgotten. Shooting my Predom a few nights ago brought the project back to memory and to the top of the project que.

Some inspection of the pistol revealed that the muzzle was deeply recessed--over two inches--and the barrel was counterbored to about 0.265" in diameter. 

I found a 1-3/8" diameter aluminum ball for a machine handle in the McMaster--Carr catalog.   


 The ball and a 2" long 5/16" shoulder bolt completed the parts list.


The ball and bolt both have 1/4-20 threads. 


Cut the head off the bolt...


And turned down the 5/16" diameter to about 0.262" to fit into the end of the counterbore.


Did it in sections--keeping the overhand to a minimum--then polished it with a piece of maroon scotchbrite.


Heat blued the shaft, then threaded it to the ball with some medium strength Loctite.


Cheap, quick and no more hand pain.

More soon...

Friday, August 29, 2008

New Leather Seals for the Predom Lucznik

So I finally decided to try my hand at making leather seals.

As I related before, the seals on the Predom worked ok, but were really nasty looking.

So I turned up a form from some UHMW scrap.

And pressed a piece of wet leather in, leaving it clamped for 24 hours.

Then I trimmed away the excess.

I finished up with a very sharp xacto.

Doesn't look bad.

I made the inner washer by stamping with an arch punch.

Then punching the hole. I knew all my leatherworking tools would come in handy someday.

Exciting!

Old and new seals.

I soaked them in oil for 24 hours.

The inner leather washer had to have the countersink for the screw head. I basically just carved it out with the xacto before soaking..

It sort of wiggled around a bit when I screwed down the screw, but I was able to massage it back round. I inserted it into the pistol and reassembled.

Well, it hasn't made any difference in velocity, although I'm hoping as it wears in it will become more efficient. We'll see. I had a hard time deciding between hair out and hair in, but the original seal seemed to have the hairy side out, so that's what I went with.

Tuesday, April 29, 2008

The Predom Lucznik Piston, Defeat and Victory.

The Predom Lucznik seemed to be shooting slow, around 280 fps. So I thought I would take the piston out and check the seal/washer. I followed the directions in this forum post for disassembly. It's a pain at first but once you do it a few times it's easy.

The washer was folded over the end of the piston (a clue for the observant).

A bit fuzzy on the end.

As you can see the washers are chewed up a bit.

I used a telescoping gage to determine the ID, I can't be sure the scrap of paper in front of me relates to this, but I think I wrote it down as .744" Don't quote me on that...

First I made a delrin seal and it wouldn't push the pellet out of the barrel, likely I made it a bit too small. So I turned some teflon...

Making the counterbore for the screw.

Making a parachute lip. I have a lot to learn about this topic...

The teflon seal.

I installed it in the pistol and got speeds of about 160 fps. Adding a washer between the spring and guide for preload, I bumped it up into the 180 fps range. Not good. Notice that my lovely parachute seal failed to deploy, instead rolling inwards...the streaks on the side are either gasses or oil leaking past the seal...all in all, total failure.

So I pulled off the teflon seal. I then realized that the face of the piston should be a full circle, and that the thin flange was broken off at the sear.

So I made a washer for the face, .050" thick. I reinstalled the old, ugly and deformed (why didn't I notice that before?) leather seal. With the other washer in place under the spring to bump the spring preload up a bit, it now chronied at 348 (CPL's 7.9 grain), which is right about what the pistol is supposed to do. I will be making a new leather seal at some point in the future but for now the gun shoots fine.
Anyway, this all tells me I have a lot to learn about spring piston airguns...

Wednesday, April 2, 2008

Prototype Cocking Aid for the Predom Lucznik

Cocking the Predom Lucznik results in an incredibly uncomfortable sensation of the front sight trying to tear a hole in your palm. The Walther LP53, which the Lucznik is patterned after, was supplied with a cocking aid. If you look at this German page, scroll down to the picture showing how the LP53 is cocked with the aid attached. So I decided to make a prototype out of plastic.

A chunk of Nylon rod faced and chamfered before cutoff.

A brass rod, 1/4" diameter, chamfered before filing the end to a half round.

The two pieces fresh from the lathe.

The plastic was tightened up in the vise on the Taig mill and the centerline was found. I milled a flat across.

I then drilled slightly undersize for the brass pin.

Next I pocketed it out to clear the barrel and front sight.

The pin was pressed into the hole.

It covers up the front sight and makes for comfortable cocking.

This is what I'll change in the future - the pocket doesn't change width, I should have narrowed it where the sight is so that it can't twist from side to side. Only after I made it did I find an end on view of the Walther one in an auction on Gunbroker, showing the narrowed slot width. I'll be making the next one out of wood, when I get a blank disc made by my friend Rudi, the wood turner.

Friday, March 28, 2008

Fixing the Predom Lucznik Rear Sight

I recently bought a Predom Lucznik air pistol from Military Gun Supply. There is a lot written about the pistol already on the web, so I won't rehash that all here. MGS doesn't have the pistols up on their site any more, but they may still have a few in stock. The price was $50.00 plus about $15.00 S&H. The gun as received was a tad rough, which is to be expected from military surplus.
As received, my main problem was the looseness in the rear sight. Generally you want your sight to be accurately adjustable, and once adjusted, to stay put! The rear sight on the Predom could easily be wobbled back and forth. So I set out to fix it. Let me state that I would not attempt such a repair on a valuable airgun, as it is possible that in trying to fix a minor problem, a problem of far greater magnitude could be created, in this case a broken rear sight...
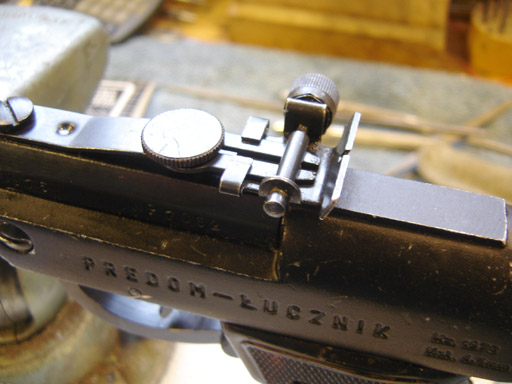
The rear sight in place.
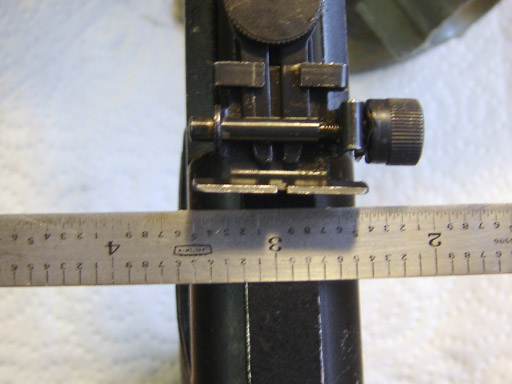
With a ruler placed approximately perpendicular to the pistol, the sight can be tweaked right...
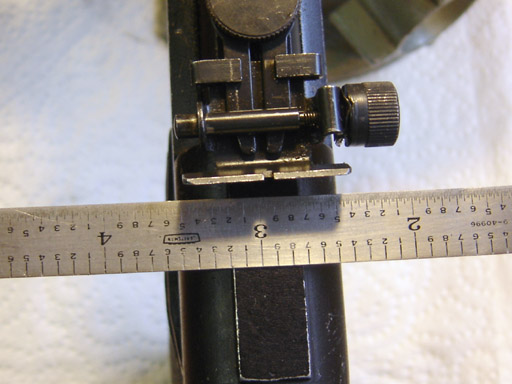
...and left by maybe 10 or 15 degrees...not good.
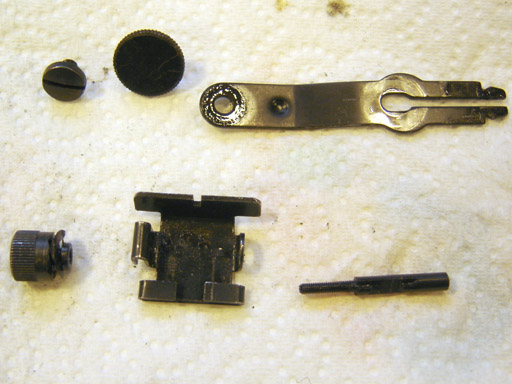
The sight disassembled. Remove the elevation screw, then the screw which affixes the sight to the pistol. Snap the sight mount out from the rear sight unit (see the barbed spring fork?) and then unscrew the adjusting screw and knurled nut. Don't lose the spring washer(s)!

This is the angled notch that bears against the spring of the sight mount.
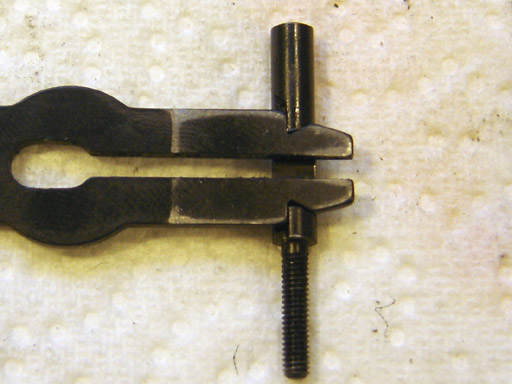
It's hard to see, but basically there is a gap, the spring does not press against the notch and thus the sight is loose. I took some measurements and the slot in the spring (I'm just going to call the
sight mount the "spring" for now, bear with me) measured .083" near the oval cutout to the left of the picture, and .076" up near the notch. So it had clearly compressed over time.
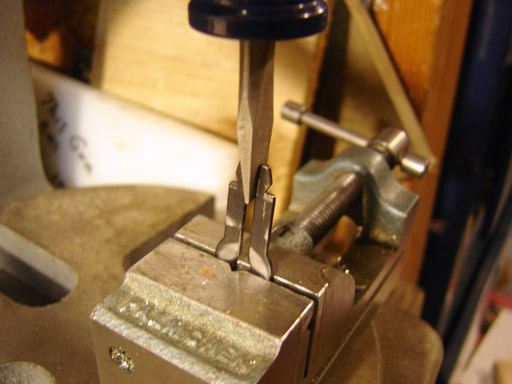
First off, let me state that I am wearing safety glasses while I do this.
I put the spring in a small machine vise (a very handy Palmgren vise ), stuck a stubby Craftsman screwdriver in the slot and put it under my arbor press. Then with only mild pressure from truning the handwheel, rather than the lever arm...
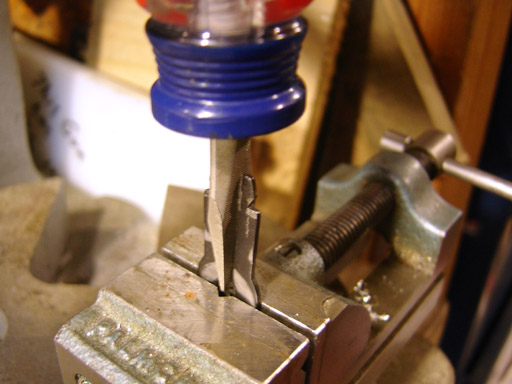
...I pushed the screwdriver down into the slot. This is the point at which things could go terribly wrong. Worst case would be a fracture of the spring, and slightly less worse would be a deforming of the spring so it was no longer flat. So again, don't do this if breaking the sight would break your heart as well. In any case keeping one hand on the screwdriver to minimize twisting, and going slowly with very little force seems to have worked. I pushed down a little, removed the screwdriver, measured the width, and repeated, pushing down a little further each time until the gap was spread far enough. Taking it slowly is important for things like this. The spring was spread beyond the point at which it would spring back to the original loose dimension, and took a set so that it was slightly wider at top than near the oval.
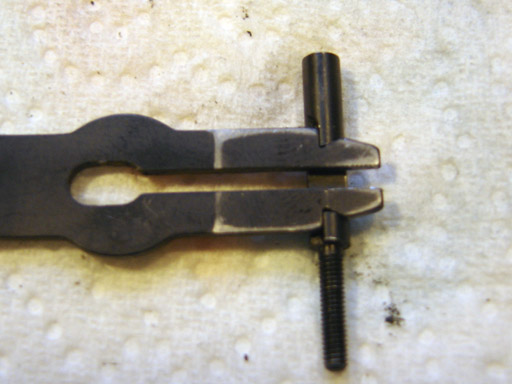
The sight adjustment screw snapped into the spring, and was held firmly.
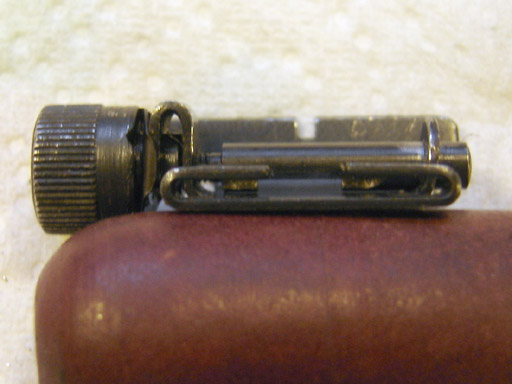
Now we had to fix the other issue, which was the folded ears on the sight body which fold around the spring. They were loose as well. The spring thickness is .047", and the sight ears had a gap of .053"
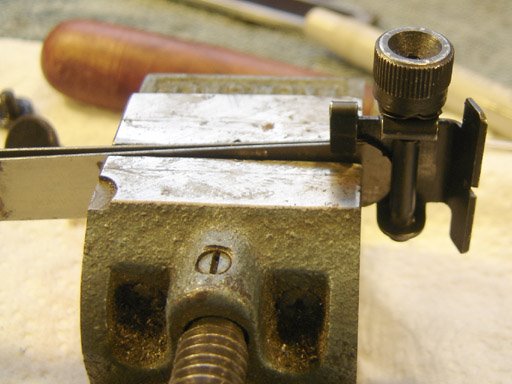
I placed a stack of automotive leaf gage/shims measuring .045" into the slot and squished the ears (one side at a time) in the vise (I told you it was handy). Because the ears will spring back slightly when compresses you want the shims to be undersize by a few thousandths.
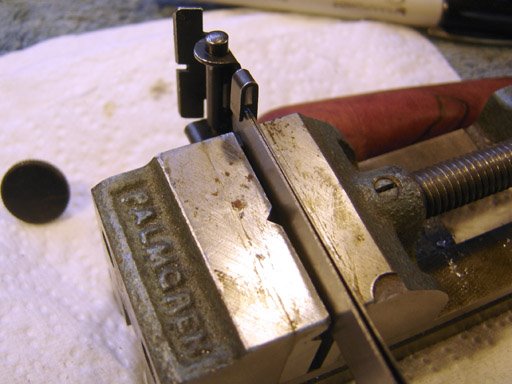
Sure you could eyeball it without the shims, but why? With the shims in place you are guaranteed to not squish the slot too far, and get even pressure over the entire ear. If it's still to big, reduce the shim stack another couple of thousandths and try again.
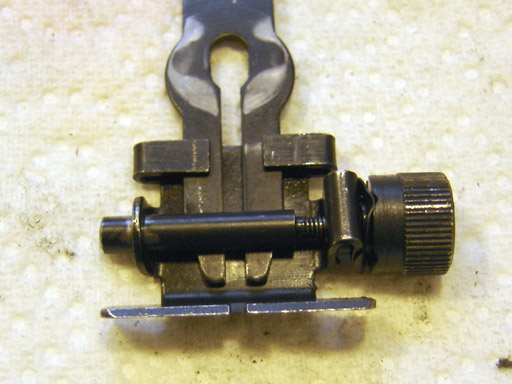
The sight is tight! Although there is a flaw in the design. Because the spring is designed to allow the insertion of the sight body, it has to spring inward under pressure. So you can still wiggle the sight if you grip it forcefully. But it is no longer loose.