Saturday, March 6, 2010

BSF S20 WCM Pistol

Derrick forced me to buy this pistol.

New in the box.

Even newer.

Came with a brush, a tiny tin of pellets. It's "select".

The end of the box.

Looks good.

The grips are comfortable.

Yet another pic.

The sight. Fine adjustment for elevation but coarse for windage.

The BSF logo.

"Made in Germany West".

So you know it's German.

Leather breech seal.

There's a lot on this pistol out there already:
http://www.pyramydair.com/blog/2008/09/bsf-s20-match-part-1-germanys-rifle.html
http://www.pyramydair.com/blog/2008/09/bsf-s20-match-part-2-germanys-rifle.html
http://www.pyramydair.com/blog/2008/09/bsf-s20-match-part-3-germanys-rifle.html
http://www.muzzle.de/N3/Druckluft/BSF_S_20/bsf_s_20.html
http://www.gunspares.co.uk/shopdisplayproducts.asp?id=24802&cat=BSF+S20+MATCH

Let's just say it's a pleasure to shoot.

Friday, March 5, 2010

A New 2250 Gas Tube

I sort of accumulate parts for airguns. Occasionally, I'll look at the pile and realize I'm but a few pieces away from being able to build a new gun--usually a Crosman 22XX. This time, the key part needed was the gas tube.

A new Crosman 2250 tube--part number #2250-009. Problem was, my steel breech has the "new" breech screw location at the rear of the bolt trough. Actually, that's not the problem--the problem is, though the new gas tube is drilled for both the old and new breech screw locations, only the front hole was tapped with 4-48 threads.

Looked through all my bajillion taps and seems I didn't have a 4-48. Need a 7/32-40? How about a 2-56? Unbelievable. Hit Kromhard's this morning and sourced a plug tap for under $4.

I was mainly concerned with alignment of the threads to get them perpendicular to the tube. With such a thin wall to thread, it would be very easy to cut the threads at an angle. I wondered about just using the existing 4-48 threads that Crosman did cut to align the tube.

With rubber jaws installed in the vise, I gently grabbed the gas tube. Threaded the tap into the existing forward screw location, then brought the drill press table upward until I could chuck the tap. Since the gas tube was held loosely, the tube rotated in the padded vise jaws until the tap was vertical. Snugged down the gas tube, left the tap in the chuck, and centered up on the threadless hole.

Turned the chuck by hand and applied a bit of downward pressure to feed the tap into the hole.

Finished by hand. It's more than accurate enough for the application. Still dragging my feet on the build. Leaning towards .20 cal but waffling on barrel length. I'll need to make a few parts, too, in the coming week. More soon.

Thursday, March 4, 2010

Aperture Retrofit for the QB77

The Crosman 411 aperture sight was a nice addition to the QB77, but I wanted a larger diameter disc. The 411 disc is also too small in diameter to fit a rubber eye cup.


I was ready to make a new disc when I remembered that I had a spare aperture for a 10-meter match rifle.

I think it's an old Anschutz.

Size comparison. The Anschutz (?) has a weird M9.5 x 1mm thread. Then again, the Crosman 411 has a weird #12-28 thread...

After looking at the aperture for a while and making some comparisons to the 411 sight base, it looked like a fairly easy retrofit. Chucked the aperture into the 3-jaw to begin.

The ID of the threaded tube was exactly the right size to tap 1/4-28. Started with a plug type tap.

Followed with a bottoming tap.

Finished by hand with a proper tap handle.

A scrap of 0.250" drill rod about an inch long.

Faced both ends.

Turned one end down to approx. 0.212" or thereabouts.

Flipped the rod in the jaws and threaded the larger .250" diameter to 1/4-28.

Turned the rod around again and tapped the smaller diameter to #12-28.

Spotted.

And through drilled with a #29 bit.

Cut a small relief at the base of the #12-28 thread.

Scrounged a washer/bushing/spacer from a parts bin.

And bored out the ID to just fit over the exterior threads on the aperture.

It's strictly a cosmetic touch to cover the unused exterior threads.

Removed the elevation and windage plate from the sight base to test fit.

Greased the double threaded adapter and snugged it down into the aperture. Pulled the rubber eye cup off the HW 35E.

Anschutz (?) installed.

Looks exactly like what I was after.

Since I didn't damage or modify the exterior threads, the Anschutz disc can be still used on the correct base as well.

I'd still like to refinish the stock, get rid of the knurled nut with a recessed fitting , add a rear sling swivel stud, overhaul the rifle... All in good time.

Tuesday, March 2, 2010

BSA Meteor, Back Together

Just some details of getting the Meteor working.

I polished all the internals.
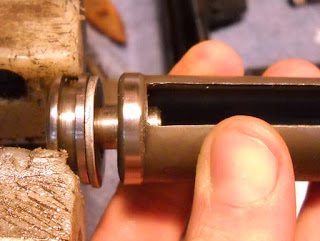
I needed to replace those yellow washers.
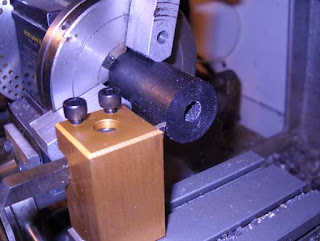
So I turned up a rubber disk.
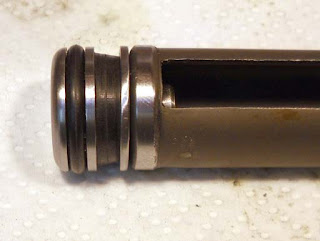
I had to trim it a few times to get the length right. It also came out tapered as it was softer rubber than I usually turn. Live and learn. The main thing was to keep the piston head from rattling around.

I have to retain the detent plunger while putting the pivot pin back in.
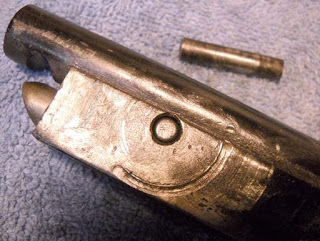
So I inserted a shorter dowel pin into the block to hold the detent in place, then pressed in the pivot pin which pushed out the shorter pin. The circular groove is from someone using stock screws that were too long...
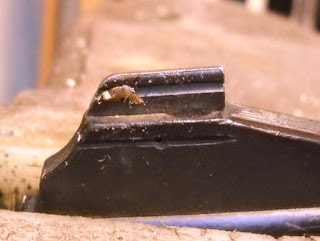
I decided to remove the front sight. If anyone has a spare Meteor rear sight I'd love it. But I'll just scope the thing for now. I think it would be better with open sights.
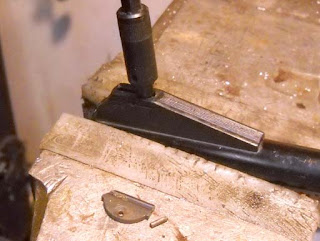
Once the small roll pin is pushed out the blade comes loose and the base can be removed.

Somewhat complex. The front plastic pin in the base goes into a hole in the barrel...

I then sanded the stock. I didn't want to put too much effort into it but did want to remove the worst dings and make a good base for refinishing.
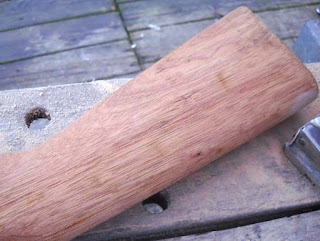
It's not a bad piece of wood.
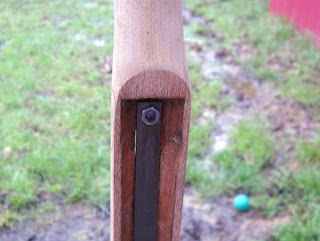
I mounted the stock to a steel bar.

I gave it one light coat of cherry stain.
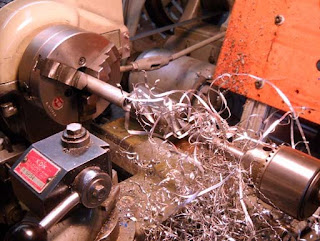
In between coats of oil I made a muzzle brake...

I decided to go with a minimal brake.
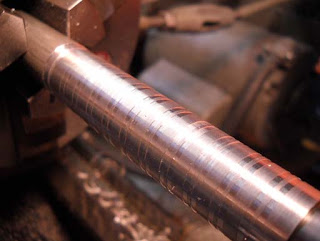
Some very light grooves so my hand could grab it.
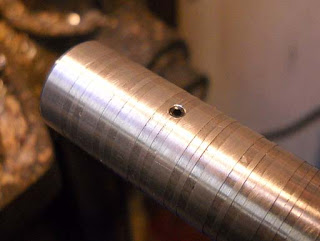
The setscrew goes into the hole at the front of the barrel that the front sight registered in. It is a push fit and the setscrew keeps it from coming off.
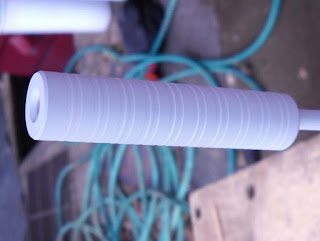
A coat of primer...
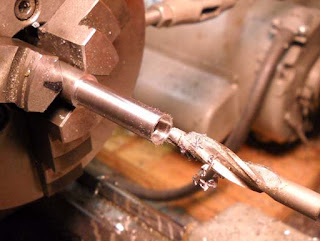
Making the screw cups.

I didn't make them a tight fit as I didn't want to stress the wood. It was pretty thin and already had the one glued split.

I did give them some cold blue. Notice the different heights due to different counterbore depths. I retapped the stock screw threads to 10-32 and used socket head cap screws.
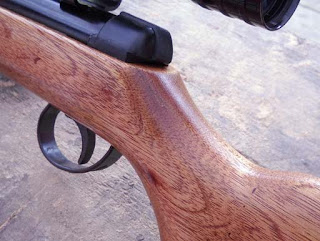
Back together. I think the wood cleaned up nicely. I did 5 coats of Tru-Oil, sanding with a maroon pad. Not perfect but much nicer than it was.
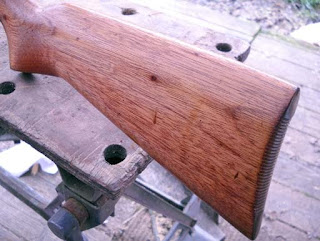
Still a few dings left, didn't want to substantially change the stock.
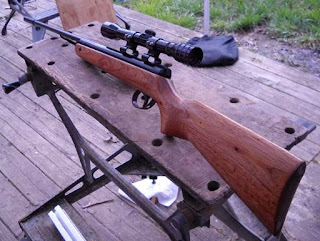
The finished rifle with a yard sale scope and some rings I hate.

Looks better? It is shooting at about 445 fps w/14.3 gr. pellets, which seems correct. A light and fun little rifle.