I do apologize for not posting more, between work, kids and a terrible flu for the past few weeks I’ve been useless. Rather than posting nothing I thought I’d crack open a Crosman model 338 I bought a while back, just to see how it goes together. I’m still messing with the Crosman 105, having problems with it. In fact I’m only batting about 50% right now with airguns. Maybe I’ve lost my mojo or more likely I’ve been lucky up to this point. Possibly I need to stop playing with CO2 and MSP guns and crack open a springer…

It’s a copy of the Walther P-38.

The hammer is part of the casting, it’s not a replica by any means.

CO2 cartridge holds the right grip in via spring clip.

Hammer spring in the grip.

It’s stout, and a bit difficult to replace without levering it back in.

One screw for the left hand grip.

This exposes one of the two screws that hold the body together.

Removed.

Things sort of spring apart at this point.

Safety on.

Safety off.

The barrel shroud and barrel lift out.

A setscrew holds the barrel lug to the barrel. This can be used to set headspace.

Everything somewhat sprung.

Other side of the riveted together trigger assembly and transfer bar.

BB shuttle mechanism.

Potmetal piece lifts out, notice the cutout for the passage of gas.

BB shuttle. There’s a small insert to take the wear of the trigger bar that lifts the shuttle.

Valve assembly.

Hammer assembly. Closest pin is the pivot, others are pressed/cast in place.

Standard piercing pin setup as found on most Crosman guns of this period.

The seal is worn. I replaced it but I’m still getting a leak right there (gas flowing out between seal and pin). Not sure why. Could be the latest seals I got from Crosman are bad or possibly I need to tweak something. This comes on the heels of a similar problem with the as yet unfinished model 99, so I am wondering what’s up. I never had such problems before. I’m sure I’ll figure it out eventually.

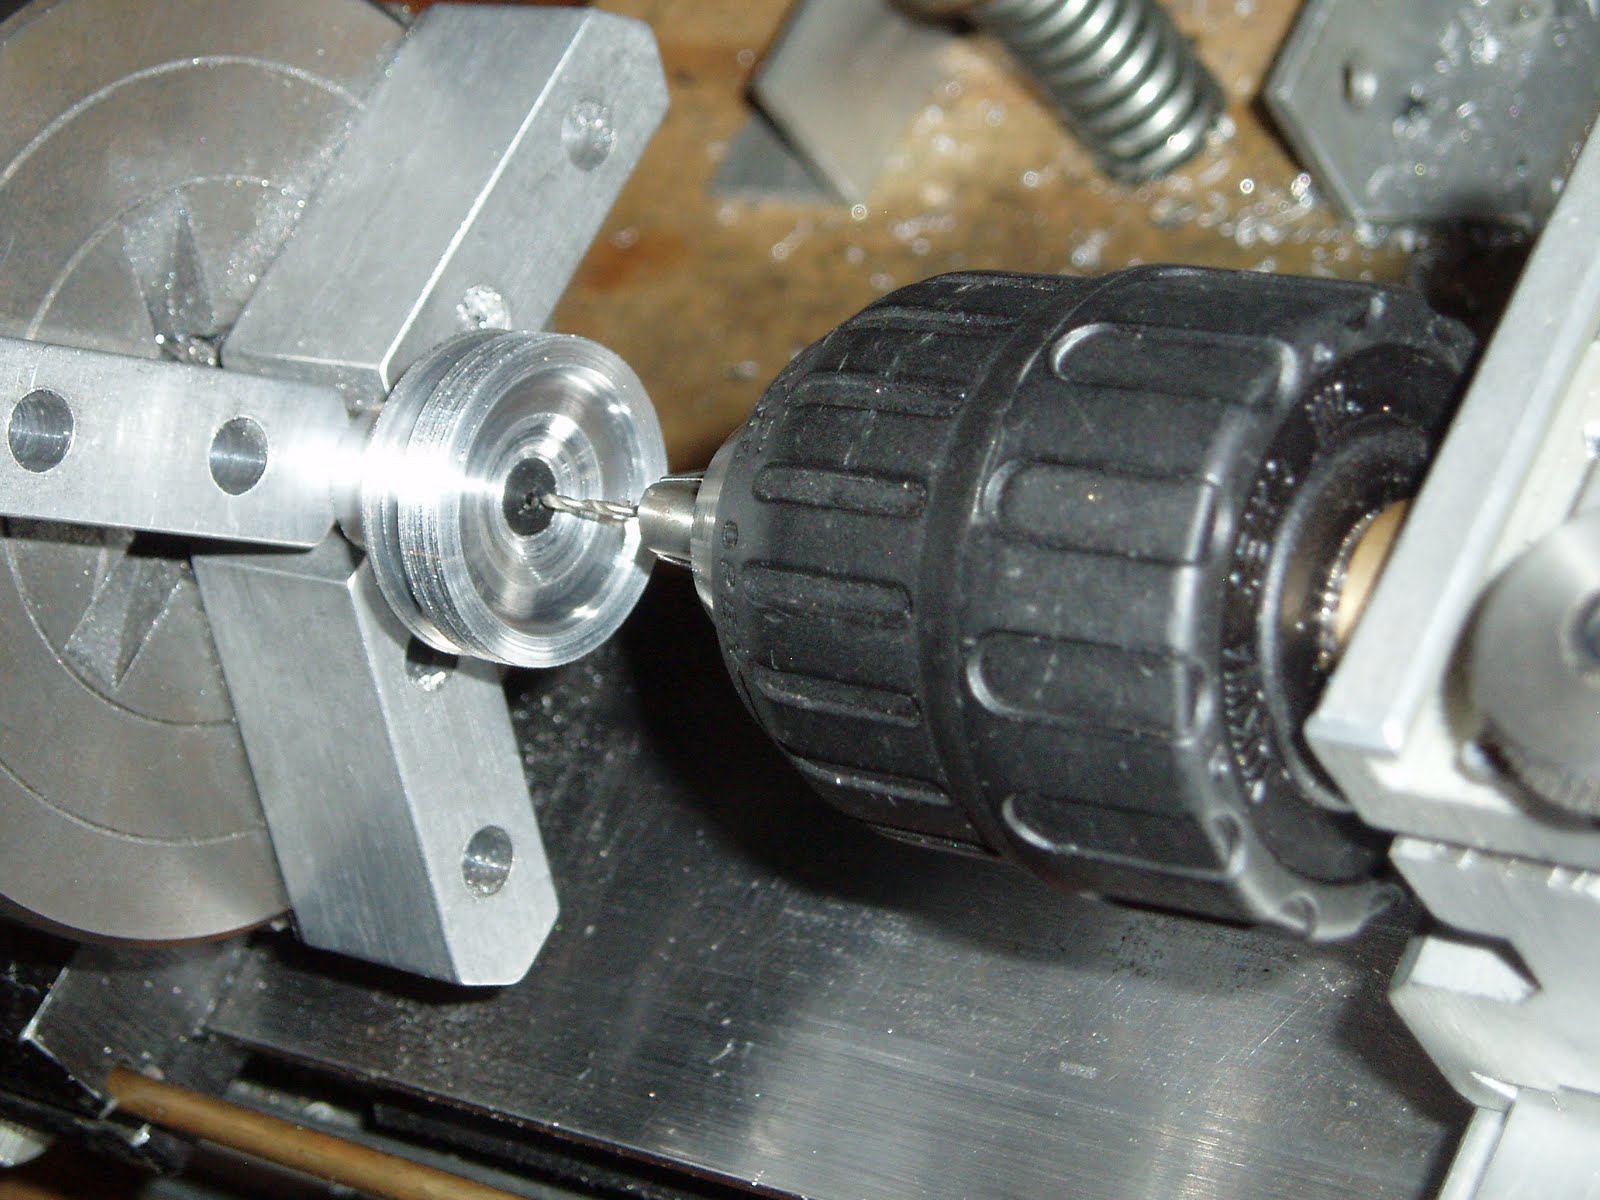
The 38 valve tool I made unscrews the valve.

Pretty simple. Not shown is the valve end seal – I left it in place.

Reassembled. Notice the position of the transfer bar. You have to sort of hold it in place while snapping the side back on, and use a tool to push it into alignment as you close it. requires 3 hands but becomes easier with time.

Notice the position of the transfer bar above the pin pressed into the hammer. Now I just need to figure out why the CO2 piercing pin seal is leaking...