Saturday, November 1, 2008

Getting a Crosman 140 Working, Part 6

So the 140 stopped pumping up...I could hear air rushing past the pump cup.

Punching out the pivot pin.
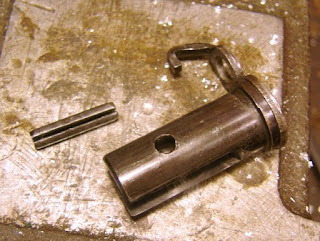
The pivot plug.

The pump cup (remember, it's a 101 pump head, and a replacement seal of unknown provenance). It didn't look bad but seemed floppy, not stiff.
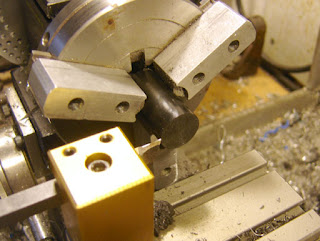
Some 95 durometer urethane rod being faced with my extreme knife tool. I ground a bunch of tools that have around 60 degrees rake, more or less.
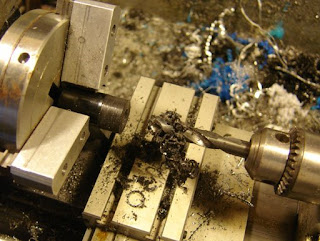
Drilling it out.

Boring the minor diameter.
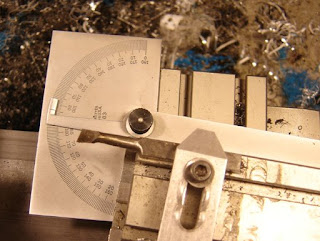
Setting the compound to about 5.5 degrees.
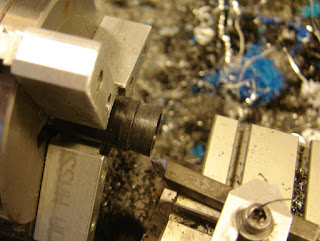
Turning the OD with a similar knife edge tool.
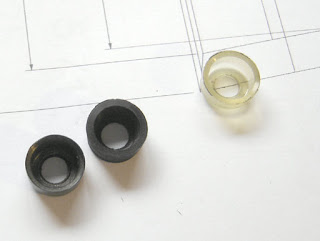
The new cup is the middle one. Left is the one that came with the 101.

I assembled it but it seemed overly tight. I also forgot the bevelled edge on the face. So I disassembled again and mounted it on a broken pump rod. I cut the bevel and turned the OD slightly smaller.
I put it all back together and pumped it up 10 times. Air was leaking past the bolt. Shot again and the bolt shot under the cover (no pic, I was having an adrenaline rush) which was a bit dramatic.

So I refurbished the bolt cover with a hole on the other end and less clearance for the locking lug, and used the old screw from my 150 (it has a head so won't allow the bolt to sneak under the cover). Anyway, I just "won" an original bolt cover on Ebay, so when it comes I'll make a new screw and it should be close to perfect (?).

I pumped it up 10 times and got 636 fps, which is great. I think if I tighten up the bolt seal and maybe clean up the flow through bolt a bit it will gain a little more. Unless something else goes wrong...I am happy I was able to make a pump cup, which is a skill that should come in handy for other projects.

Thursday, October 30, 2008

Derrick's P17 Pistol

Derrick had a problem with his P17 pistol...pics and text by our hard working Ohio correspondent.

I was going to shoot my identity confused Beeman 2006 and/or P17 and/or Marksman 2004 this afternoon. Sadly, the single-stroke part of the single-stroke pneumatic mechanism refused to cooperate and actually seal. From past experience, I knew that it was likely that the piston o-ring was either dry or had lost it's elasticity.
How many names has this gun been sold under by Beeman now? I pulled the piston and found that, surprise, it was the main o-ring. A replacement R-14 o-ring had the gun running again in about 5 minutes. What bothered me the most, was that I had replaced this ring less than 6 months ago. If the gun saw more regular use, the seal would probably last longer. This seems to be a common problem with this gun. Too bad, because it's otherwise a decent design for $50.

It didn't seem like a huge leap to imagine that in this application, the single o-ring seal is tenuous at best. Maybe adding a second piston o-ring as a sort of "back up" seal would fix the gun more permanently. I pulled the piston again and chucked it up into the Taig lathe in a 3-jaw chuck. Not good. The piece had miles of runout and was nowhere near straight enough to make an accurate cut. I switched to the 4-jaw chuck and got out a dial indicator. It took about 5 minutes of positioning each jaw individually while watching the indicator slowly settle down until I was satisfied. I only checked the runout at the location I wanted to make the groove.

Having to make the cut so far from the jaws, I was concerned about the piece deflecting. I removed the cross slide and installed a steady rest.

Checked the runout one last time.

Funny, it doesn't look blurry in real life. Matched the same 0.095" width groove. Didn't bother to measure the depth. I just used a comparison caliper and made it the same.

So here's the final. If this doesn't seal now, I think there's enough room for about 11 more o-rings...After cocking, the gun held for 45 minutes w/no pressure loss. Never did that before. I'll let you know next year how it's holding up. By the way, if you remove the "Beeman" sticker on the gun, underneath it says "Marksman". Unfortunately, they sanded the "Marksman" imprint down so the sticker would lay flat. So I glued the sticker back on. Too bad. I wanted to be a Marksman.

Monday, October 27, 2008

Getting a Crosman 140 Working, Part 5

The safety was bugging me. Rather than make a new perfect one I just compounded my reputation as a hack by doing a Frankenstein on it.

Drilling the lever.

drilled and reamed 1/4" undersize.

The hack, hacksawing.

What one should look like, next to my lever.

Turning a .251 boss.

Milling the slot.

I noticed there's a groove on the stock safety I had, so I added one. There's a small pip on the end of the safety plunger, so this must be for clearance.

I pressed the old lever onto the new safety, with some loctite bearing compound. It should stay put.

I peened the proud end a bit then sanded it flush. Now it is oriented correctly. Not that anyone actually uses the safety on these guns.

Sunday, October 26, 2008

Getting a Crosman 140 Working, Part 4

Now to make a new bolt.

Turning some stock down to 5/16"

Turning some steps on the bolt nose.

Blurry pic of making the o-ring groove.

Drilling the end.

I used a file to chamfer the end and the lip that holds the o-ring on.

Flipped with the waste parted off.

Looks pretty close.

Spotting the flow-through port in the bolt nose. Notice the orientation of the hexagonal collet holder.

Drilling to size.

The collet holder is rotated 30 degrees in the vise. Notice the old bolt being used to make sure I get the alignement correct between the bolt screw and port...

Drilling the bolt screw hole.

Tapping the hole.

Old bolt, new bolt.

Turning up a new transfer port seal out of urethane.

I ground a new toolbit for rubber, an extreme rake angle, more of a sharp knife edge. Worked well and gave a nice smooth cut.

Put the 140 back together and found that I gained about 15 fps, to 595 for 10 pumps. Still a little slow, which may be because of the pump cup having too much headspace.