Saturday, May 3, 2008

Sheridan Sight Adjustment Knobs

Sometimes you just get an idea in your head that you have to try, which is why I made these adjustment knobs for my Sheridan rear sight.

Turning some 1/2" steel down so I can put a #5-40 thread on it.

Using a Taig Die Holder to cut the thread. I keep a 1/2" length of steel rod with it so I can use it on any of my lathes.

Threaded.

I moved out the bar a bit and turned it all down to around 7/16". I then used my turret knurling tool to knurl it. These are handy and quick tools, the only drawback being you need a way to hold the 5/8" shank (and I have others with 3/4" and 1" shanks)

I parted off the elevation knob and put it in place of the tiny setscrew used on the sight. I then tinkered with the length a bit so the knob wouldn't block the sight.

I still had a length of knurled rod. I drilled it for a press fit on the head of a #6 socket head cap screw.

Two knobs parted off.

Put one on top of the head of the screw.

And pressed it on. This is an easy way to make knurled head screws. I didn't do it for the elevation knob for two reasons: one, I needed a thinner head than you can achieve with this method and two, I didn't have a #5-40 screw handy!

All done. I think I'm going to redo the windage knobs in a larger diameter as it takes a bit too much finger pressure to turn them for my taste (and comfort)

Gee, I really should get rid of that rust speckling on the sight, shouldn't I?

Friday, May 2, 2008

Friday Yard Sale Score!

The yard sale ad in the paper said "BB Gun Collection"...it was only a few miles away from our house but I got there a 45 minutes after it opened because we had to drop the kids off at preschool. So I definitely (probably) missed out on a few of the better deals. That said, I think overall I did well. In any case I have a few good projects to blog about in coming weeks.

(L)Crosman SSP250 with .177 barrel installed and a spare .22 barrel ($15-). The loading port is missing and it's a bit rough. As with the other CO2 gun, I have no idea if it holds gas but I suspect not.
I thought that (R) I was buying a Daisy 717, but on closer inspection it's a 722 ($10-)! Excellent! Missing the rear sight and bad seals but that's not a problem. I think I have all the parts for repair. The 722 is in .22 caliber and somewhat rare.
The box of scopes was 5 for $10-, there are two good ones and 3 crappy ones. And a Marksman slingshot for a buck that I will never let the kids know about.

(L)A Daisy 200, in the box ($10-), I generally hate Daisy airguns (except for the 7xx series) but it's collectable and looks nice. (R) a Crosman 1377, pretty much in new condition ($20-)

Still has the stickers on it, holds and shoots! "Honestly Now...Have You Read These Instructions?", I love that.

The 200 is a nice looking gun. I just hope the seals are good as I don't want to invest any time in it.

(Top) Crosman 66 Powermaster with rust freckling. Not an exciting buy but I didn't have one. ($10-) It seems to work fine.
(Bottom) Crosman 760 Pumpmaster, in black with worn plating/polish. The scope is broken too. (EDIT: The scope is fine, it was mounted backwards) This will be a good loaner gun for friends. ($10-)

You can see the rust...it never sleeps.

A Daisy 840, it works as well as the other Daisy 840 I have, which is to say the seals are shot ($3-). I'm thinking of hanging all the broken Daisies on the wall of my shop. I won't be working on it.

This makes me think I missed out on a Crosman CO2 Trapmaster Shotgun! 4+ boxes of unused Crosman shotshells ($10-), and the manual for the Trapmaster. I'm saddened to think that someone bought it out from under me, but psyched that I got this rather hard to find ammo. Now I just need to find a Trapmaster. I'd probably trade one or two of the boxes for something interesting.

In great shape!

Anyway, I figured I'd gloat a bit. I can only imagine what I missed. I'm hoping that one of my yard sale contacts, who looks for airguns for me, bought a few others. But no guarantees...there never are.

Felice bought a chicken shaped towel hook ($1-) and was an extremely good sport about my insane buys. She even feigned interest convincingly as I showed her each one.

Thursday, May 1, 2008

Ok, I Felt Guilty, Phantom Crowning Part 2

I felt guilty being so lazy about crowning the Phantom barrel. So I found the time today to zip into the shop. I took the barrel/breech off the rifle and got down to business.

First I turned up a brass plug .1765" dia with a larger OD section on the Taig and parted it off.

The linkage is not easily removed so I bound it up with rubber bands and stainless lock wire.

Bagged it and wrapped a bunch of duct tape around it.

I put a shim around the barrel to protect it from the 4 jaw chuck jaws and dialed in the brass plug that was a push fit in the barrel.

I faced off the old crown.

Then I used a 90 degree center drill to give it just a slight crown.

I lapped it with the 1200 grit lapping compound and another brass screw.

I think it looks much better. Now I have to put the darn thing back together, good thing I bought more blue loctite the other day.

Replacing the Broken Crosman Phantom Front Sight

As I mentioned in my earlier post on the old Diana Modell 5 I bought at the pawn shop, the deal included a Crosman Phantom with a broken front sight. I finally ordered in a new front sight from Crosman. They do not have a manual or exploded drawing of the Phantom up, which is odd, and when I asked on the phone they said they did not have any replacement sights, but they did for the Quest.
The Quest is essentially the same rifle with a wood stock. So I ordered the Quest front sight. The sight doesn't look like the one in the Quest exploded drawing or pictures, so I'm unsure what exactly I ended up getting, but it looks like the broken Phantom sight. Perhaps Crosman customer service was able to find one. The cost was $2.20 (plus $4.00 shipping, but I ordered a fair amount of other stuff, including two 24" barrels for my projects at the same time) and the part# is C1K77-001
Derrick sent me a used Weirauch sight set but it seemed akin putting lipstick on a pig to use it on the Phantom, especially as I'll probably end up selling or trading it.
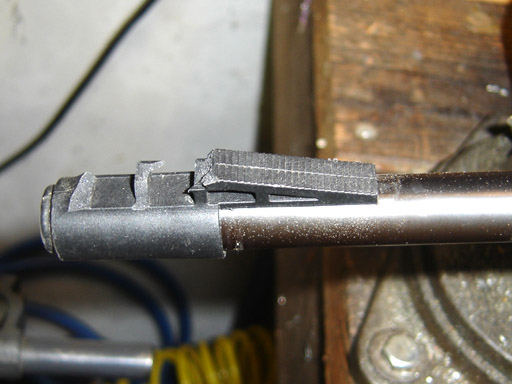
The broken sight.

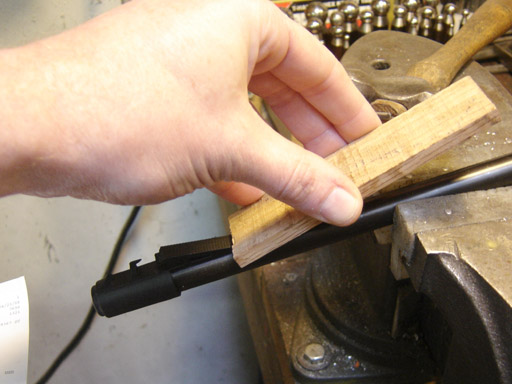
Tapping it off with a piece of wood and a hammer. It came off with blows of moderate force.

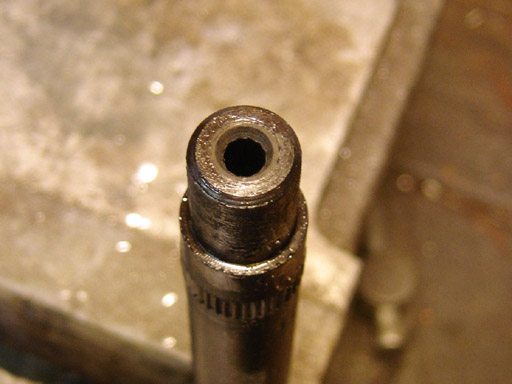
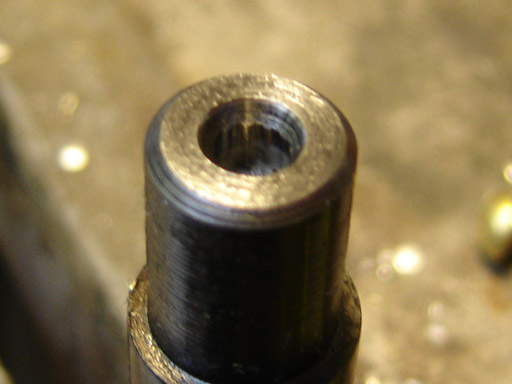
The barrel end. The straight knurl bites into the plastic, I didn't see any glue or epoxy.

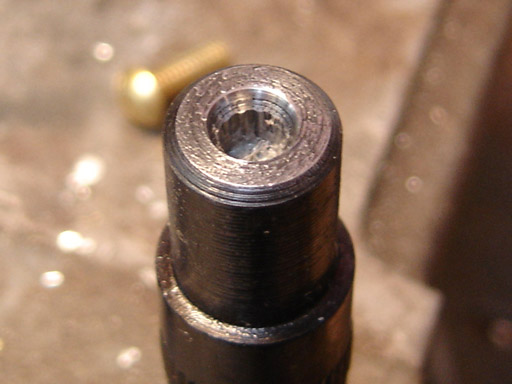
The crown seemed rough so I innocently thought I'd just give it a quick lap.

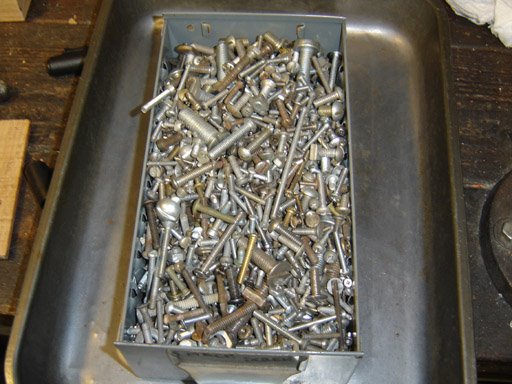
I pulled out my drawer of miscellaneous machine screws. I always keep a baking pan by my screws so I can dump out a drawer and search for what I need. I selected a small brass machine screw to use as a lap. No pictures because my camera decided to get drunk and all the pictures of the drill with the screw in it were blurry.

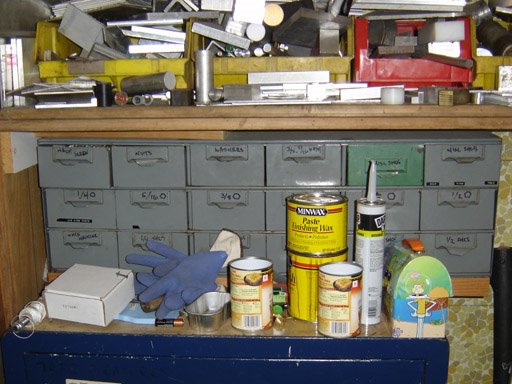
Might as well show this drawer unit full of screws, nuts, washers and bolts.

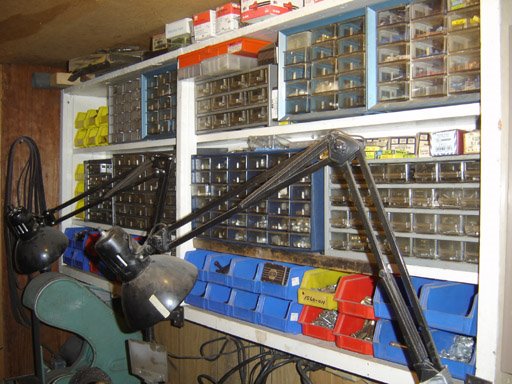
Oh and all my other tiny drawers of fasteners...there are even more in other places.

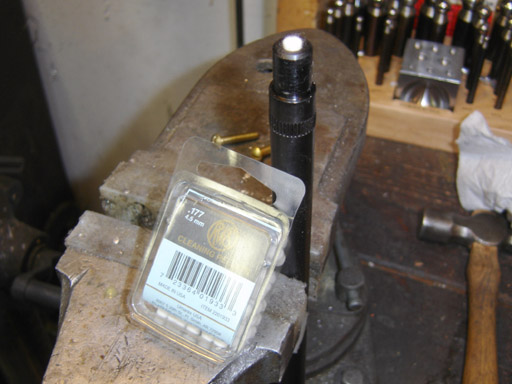
Anyway, I then pushed a cleaning pellet into the barrel past the crown.

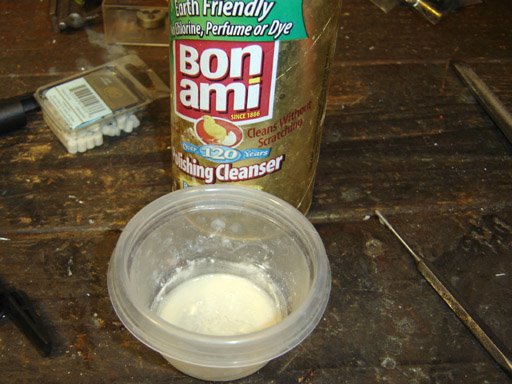
I thought I could use some Bon Ami mixed in oil...

But that didn't even barely remove any material, so I went with 1200 grit lapping compound.

As you can see the crown was really rough, even with the 1200 grit it only hit the high spots. At this point I decided to cut my losses...so I chucked up a fine cratex pointed abrasive and went to work.

Which still didn't achieve much. So I had to decide between stripping the gun, removing the barrel, chucking it in the lathe, making a crowning cutter, recrowning, lapping again, and reassembling...or...just calling it good enough on a gun I don't care much for. So I called it good after relapping with the 1200 grit. I only needed to get it lapped right at the rifling transition to the bore, which I seem to have achieved.

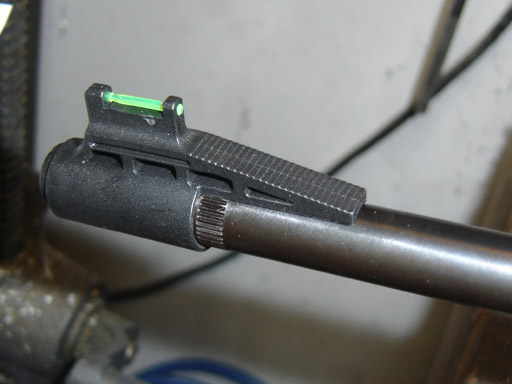
I then tapped the new sight on just up to the knurling.

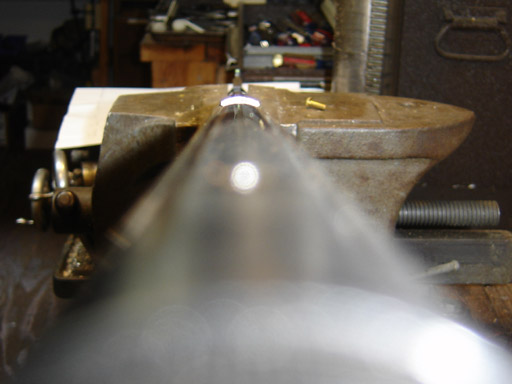
I looked down the barrel and made sure it was on straight. Then I hammered it home with a block of wood against the face. Notice the circular reflection of the light, I couldn't photograph it but I saw a similar reflection of the front sight's green dot, which aided in getting it all lined up.
I remounted the rear sight and shot a few pellets, seems to work fine.

This highlights my need to make a shooting bench so I can properly benchrest and sight in these projects...

Tuesday, April 29, 2008

The Predom Lucznik Piston, Defeat and Victory.

The Predom Lucznik seemed to be shooting slow, around 280 fps. So I thought I would take the piston out and check the seal/washer. I followed the directions in this forum post for disassembly. It's a pain at first but once you do it a few times it's easy.

The washer was folded over the end of the piston (a clue for the observant).

A bit fuzzy on the end.

As you can see the washers are chewed up a bit.

I used a telescoping gage to determine the ID, I can't be sure the scrap of paper in front of me relates to this, but I think I wrote it down as .744" Don't quote me on that...

First I made a delrin seal and it wouldn't push the pellet out of the barrel, likely I made it a bit too small. So I turned some teflon...

Making the counterbore for the screw.

Making a parachute lip. I have a lot to learn about this topic...

The teflon seal.

I installed it in the pistol and got speeds of about 160 fps. Adding a washer between the spring and guide for preload, I bumped it up into the 180 fps range. Not good. Notice that my lovely parachute seal failed to deploy, instead rolling inwards...the streaks on the side are either gasses or oil leaking past the seal...all in all, total failure.

So I pulled off the teflon seal. I then realized that the face of the piston should be a full circle, and that the thin flange was broken off at the sear.

So I made a washer for the face, .050" thick. I reinstalled the old, ugly and deformed (why didn't I notice that before?) leather seal. With the other washer in place under the spring to bump the spring preload up a bit, it now chronied at 348 (CPL's 7.9 grain), which is right about what the pistol is supposed to do. I will be making a new leather seal at some point in the future but for now the gun shoots fine.
Anyway, this all tells me I have a lot to learn about spring piston airguns...