Friday, May 7, 2010

Old Style Benjamin Stems from New Sheridans

Precision Airgun owner, Chuck Trepes, asked me to modify some new style Benjamin/Sheridan valve stems to work with vintage Benjamin pump guns. Seems the new Sheridans and Benjamins use a fairly normal coil spring inside the check valve, while the older Benjamins used a conical shaped volute spring. The new stems have a post that the spring fits over, but it's too large in diameter for the old conical spring.

What is the #99-079 number on the envelope? I'm going to guess that these are actually Crosman part #397-038. The one on the left has the smaller diameter post that Chuck needs.

As long as I roughly match the diameter, the spring will stay in location.


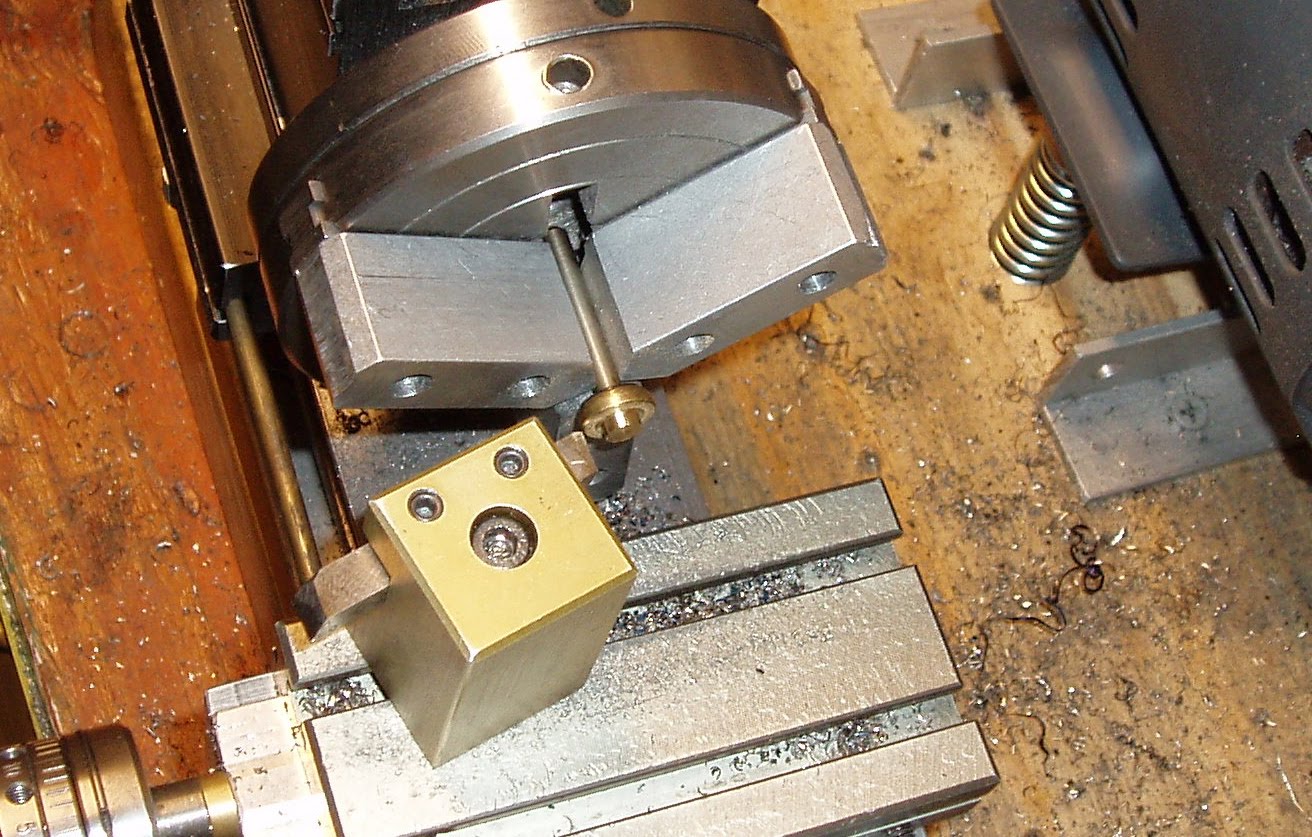
Really a perfect job for a small lathe like this. The model Chuck provided didn't have any semblance of a truly round post. It varied by several hundredths in diameter. I settled on turning these down to the average diameter.

As long as the volute spring fits over the end, it's a go. This was such a non-precision job, I just used a comparison caliper rather than measure each piece. I was still within about two or three thousandths of an inch over the batch.

I can't find my notes as I write this. Believe I took the diameter to 0.248". I'll find it and edit if necessary. The important part is the spring fit, not the actual number.

In about 20 minutes, I had six done.

Monday, May 3, 2010

Gecado Diana Model 5 Pistol, Fixing The Piston Head

Now to deal with that messed up piston head.

I chucked it in the 3 jaw. You can see the folded over burrs that are keeping the loose head in.

I turned away a couple of thou' at a time. I wanted to remove the minimum.

Then when I had a nice clean ring on the face I started working on the inside rim.

At this point I was able to pop the head out. Those burrs were thick.

The head...

The back side. As you can see it's a rivet of some sort that retained the original seal.

Dialing in the piston in the 4 jaw chuck.

Boring the recess true and clean.

Ready for a head.

The insert roughed out.

Using a form cutter to make the dovetail button. Notice the chatter marks.

Final cutting, chatter removed at very low speed.

You can see the tool I ground. The Diana pistons seem to have a 70 degree dovetail as best I can measure.

Cutting the insert off.

The insert.

Fits!

I soldered it in with soft solder. The new acetylene tank did not catch on fire like the old one did last time. A nice even ring of solder holding the insert in. I cleaned the face up with a very fine pass across the face.

You can see the solder flowed inside.

Using my extremely handy Diana seal tool.

Popping the seal on. Notice I cleaned up the OD near the head as it was a bit scored.

The seal in place. Looks good.

Another shot. I bought the seal from Air Rifle Headquarters. He gets a lot of my money these days.

Now to derust, deburr, clean, reblue the pistol, make breech seal (o-ring) shims, lube and reassemble...then test. Then if it works... fix the cap that screws on the end...all the ones I have are beat up and I should make a threaded arbor so I can reknurl/cut new knurls after truing. fix the stock... fix the windage screw... I'll never run out of projects.