Went back to work on the 1377 a few days ago. Like to bump it up to a .22 caliber. Why? Ahhh, you know, for the good of all mankind and whatnot. Since there are several other posts involving disassembly of the 1377, I'll assume we're all familiar and just jump in. I should note that one can probably just call Crosman and order a 1322 barrel and (maybe) a new bolt. That doesn't hold nearly enough thrill for things to go wrong for me. Besides, I have several feet of Crosman barrel on hand, so I'll just use what's here and machine it to fit and take my chances.
I bought three or four spare barrels a long time ago to have some cheap barrel stock on hand. Sorta like...well, for projects like this. Anyway, I disassembled the 1377, removed the .177 barrel and found just over a foot of Crosman .22 barrel remnant on the shelf. I'll refer back to the original 1377 barrel for a few measurements and locations.
It's best to start at the breech end. Squared up.
Mounted the tailstock drill to the Taig lathe. Need to cut the leade--the slight taper to aid loading the pellet into the barrel with the loading bolt.
I've done this a few different ways in the past. Years back--probably at a flea market--I found a set of #0-10 taper pin reamers. Must have been coming fresh off a Crosman barrel swap, because as soon as I saw them, I knew they'd make this job easy.
#4 looks good for the .22 barrel.
Lots of cutting oil. Kissed the end of the bore and removed just the rifling lands.
Only need to go about 1/4" deep. Not shown here, but went back and added a small 60^ chamfer about 0.030" deep. That made the pellet transition from the loading trough into the barrel a bit smoother as it eliminated what otherwise would've been a small step.
I've read that the bolt that comes with the steel breech should work with both .177 and .22 pellets by changing the o-ring. Then again, I've read a lot of things on the internet and this hasn't worked out for me every single time. Anyway, there can be several approaches to getting the loading bolt to function correctly.
What does "correctly" mean? For me, it means the pellet gets loaded into the barrel, the bolt closes and doesn't leak air from the breech. Essentially, I try to close the bolt on a pellet and adjust things until it closes snugly. Depending on the particular combination of bolt probe size, o-ring, leade, chamfer, one or more components may need to be tweaked. And yes, I've had to reface a barrel or two and start over. That's why I start from the breech end and work forward. It's possible to create this air seal several ways--especially if you can machine one or both items. With a 60 degree bevel on the barrel and a mating angle on the bolt, it's not difficult to get a metal-to-metal seal with careful fitting of the bolt length. This works well, but will likely only seal with that particular barrel, bolt and breech combination. Relying on the factory design using a bolt o-ring allows for more combinations of parts to work interchangeably. There's not a single approach that's best.
Let me back up a second and mention that before doing ANY barrel work, I now shove the pellet of choice into the rifling and push the pellet through the bore with a brass rod before turning on the machines. Ensure that the bore isn't oversize beforehand. Otherwise, it's really fun to watch pellets free fall through the entire bore and hit the floor after spending an hour or two of lathe and mill time.
OK. Back to whatever I was doing. I always do the test fits with Crosman Premier HPs--my go-to plinking pellet. In this case, I changed the o-ring on the bolt to a #005 and all went well. About the simplest outcome.
Bolt works. Now for the transfer port. Checked the original 1377 barrel transfer port with various drill bits to figure out the size. A #29 fits exactly into the hole. Next was the hole location.
Installed the .22 barrel into the Crosman steel breech and used hole in the breech to spot the location.
Here, I've marked the location from the breech end with a scribe. Though I believe that Crosman specs this hole location .250" from the end of the barrel, I prefer to use the breech itself for finding the location.
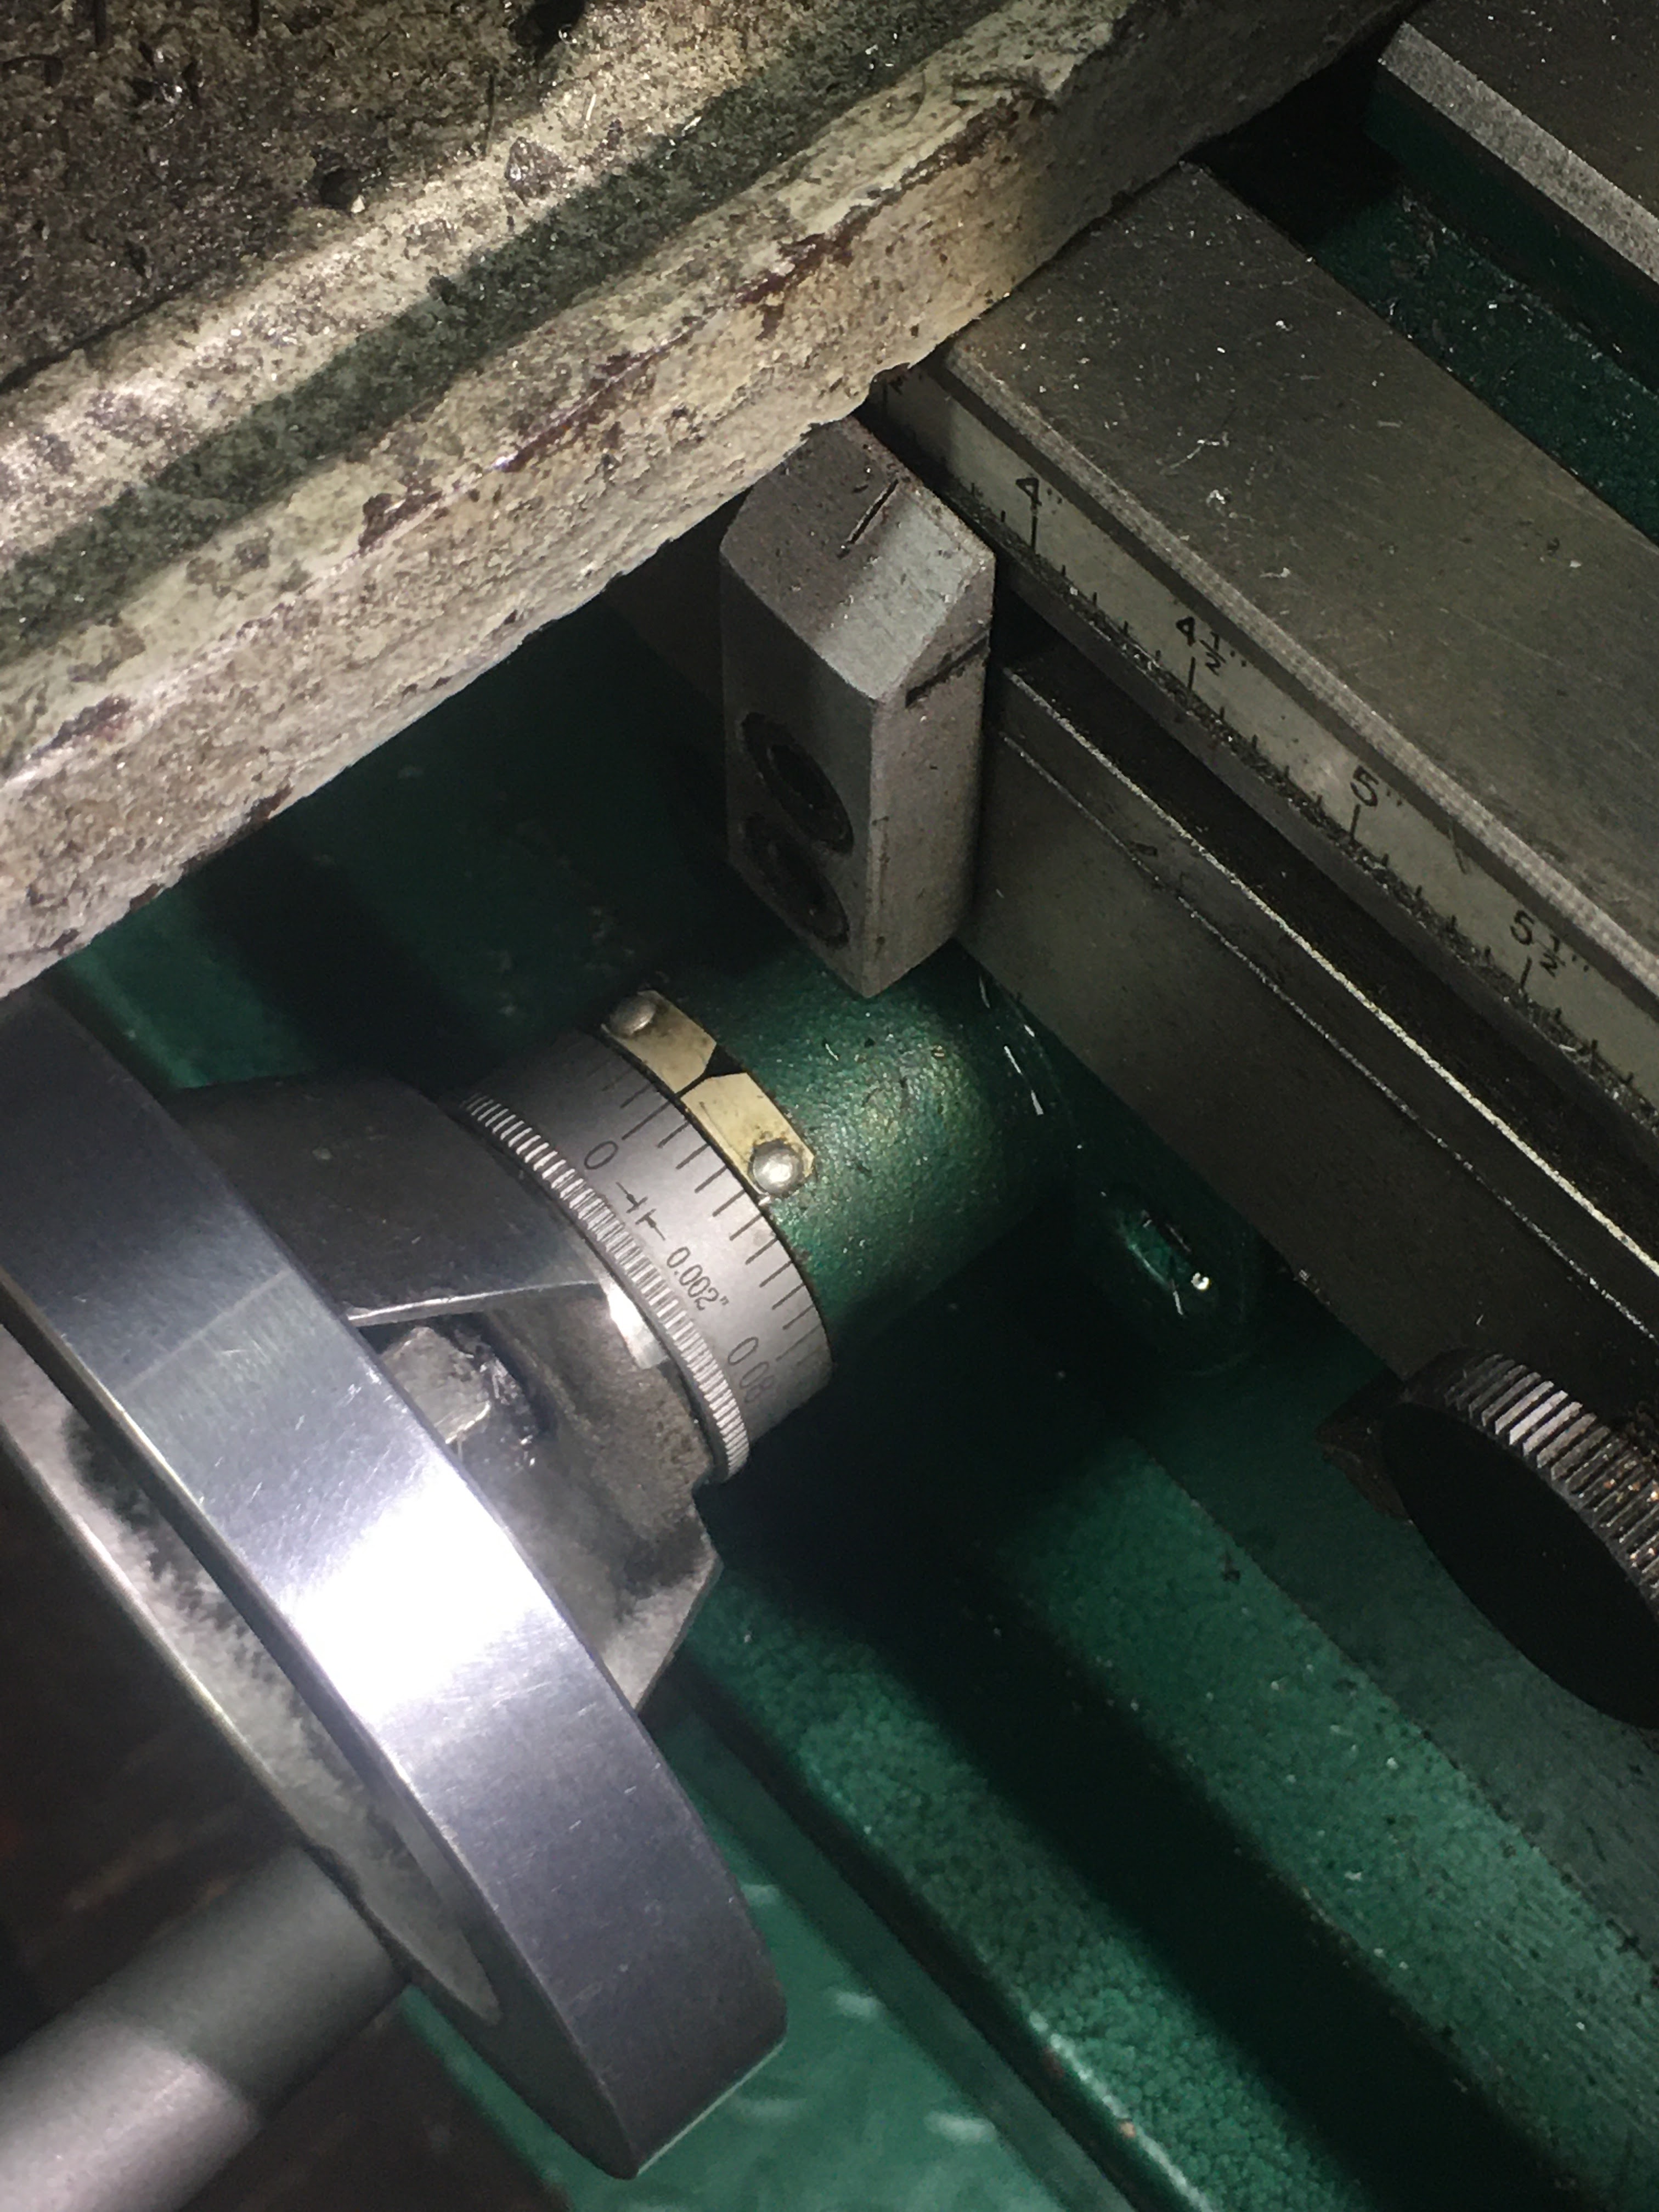
That's the length, but it doesn't center the hole. To center and drill the hole, the barrel went into the milling vise and an edge finder was mounted in the drill chuck. This was pretty simple. With a traditional edge finder, you make contact with the edge of the workpiece, move the table half the tip diameter, then half the workpiece diameter.
The tool kicks out of alignment when it makes contact. (see above image) This edge finder has a .200" diameter tip. The EDGE of the barrel is half the diameter of the edge finder tip away-- .100" in this case.
Zeroed the Y-axis, then cranked the table .100". That puts the tool center on the edge of the barrel, the table is then dialed in HALF of the barrel diameter. (Half of .4375" in this case--right, I needed to measure the OD of the barrel)
Spotted then drilled with the #29 bit.
Don't want to use Crosman's tiny steel transfer port tube and rubber o-ring. This seems easier. Spotted with a 1/4" drill bit.
Then a .250" center cutting end mill was used to carefully produce a flat bottomed counter bore.
Not much wall thickness left. Deburred the sharp edges.
Test fitting to the steel breech for a quick check. The transfer port locations match up.
Breech end done,
Measured the length of the original 14377 barrel and hacked the new one just a bit long.
Squared up the muzzle, then reduced the end diameter for the front sight plug.
Didn't exactly match the diameter to the original factory barrel.
Instead, used the front sight plug itself as I got close (to the original barrel diameter) and went for a snug press fit. Ended up being about .004" larger in diameter than the factory fit. After this shoulder length was correct, as the last step, I crowned the muzzle.
Some quick bluing.
The new transfer port. 1/4" OD poly tubing. Hardware store--buy it by the foot. It's in the plumbing aisle. Usually called "ice maker" tubing.
With a fresh blade in the razor knife, I cut some sections of tubing, test fit, eyeball things, ponder my existence, then trim a bit more. With the barrel assembled into the steel breech, install the poly tube transfer port and place it on the gas tube. Does it pivot on the transfer port and rock front to back? The poly tube is too long. A very slight amount of squish downward is about right. Finished the assembly and gave it a go.
This is the single best tip for assembling/disassembling Crosman 13XX/22XX guns. Using a cheap wood clamp, apply slight pressure from breech to trigger guard.
Doesn't take much, but it takes the pressure off that little #4-48 breech screw with the 0.050" hex head that is so easy to damage. Remember, the trigger guard is die cast. DO not crush the trigger guard. So, not more than a firm handshake of squeeze. Do this for installation and de-installation of this tiny screw.
All back together without any drama. The larger pellets are so much easier for these carpal tunneled fingers to fumble into the loading port.
Thanks for checking in.