Friday, September 30, 2011

Frank B's FWB 124 Tear Down and Rebuild Part 2 Final


Finishing up Frank B's FWB 124. 


Set the end cap/trigger housing onto a bench block and drove out the trigger pivot pin with a punch.


Removed the sear, trigger and trigger pivot pin.


Pressed out the rear pin, too.  I don't have a good name for this part.  It's after midnight...  Uh, secondary sear?


The Maccari parts kit that Frank included.


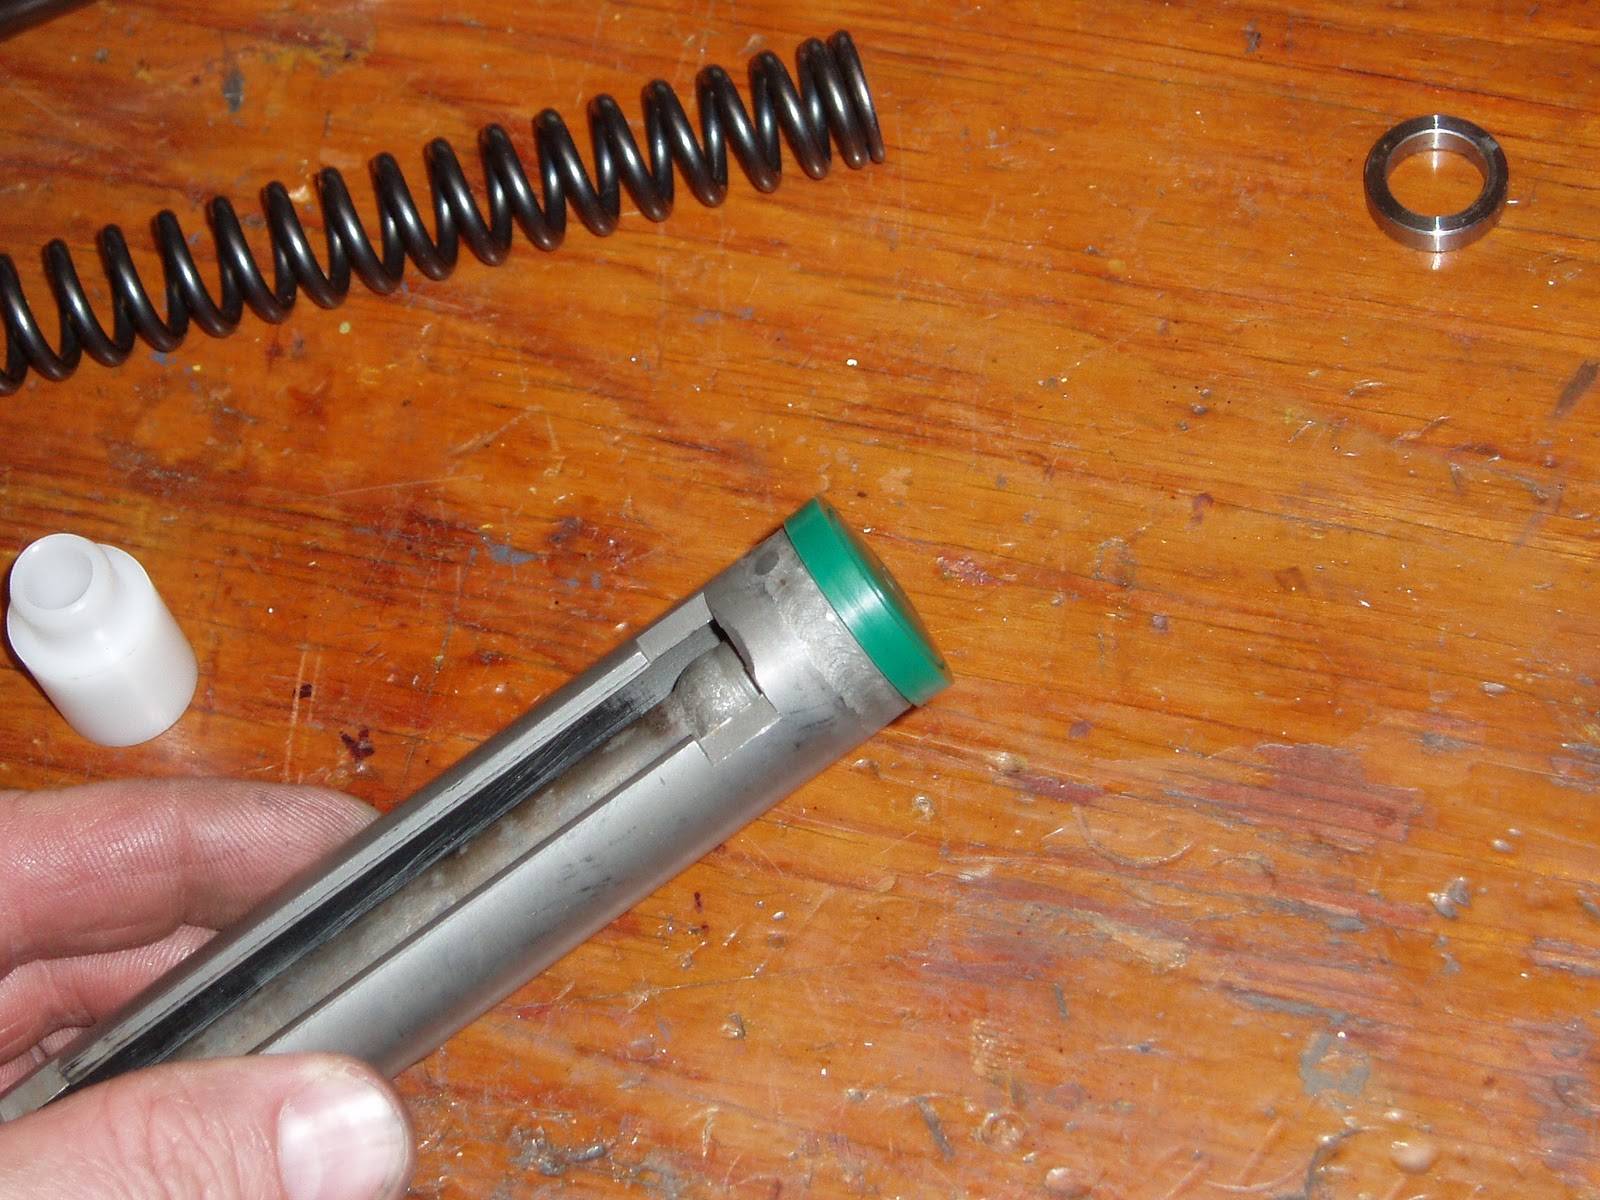
Started with the new seal.


Pressed right on. 


Did a quick test fit into the compression tube and it was pretty tight. 


For some, this is a somewhat controversial step, but the tube was so smooth inside, all the moly I rubbed into the walls of the compression tube was squeegeed forward by the piston seal.  That's not good.  I made a light pass with a flex-hone.  The hone imparts a very fine crosshatch that will trap and hold lube for the seal.


The seal was still pretty snug, so I chucked it in the lathe and took a small file to the sides and removed a few thousandths.  Then another test fit and another round of sizing until it was done.


The white bushing goes inside the piston over the cocking rod.


Like so.


Original FWB spring on top.  Maccari below.  Adding the length of the included spacers/bushings in the kit to the spring, the overall length is comparable to the factory part.


Most of the reassembly is a simple reverse of part 1.  The breech block got a coat of a moly based grease.  Pivot bolt was reinstalled.  Trigger unit was reassembled after polishing all the contact points.


Burnished moly grease into the freshly honed compression tube.  Installed the piston and cocking shoe, then the mainspring was lightly coated in Maccari heavy tar.


Whoops, forgot to show the steel bushing from the Maccari kit.  It went on the spring guide.  So, essentially, the spring is sandwiched between the plastic bushing at the front in the piston and the steel bushing at the rear on the base of the spring guide.


Carefully compressed the spring.  Be mindful of the safety.  Helps to hold it in place with a finger while tightening the compressor clamp.


Absolutely critical that the threaded hole be aligned before attempting to install the threaded lug.  Cross-threading this could be an ugly repair.


Done.  Just needs to be bolted into the stock.


Replaced the breech seal with an o-ring.  Nothing complicated, just went through the bins until a likely candidate appeared.  Frank will find a spare half dozen in the box.

After final assembly, I fired about 100 shots to get the gun settled in then set up the chronograph.  The velocity average for 20 shots was 887 fps using RWS Hobby wadcutters.   I think that's on the warm side for a 124.  That's about 30 fps faster than mine.  The gun has no vibration or twang.  Just a very quick punch.

Ahhh, almost forgot the important part--how I adjusted the trigger.  Here's the procedure: Turn the trigger adjustment screw in all the way.  That will give a 2-stage but heavy pull with a very definite second stage.  Back out the screw about a half turn at a time until you feel the second-stage get lighter--eventually, it'll disappear.  Turn the screw back in--in quarter turns if necessary--until you can just feel the second stage pause.  That's about as light as it'll get and still give the 2-stage feedback. 

Shipped the gun back to buddy Frank.  He'll get it later today.

Wednesday, September 28, 2011

Some Notes On Reassembling the Crosman 500

So the handle on the BB magazine follower broke off when I was futzing with the gun.
09271101
So I drilled and reamed.
09271102
And pressed a 1/16” dowel pin in with a drop of superglue.
09271103
It works. I might shrink some small diameter heat shrink on it, not sure.
09271106
I made a seal for the valve, cleaned and reassembled the valve.
09271104
The biggest problem was that the barrel shroud wasn’t lining up correctly with this boss that’s part of the frame casting.
09271105
And the boss is somewhat mushed from having the shroud forced against it by the previous owner.
09271107
With the barrel and BB magazine inserted into the valve I found that the barrel wasn’t going in to the same depth as the magazine.
09271108
As you can see here. The muzzle cap has two holes of the same depth so I assume they should be the same.
09271109
The culprit seems to be that the barrel end is flared. I don’t know if that was done by the factory or by the owner. I suspect the barrel isn’t original. In any case it has to go.
09271110
So I inserted a transfer punch that was a slip fit and hammered out the dent.
09271111
And trued up the end, so that now the barrel and magazine are the same length.
09271112
And the shroud magically fits over the boss in the casting (I cleaned it up with files as well.)
09271113
The hammer spring (?) position was completely wrong when I disassembled the gun. This tells me that at least one person definitely was in here monkeying. It also shows why you need to take lots of digital pictures when you disassemble airguns. Through trial and error I found this is probably the correct position.
09271114
I’m not sure why the spring has that bent leg.
09271115
One more view for the sake of all who delve into these things.
09271116
The forestock was missing the square nut and screw. I used a #10-32 which isn’t original but I don’t really care. It works.
09271117
After reassembly I found the trigger was sticking – you can see scuff marks where it was binding against the slot in the receiver. So I massaged it to where it doesn’t bind and lubed a bit more.


The rifle works! It is actually fun to shoot and not as inaccurate as some BB guns. Semi auto can plinking is a treat.

Monday, September 26, 2011

Frank B's FWB 124 Tear Down and Rebuild Part 1

Amazing.  After over five hundred posts on airgun butchery, we've never torn down a Feinwerkbau 124.  Nick and I both own 124's, yet still nothing on one of the most iconic spring guns ever made.

Luckily for us, airgun purveyor, rock legend, and hall of fame co-chair, Frank B, happened to have a 124 that needed some attention--and he thought it was high time to set this blog to straight.  We also figured I needed the practice and a couple more blog posts.

Frank separated the barrel/breech block assembly from the gun for ease of shipping in a shorter box.  Many folks would be hard pressed to reassemble a spring gun if they had to re-seat the cocking lever and install the barrel pivot bolt while fighting the detent spring.   So maybe keep that in mind if you're packaging something up for sale.


You know I was stuck right here until I popped the entire sheet.


The stock is one used just for shipping--we were mainly concerned with protecting the trigger.  I'm contractually obligated to disclose that Frank had absolutely nothing to do with refinishing this poor piece of wood.


Removed the stock screws and set the lumber aside.


Reinstalled the barrel assembly to the compression tube.  This is where the tear down really begins.


This is one of the few guns that I gotta use a spring compressor to disassemble.  The chunk of wood bearing against the end cap is relieved to clear the safety lever. 


An 11mm wrench fits the lug.  A slight amount of pressure on the end cap takes tension off the lug.  It should unscrew pretty easily.


As the end cap is backed out, the safety falls out along with the trigger return spring.


The return spring is directly above the trigger blade.   It pulls right out.


Roughly 4.5" of factory spring preload.


Weird.  Hey, uh, where's the grease? 


Like it's right out of the parts washer.  Where does he find this stuff?


The trigger is unitized into the end cap with the spring guide.  Also squeaky clean.


Removed the lock screw from the pivot bolt.  It works by expanding the end of the pivot bolt in the threaded hole.


The pivot bolt was unscrewed.  Note the expansion slot.  One on the opposite side of the bolt, too.


A single pivot washer on the right side of the breech block.  Note the counter bore machined into the breech for the washer.   Anyway, with the pivot bolt removed, the barrel assembly is pulled free--the end of the cocking lever also comes right out of the cocking shoe.


The piston still won't come out quite yet.


The rear of the cocking slot is enlarged to permit removal of the cocking shoe.


Remove it....


and the piston will come out.


Still no grease.  Maybe someone soaked the gun in a vat of kerosene before sending it out.


There's a tiny nick in the seal--no doubt it was cut on the cocking slot. 


No grease inside the piston body, either.  Why would someone tear the gun completely down, replace the seals and then reassemble without even using axle grease?


Not sure what's going on with that breech seal either. 


I don't think this is any good.   Fortunately, Frank thought ahead and included several Maccari parts for reassembly.  I think he sent the "Pro-Mac kit".

Give me a couple more days and I'll finish this up in part 2.