Finishing up Frank B's FWB 124.

Set the end cap/trigger housing onto a bench block and drove out the trigger pivot pin with a punch.

Removed the sear, trigger and trigger pivot pin.

Pressed out the rear pin, too. I don't have a good name for this part. It's after midnight... Uh, secondary sear?

The Maccari parts kit that Frank included.
Started with the new seal.

Pressed right on.

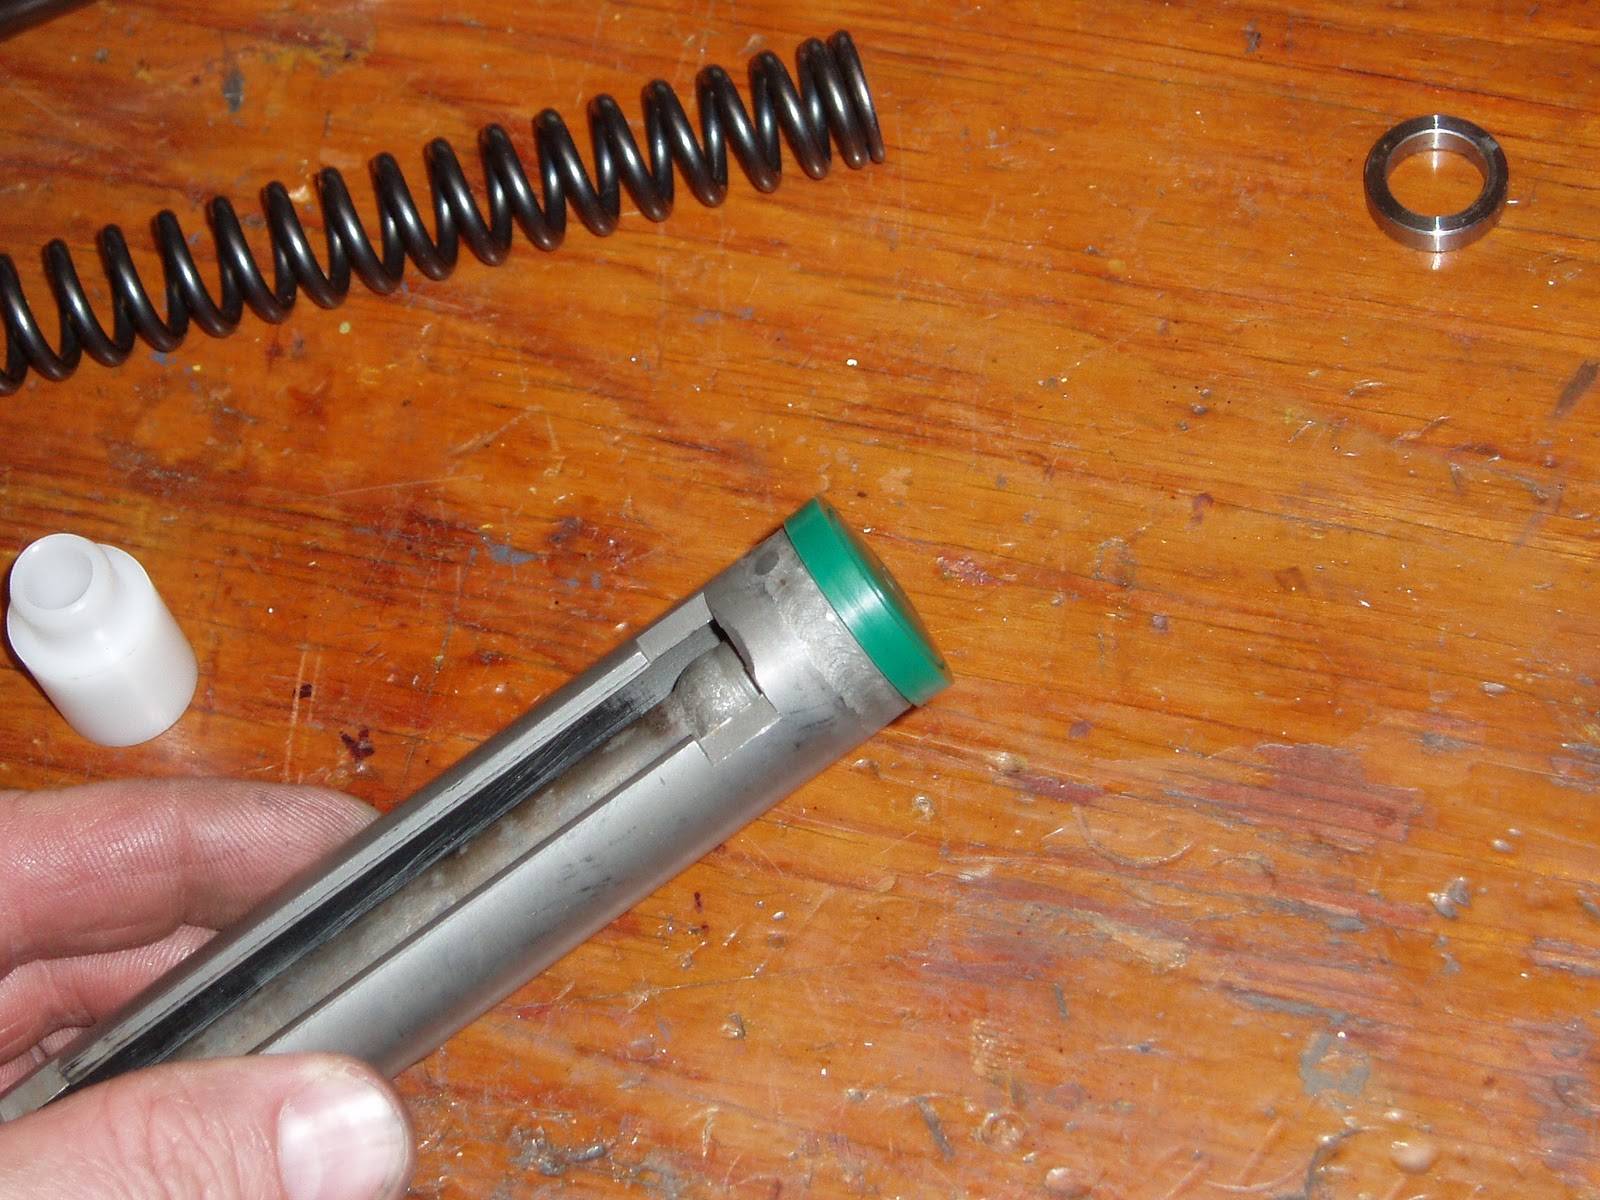
Did a quick test fit into the compression tube and it was pretty tight.

For some, this is a somewhat controversial step, but the tube was so smooth inside, all the moly I rubbed into the walls of the compression tube was squeegeed forward by the piston seal. That's not good. I made a light pass with a flex-hone. The hone imparts a very fine crosshatch that will trap and hold lube for the seal.

The seal was still pretty snug, so I chucked it in the lathe and took a small file to the sides and removed a few thousandths. Then another test fit and another round of sizing until it was done.


The white bushing goes inside the piston over the cocking rod.

Like so.

Original FWB spring on top. Maccari below. Adding the length of the included spacers/bushings in the kit to the spring, the overall length is comparable to the factory part.

Most of the reassembly is a simple reverse of part 1. The breech block got a coat of a moly based grease. Pivot bolt was reinstalled. Trigger unit was reassembled after polishing all the contact points.

Burnished moly grease into the freshly honed compression tube. Installed the piston and cocking shoe, then the mainspring was lightly coated in Maccari heavy tar.

Whoops, forgot to show the steel bushing from the Maccari kit. It went on the spring guide. So, essentially, the spring is sandwiched between the plastic bushing at the front in the piston and the steel bushing at the rear on the base of the spring guide.

Carefully compressed the spring. Be mindful of the safety. Helps to hold it in place with a finger while tightening the compressor clamp.

Absolutely critical that the threaded hole be aligned before attempting to install the threaded lug. Cross-threading this could be an ugly repair.

Done. Just needs to be bolted into the stock.

Replaced the breech seal with an o-ring. Nothing complicated, just went through the bins until a likely candidate appeared. Frank will find a spare half dozen in the box.
After final assembly, I fired about 100 shots to get the gun settled in then set up the chronograph. The velocity average for 20 shots was 887 fps using RWS Hobby wadcutters. I think that's on the warm side for a 124. That's about 30 fps faster than mine. The gun has no vibration or twang. Just a very quick punch.
Ahhh, almost forgot the important part--how I adjusted the trigger. Here's the procedure: Turn the trigger adjustment screw in all the way. That will give a 2-stage but heavy pull with a very definite second stage. Back out the screw about a half turn at a time until you feel the second-stage get lighter--eventually, it'll disappear. Turn the screw back in--in quarter turns if necessary--until you can just feel the second stage pause. That's about as light as it'll get and still give the 2-stage feedback.
Shipped the gun back to buddy Frank. He'll get it later today.

7 comments:
Yes that is fast for a 124. Nice job, Volvo
Derrick,
You make it look easy! I've been scratching, bending and replacing parts on a 2240 for weeks now. I am learning to be patient and not force things, though1
ka
what happens if you dont use a spring compressor when working on opening the rifle?
So far, the 124 is the only gun I've ever repaired that I consider a compressor absolutely mandatory. I'd be most concerned with the end cap (including the trigger assembly) firing across the room breaking the trigger off in the process. Also may damage the last thread(s) in the cap making reassembly difficult. It's also virtually impossible to reassemble the gun and manage to install the end cap, spring and safety, while compressing the spring then align for the securement bolt. Not enough enough hands, dexterity and strength. There's also some probability of damaging a replacement mainspring on reassembly. It'd be hard to compress that much free length of spring w/o it bending sideways.
Very nice post and thank you for taking the time to publish. I bought my 124 directly from Beeman back in 1984 for the astronomical sum of $360. I have fired thousands of rounds and killed hundreds of small animals since then. My gun gave up the ghost a few years ago and I recently bought the kit FWB 124-127 Pro Mac Kit- NEW from a local smith and installed it today. It fired properly , after a somewhat difficult cocking, once, and since then I have not been able to cock it. It seems like the available travel to allow the sear to engage, may be compromised, I am thinking, by the SS spacer at the trigger block end. I intend to disassemble and remove that spacer tomorrow to see if that may be a factor.
If anyone has any thoughts on this, I sure would appreciate hearing.
timagination11@gmail.com
It happened to me and I had to cut 2 coils off the spring.
It happened to me and i had to cut 2 coils off the spring
Post a Comment