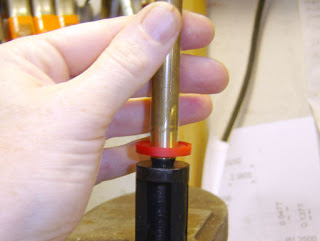
The tool is two pieces. A plastic rod 1/2" in diameter, with a taper on the end and the other end turned to be a slip fit in a piece of brass tubing. The brass tubing is polished on the end for about 5/8" of an inch. It's about 8" long because that's what I had in my box of brass tubing. I could have used solid plastic rod and just bored a hole to mate with the pointed piece.

The assembled tool.

The tool was lightly lubed with thin oil, and I pushed the seal on, backwards from the direction it would be installed on the piston.

The seal was pushed past the plastic tapered piece, onto the brass tube.

I removed the plastic piece and pushed the seal against the edge of the tube.

I held the brass tube against the end of the piston button, making sure it lined up.

I pushed the piston seal off the tube and onto the piston, where it settled with a lovely and almost inaudible click. This was by far the easiest piston seal installation I have ever done, and I will likely use a tool like this every time I need to fit a seal to a piston. I did the same for the other piston recoil seal/bumper.
Almost done...
No comments:
Post a Comment