Ah, the final piece for the buttplate--the top-most shoulder piece.

I'm not sure this will be the final, but it's modular and easy enough to change. Faced a piece of 3/4" round aluminum rod for the adapter.

This will hold the shoulder piece to the rod.

Cut a flat.

Don't try this at home. This is poor practice and stupid. The workpiece could fly out of the chuck. Angled the piece in the jaws and cut a flat. This will angle the shoulder plate on the rod.

Also angled the adapter for the mounting hole. Spotted, and progressively through drilled...

to 3/8" to fit the main rod on the buttplate.

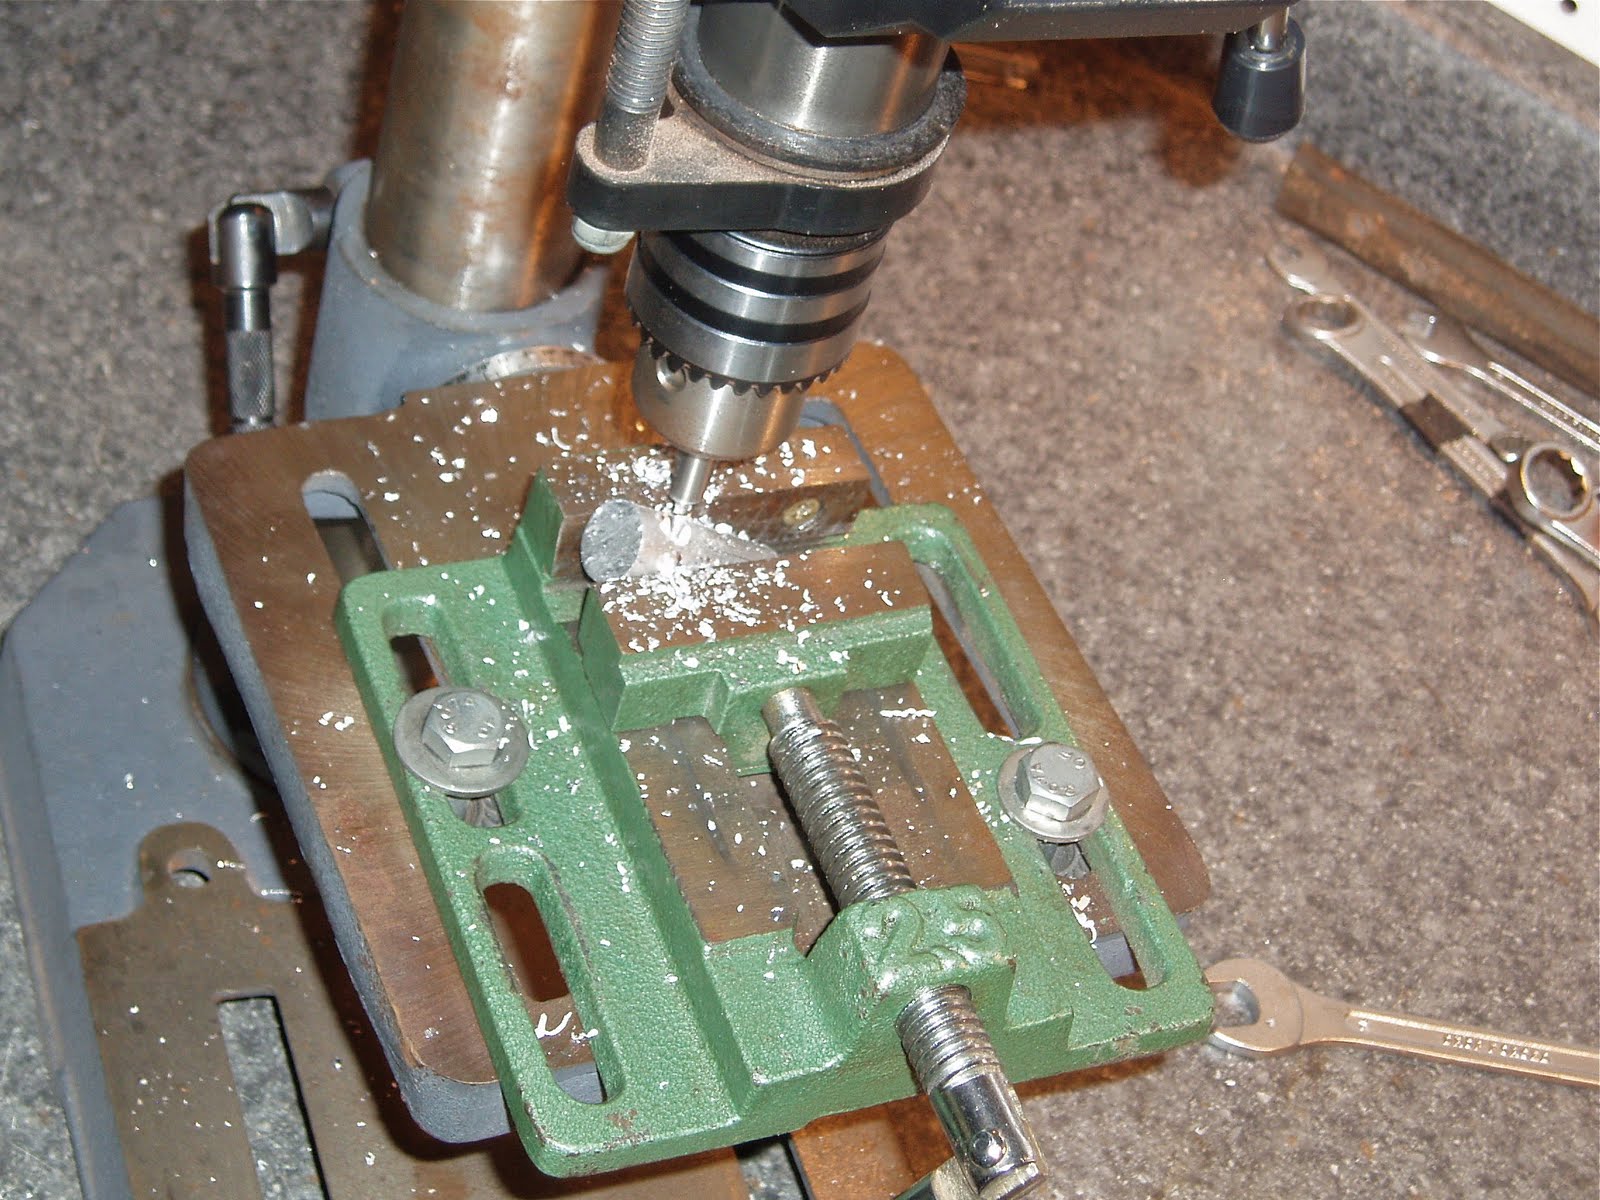
The pinch clamp hole needs to be offset on the rod. Spotted and through drilled with a 4.2mm bit --the tapping size for M5 x 0.8mm.

Used an endmill to cut a pocket for the head of the clamping bolt.


With an arbor, I set up a slitting saw in the Taig lathe. As the lathe is completely modular, it's possible to mount the milling vise to the crosslide

The crosslide allows for easy control over slot width.

Tapped M5.

Cut a piece of 3/4" aluminum plate--this will be the actual shoulder piece --and faced both ends to get 90 degree corners.

Found the mounting hole location and through drilled. Note the bolt in the drill press table--ideally it would be a taller brass stud(--non marring). It keeps the work from becoming a helicopter on the drill bit.

Through drilled with the 4.2mm bit. Trying to standardize the threads on the buttplate. With just a couple exceptions, most all the fasteners being used are M5.

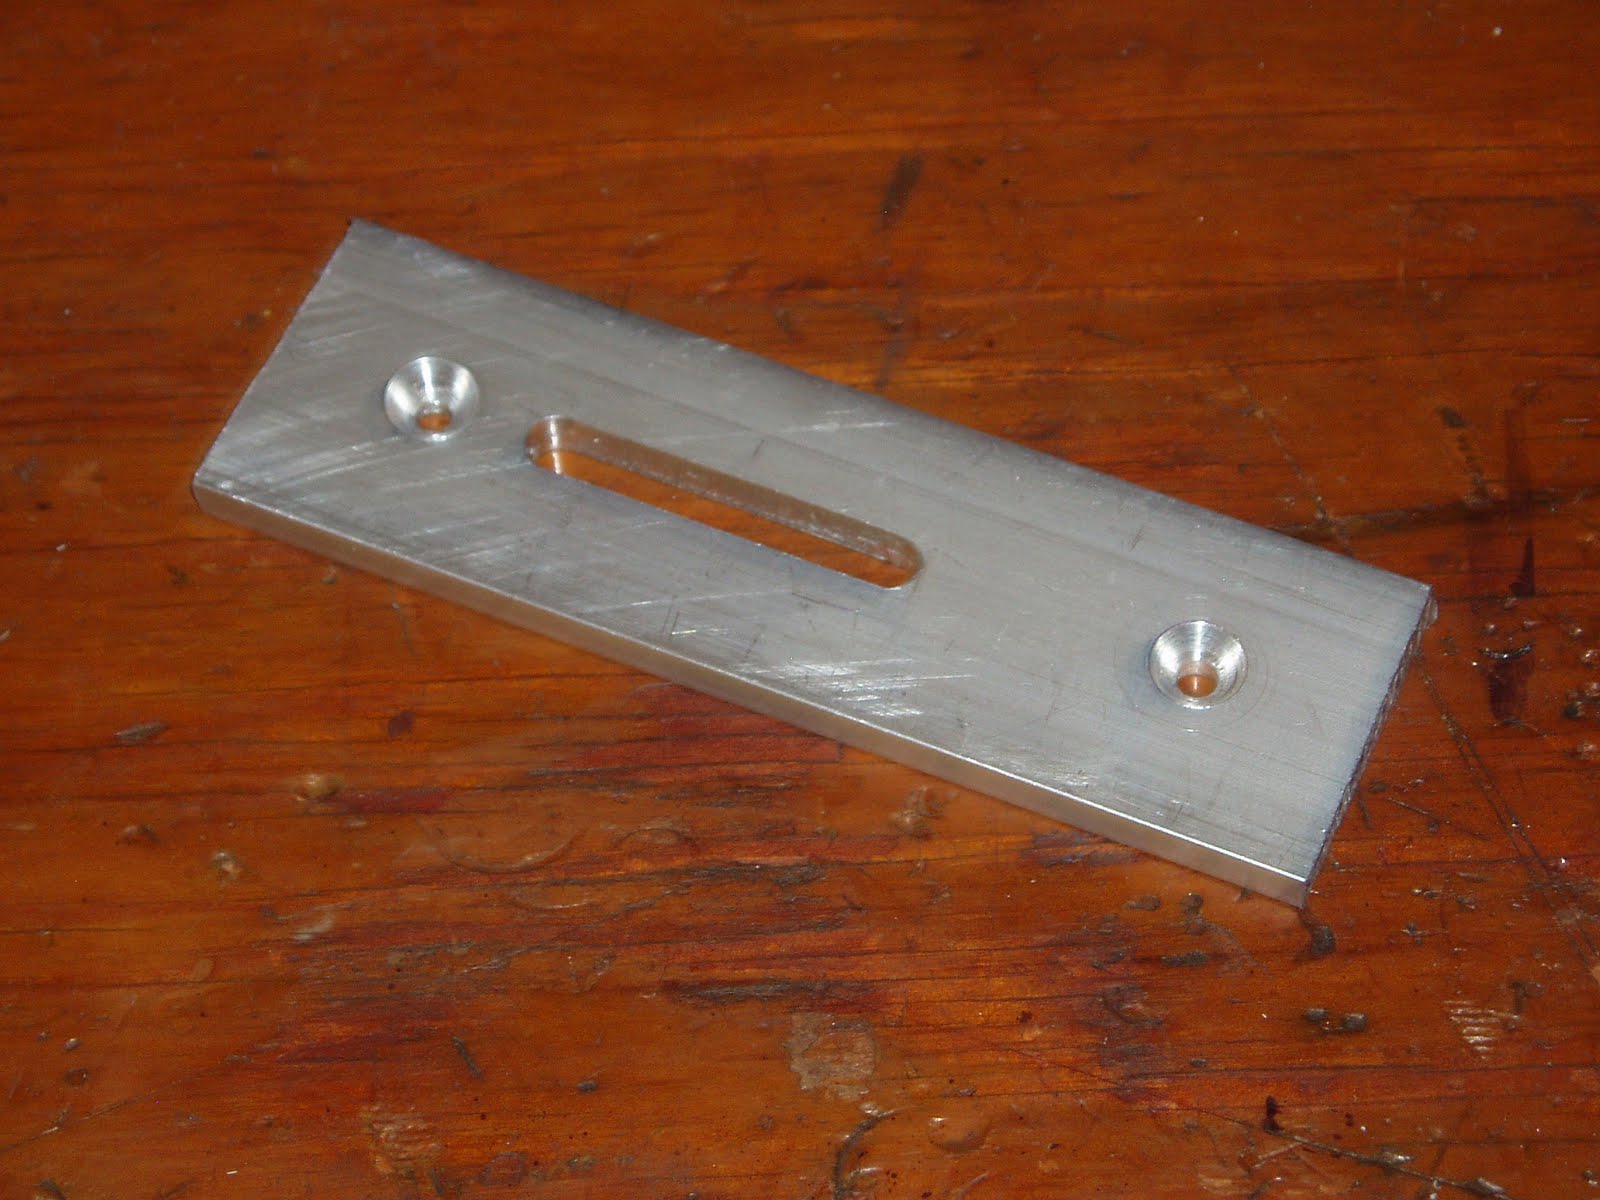
Tapped. The upper shoulder piece will bolt to this adapter.

Countersunk.

Better view.

Still in the rough. Man, the finishing is gonna just about kill me.

A hasty assembly.

Not shown, but I cut the mounting rod to size, and rounded the ends.

The plan is to contour the ends of the lower blocks to fit the shoulder and add some side taper to reduce their width--then put a satin finish on all the aluminum.

Before that happens, I need to make the baseplate to attach this whole mess to the stock.
Check back in a couple days.
 Skipped a few semi-important steps here. Here's the gist of what happened: This will be fitted to match the contours of the rifle butt but I also need to mill a slot in the plate for vertical adjustment. I can't hold the plate in the milling vise once it's shaped to fit the stock, so the slot has to be cut first.
The aluminum plate is virtually the exact same width as the butt of the rifle. That means I've got no room for error in the mounting holes. I started with the rifle's old rubber buttpad. Set it on the aluminum and spotted the mounting holes through it. Then measured the holes in the rifle butt using a caliper to pick up hole centers. Back to the aluminum to verify--and correct--the hole locations slightly. Keeping the holes on the same line did the trick.
Skipped a few semi-important steps here. Here's the gist of what happened: This will be fitted to match the contours of the rifle butt but I also need to mill a slot in the plate for vertical adjustment. I can't hold the plate in the milling vise once it's shaped to fit the stock, so the slot has to be cut first.
The aluminum plate is virtually the exact same width as the butt of the rifle. That means I've got no room for error in the mounting holes. I started with the rifle's old rubber buttpad. Set it on the aluminum and spotted the mounting holes through it. Then measured the holes in the rifle butt using a caliper to pick up hole centers. Back to the aluminum to verify--and correct--the hole locations slightly. Keeping the holes on the same line did the trick.
 After the layout, I center-punched the marks and through drilled.

 Then countersunk.
 Holes lined up exactly.
 The mounting side-to-side is correct.
 A bit of dykem and I scribed a fine center line. The hash marks are the end points for the slot. Not a critical length.
 Mounted up the milling attachment in the Taig. Used a pointed 3/8" indicator to first set the height then verify that the workpiece was level. When the crosslide is advanced and the point doesn't stray from the scribed line, it's good.
 A 1/4" center-cutting endmill was mounted without disturbing the setup.
 Started with a light pass.
 Used quite a bit of cutting fluid to keep the aluminum from adhering to the cutter.
 Followed with repeatedly deeper cuts.
 Until it broke through.
 Bolted this to the rifle stock and scribed the outline.
 I'll cheat a bit and cut the corners off with a hacksaw.
 Then go to the sander.
 Remember to angle the toe.
 It's about 90%+ fitted. Since I'm going to refinish the stock, this is as far as I'll go with the baseplate for now.