The Sixteenth Annual "Toys that Shoot" Airgun Show is almost here!
Saturday, April 23 in Findlay, Ohio
Click Here For More Info and Directions

NOTE: NEW LOCATION!!!
THE CUBE SPORTS COMPLEX
120 + TABLES OF AIRGUNS AND RELATED ACCESSORIES
The Sixteenth Annual "Toys that Shoot" Airgun Show is almost here!
Saturday, April 23 in Findlay, Ohio
Click Here For More Info and Directions
Picking up when I left off with the TF79, figured it was time to give the barrel some attention.
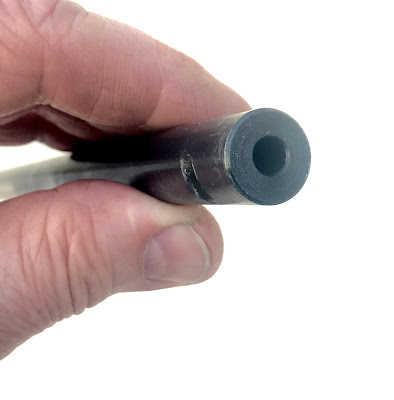
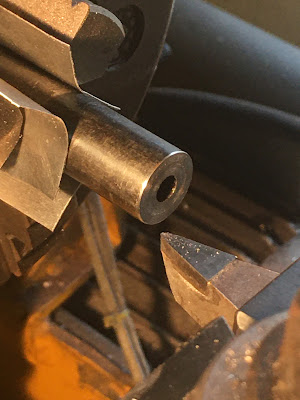
The original muzzle crown. We've seen much, much worse.
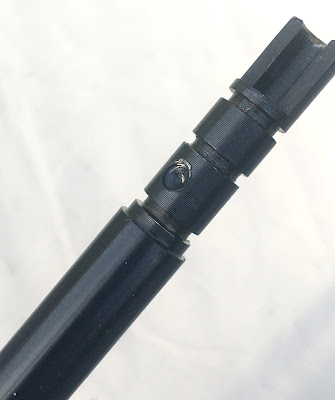
And since it's out of the breech block, here's the aft end of the barrel. The o-ring grooves and the dimple for the barrel retaining set screw are a bit sharp and bitey.

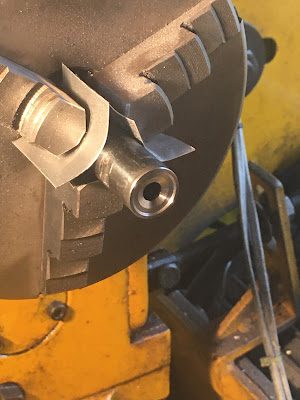
The pics didn't come out as well as I'd hoped. Not enough light. Some aluminum sheeting was used as chuck padding for the barrel.
Skimmed the face.
Recessed, then cut an 11 degree angle.

Flipped the barrel around and knocked down the high spots. Just softening edges.

Like so.

The crown--before going back to polish.

Some new o-rings for the breech end of things.

A final pic of the muzzle after some polishing and a re-blue.
I did end up making a new bolt handle. Really just to try something different. Try to get that posted in the next few days.
Thanks for reading.
Got three or four airgun projects in process right now. Thought I'd get a quick post up with one of the happenings. I've been shooting my old Tech Force TF79 target rifle, and while I've reworked the stock, the mechanical parts have been left almost untouched. I did try to smooth out the bolt loading mechanism a few years ago. Trued up the bolt body. It's been straightened, polished and deburred. When cocking, the bolt mechanism feels like it's full of sand and gravel. It originally felt like it was full of rocks--so at the time this was an improvement!
Thought I'd give it another go and smooth out the inside of the breech this time around.

Removed the breech and took it into the shop.

Yep. Tech Force. Is that brand name still around? Pretty much identical to the AR2078A CO2 rifle--or QB78, or QB79, or Crosman 160...

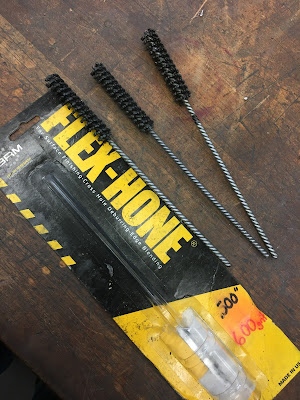
Found a few 1/2" diameter silicon carbide Flex Hones from Brush Research. These are also sometimes referred to as "Ball Hones" or "Cylinder Hones"
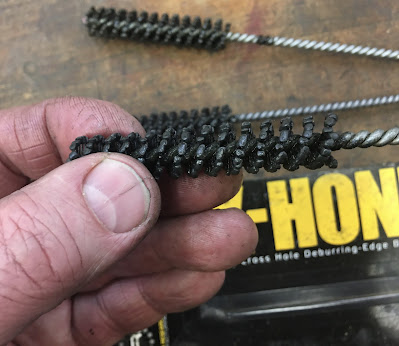
This particular flex hone is pretty worn. I'll start with it and see how it does. I really only want to knock off the high spots. If this doesn't work, I can always hone the ID on a Sunnen horizontal machine and really get the gouges out.
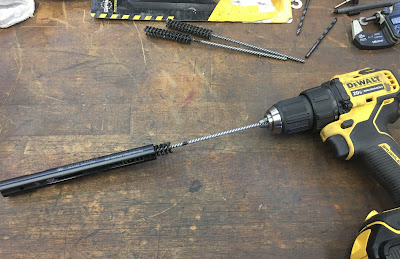
Simple. Chuck it in a drill, flood the tube with oil and hone away. Keep the hone moving.

I cheated and got some honing oil from one of the Sunnen machines. The used oil works great with flex hones because it's charged with very tiny particulates (micro pieces of grinding stones and ultra fine metal dust) from the honing process.

Still see some rough machining marks. As long as the high spots and sharp edges are gone, this should be OK.

Didn't bother with the very front of the breech where the barrel fits.


Fixed? Dunno yet. It occurred to me that while the gun was apart, this is a fine time to re-cut and crown the muzzle.
Are the remaining scratches in the tube a problem? Doubtful. If it was a mirror polish, I'd have honed the tube to intentionally put some scratches in there. The scratches retain lubricating oil.
Anybody got a favorite grease/oil for the QB bolt mechanism?
More in a couple days.
Really hadn't planned on blogging this little project, but it turned out to be pretty slick.
Found and purchased a 3D printed picatinny rail on eBay from a seller called "ezapper". It was made to fit most of the Crosman 22XX type guns. Slides over the barrel and gas tube and allows for attaching things like sights, lasers, lights, hand stops, forward grips, a bipod...whatever. It was printed with a PLA + resin which promises to be substantially stronger than the "normal" PLA print material.
The part is made for a Crosman 2240 with the stock plastic breech or a Crosman 2250/2260 with plastic or steel breech. It WILL NOT FIT a 2240 with a steel breech without modification--the steel breech extends too far forward for this to fit--unless you shorten the shroud.
Apologies. As I wasn't going to blog this, I failed to take the "BEFORE" images of the part as I received it. It was kinda shiny and had very fine print lines Wasn't quite a match to the plastic Crosman breech or grips--close, but not quite. The print quality was very good.
Remembering my goal, "Make Things That Don't Look Like I Was Involved", I threw the 3D part along with a set of stock Crosman black plastic grips into the media blasting cabinet at work. This worked perfectly for all the nooks and crannies of the picatinny slots.
Sorry, it's bit blurry. Here's the 3D printed picatinny rail shroud after glass bead:


Installed four #8-32 set screws into the shroud. Holes were already molded in. Didn't bother to tap first, just ran the set screws home.
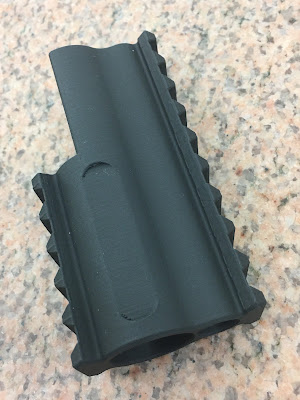
The media blasting blended and matted out the finish and removed--or at least softened--the print lines.


The Crosman grips turned a dead flat and uniform gray color. Then sprayed everything with a healthy coating of WD-40 oil and wiped off the excess. Back to black.
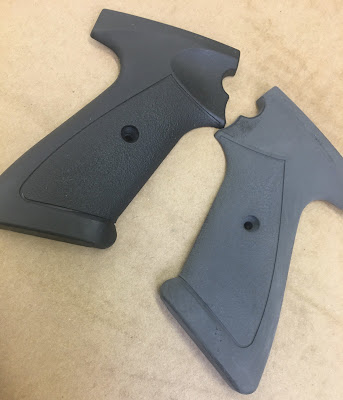
Blasted and oiled on the left. Blasted, no oil yet on the right. The oiled finish is a close match to a Magpul magazine. If I don't oil the parts after blasting, the dry matte finish will show every single bit of oil from my fingertips. I've oiled the finish so it doesn't show oil from handling.

For fun, I installed this on a Crosman 2250 length tube and Crosman long steel breech along with a black Magpul RVG.


While I was at it, made another AR stock adapter that accepts my modified AR buffer tubes.

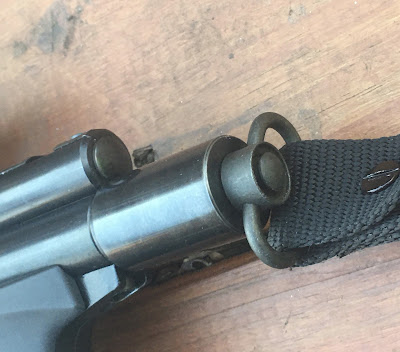
Since this is version 3 or 4 of the adapter, I added a rear facing QD socket...
...for a single-point sling.

So, yeah. Options.
Option #1 Go short with a single point.


Option #2 Go longerish with a Magpul (or any Mil-Spec AR) stock.

Ended up bead blasting and oiling most of my other Crosman black plastic grips/forearms over the next few days. Think it's a good look.
I've kinda got a themed group of Crosman airguns now:
Trois --this one
1377--What? here:


Like all my projects--a work in progress.
More soon.
Guess I'm on a roll. I liked the way the trigger turned out on the CP1-M last time around. Since I had a second IZH 61 trigger blade, figured I'd make something similar for a long gun. Looking at the candidates, the .25 cal QB project gun was volunteered.
Pretty much same deal as the CP1-M. Need a carrier with a stem to attach the IZH blade.

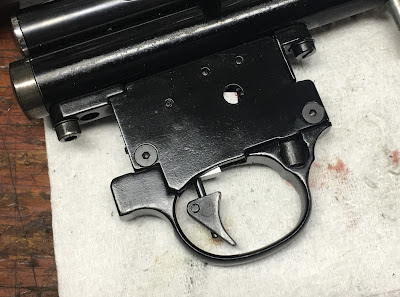
Pulled the trigger housing.

Removed the cover plate and took out the trigger blade.

A small piece of 1/4" thick 4130 steel. This is probably a bit easier than it looks. The only really important dimension is the pivot hole to the sear contact surface. And there's some grace in that dimension due to how the two arcs intersect.
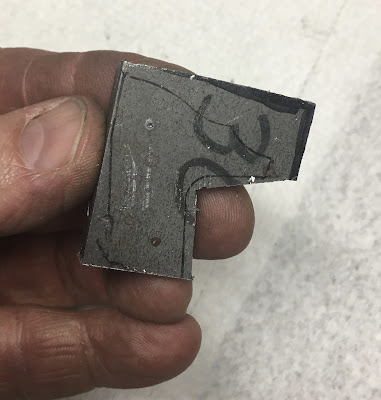
Traced the outline of the trigger and marked the pivot hole. Rough cut some of the excess away.

Milled two opposing sides for parallel...
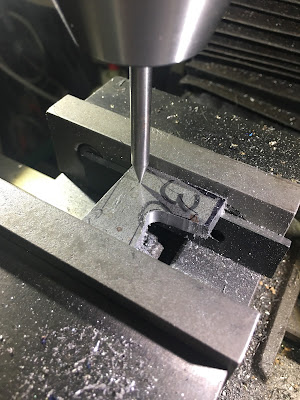
...so I could clamp it in the milling machine. A bit more shaping, then lined up for the pivot hole. Centered up with a point.

Spotted

Through drilled with a #31.

Copying the factory QB trigger, drilled some holes to remove excess weight.
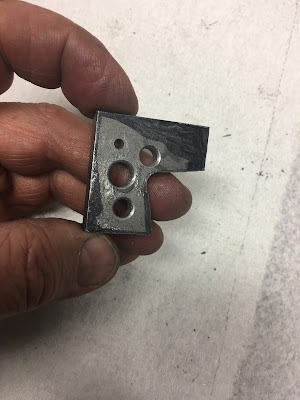
Getting there.

Some milling, some filing. Little of this, little of that.

The carrier needs a small boss for the trigger spring.

A brass rod was turned down to act as the base for the spring.


Cut off and the head rounded.

X marks the hole location.

I use this ground point all the time to pick up lines/locations.

Spotted and drilled for the spring boss.

Finally, I figured out where I wanted the trigger blade and spotted then drilled for the stem.

Like so.

Just needs some spit and polish
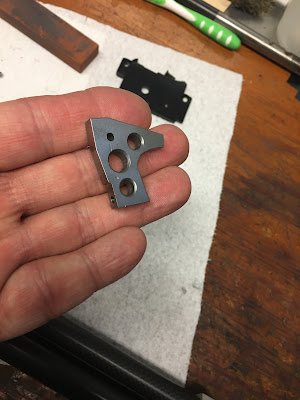
Knocked off the sharp edges then hit it on a brass wire wheel.


Test fit. Stoned the sear contact surface.

Pressed in the tiny brass base for the trigger spring.

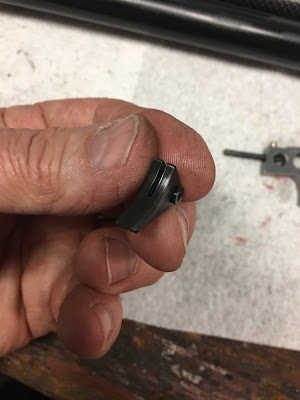
Cut a 3mm diameter rod for the trigger stem. Installed with a light press fit and some Loctite 680 retaining compound.

Test fit---gotta adjust the stem length before the Loctite sets up.

The IZH trigger blade isn't a precision finished part.
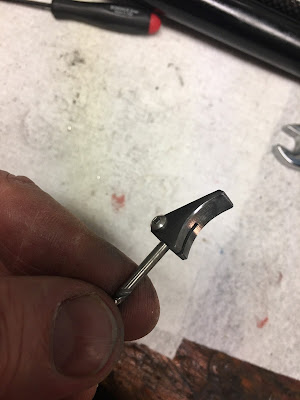
Clamped it to a spare 3mm drill shank and sanded out the face and radiused the edges.
Re-blued.

Assembled.
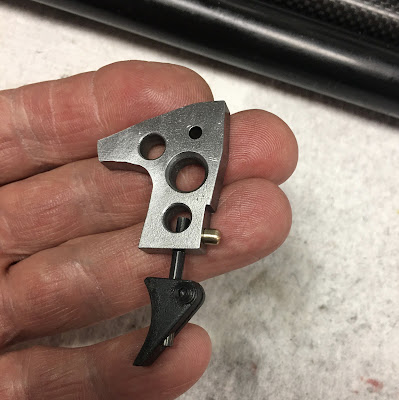

Mine's a bit chunkier. I'll leave it for now and see if there are any problems.

Here's that little trigger return spring boss.
Buttoned up.
I'll recheck after getting some shots through, but I set the trigger at about 2 lbs of pull weight. Dialed in enough sear contact so the rifle will not accidentally fire even when banging the recoil pad against the floor.


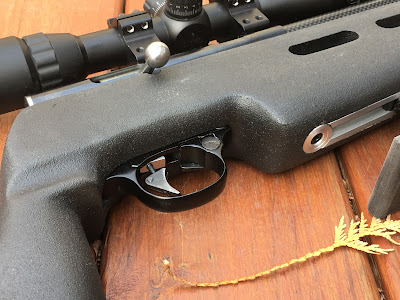

Dunno what's on the menu next. Don't think it'll be another trigger, but that Belgian Hy-Score desperately needs a blade with more set-back--and that was the reason I snagged that plate of 4130 steel in the first place.
Merry Christmas and Happy New Year!
Thanks for checking in. I'll have another post soon.