Tuesday, February 2, 2010

Crosman Model 140 Disassembly, Part 1

I picked up a Mongomery Wards branded Crosman 140 in December, pretty cheap. It wouldn't pump up but I figured I had already done a strip of the 140 for the blog, until I checked and realized that while I had rebuilt a horrible 140 in parts and Derrick refinished a 147 stock, we hadn't actually disassembled one for the blog. So here I go.

Dark brown stained stock, plain jane 140.

A nice touch on this 140 was the plastic ramp attached to the utilitarian front sight. I'm not sure if all 140s had this or only the MW ones?

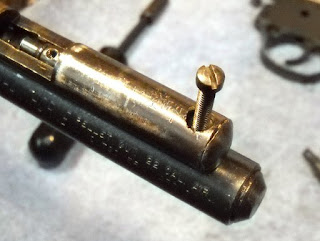
The cap on the breech was chewed up, which is a clue that someone has tried to fix it in the past.

To get the stock off I had to remove the safety and unscrew the lock nut.

I put the safety in the neutral poistion and pushed it out. You can see the plunger tip.

I used my roll pin pusher to remove the pivot pin.

The front sight assembly.

The pump arm and piston slid out. The pump plunger pulled vaccuum on the way out which means that it's ok (borne out by later use) so I won't be removing it. Which is a pity as it requires making a tool to remove the pressed on retainer.

Small dowel pin removed.

Now the breech cover.

Screw removed and cover slid off rearwards.

Rear breech screw.

I used an offset screwdriver to remove the trigger assembly.

Put aside for later.

There's a nylon bushing in the hole that had to be pried out.

You can see that someone tried to pry the cap off the breech but didn't realize the nylon bushing had locked it in.

Using the screw as a lever worked fine.

The cap is really chewed up.

Then the bolt comes out. It looks fine, or at least better than the last one.

Sunday, January 31, 2010

A NOS Weihrauch 35 E Gets an Overhaul Part 4 Final

The 35 E was still shooting the same velocity the next day-- 750 fps.. It was OK, but for some reason, I wasn't thrilled. Not really sure why, maybe having three different mainsprings available had something to do with it. I thought the recoil was a bit harsh even though there was no vibration. This could simply be due to the relatively short piston stroke and the heavy weight piston and spring moving in the compression tube. Anyway, I tore it down again and thoroughly cleaned out all the moly. I sleeved the piston with a piece of 0.008" sheet steel. Where's the pic? Dang it, did it at work on lunch break and it didn't come out.

Here's a pic of another sleeve I made last year for the IZH-61. Sleeve was made exactly the same way and the results were the same. Just pretend this sleeve is longer. The original spring fit like a dream.

Instead of moly this time around, I used Permatex copper based anti-seize. This is the stuff that Beeman used to send when you got the "Laser" upgrade kit for your R-1--only they called it Beeman Laser Lube and charged accordingly.

Marked "for titanium" because I use it on titanium fasteners instead of grease or aluminum based anti-seize.

The piston seal got a thin coat. The piston body, even less.

Only this much.

Psycho Lube. I don't think this grease is made anymore. I can't find a web site for it. I think I got it at a trade show a couple years ago. It's a "high performance" synthetic bearing grease. It's translucent and feels slicker than moly. I rebuilt the pivot, barrel latch, and cocking lever with it.

Thin coat of copper anti-seize on the mainspring. Reassembled as before and shot some targets. Gave it about 100+ shots to settle in and set up the chronograph. As usual, RWS Hobby wadcutters were used as a baseline pellet.

Wow, this is on the hot side for a Weihrauch 35! A ten-shot string ranged from 802.6 to 816.7 fps. This may well be my stopping point for internal work.

Gonna leave this one set up with the diopter sights. I've got enough scoped rifles and need some variety.

Found some brass set screws for the original sight holes, but next up is probably a cover plate.
Note: HW sight mounting holes are an extremely odd metric thread size-- M5 x 0.5

Friday, January 29, 2010

Sidetracked on Paintball Auto-Cockers

Got waylaid on a couple small projects for co-worker Rich (aka "Gigantor"). When your 6'5", 240 pound co-worker asks for something, you don't say no.

He's a paintball fiend and is one of the top players Ohio. He just recently purchased some custom paintball guns that he wanted slightly modified.

Forgive me if I butcher the terms and items. Not my field.

These are auto-cocker bolts. The top is a custom delrin bolt from CCM. He was getting air blow-by and wanted to add o-rings like the aluminum bolt on the bottom.

Chucked it into the 3-jaw,

and using a small parting tool, cut o-ring grooves on either side of the port.

Here's one cut. It's 0.072" wide. The bottom of the groove is 0.555" in diameter.

A couple pics from another co-worker, Doug. He's the guy with the camera always at the ready and he can shoot like a pro--if you pay him.


The second small job involved another used paintball gun for Rich. In a fit of stupidity I didn't take pics of the work until the end. In my defense, I was trying to just get it out of the way to work on the HW 35EB.

The end of the bolt had a small lip to grasp when cycling the gun manually--in case there was a broken ball in the gun. This gun shoots about 30 balls per second and Rich burns through about $65+ in paint per HOUR of game play. (He will seriously jack you up.) I get a sinking feeling in my stomach every time he mentions taking me along to a paintball match. I've no desire to be shot 45 times in under 2 seconds.

Anyway, the end of the bolt was covered in plier marks. I chucked the bolt and took off the plier-damaged lip. Then, I turned the domed end into a cone and faced off the very end. The flat end was then spotted, drilled, and tapped to M5 x .8mm.

Countersunk a knurled stainless steel washer and attached it with a stainless steel flat head bolt. Added an aluminum washer in between the knurled washer and the bolt to allow some stand-off to make it easier to grab. Polished all the aluminum. Gigantor is happy as can be and when Gigantor is happy, everybody is happy.

Monday, January 25, 2010

A NOS Weihrauch 35 E Gets an Overhaul Part 3

Almost ready to reassemble the HW 35 E . Just a few things to deburr and polish first.

The cocking slot on the bottom of the compression tube always has some really sharp edges.

A small file, a diamond hone, sandpaper whatever. I used a deburring tool this time. Be careful, the edges of the slot or the tool itself can open you up like a zipper.

I hit both the inside and the outside edges. This makes the gun smoother to cock and reduces the chance that the piston seal will be damaged upon reassembly.
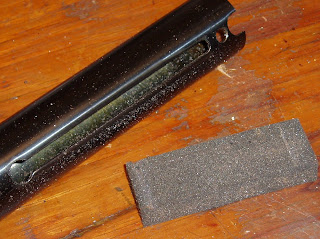
Finished with a rubberized abrasive block. It's called a "Rust Eraser" or something like that. Cleaned the tube thoroughly inside and out after this step.

Polished the end of the barrel latch,

and the end of the cocking lever.

Then cleaned the barrel with the JB Non-Embedding Bore Cleaner.

Some moly grease on the end of a plastic dowel

And gave the compression tube a very thin coat.

Also slathered the piston--inside and out. Didn't lube the front of the seal. I wiped this down to a thinner layer before sliding the piston into the compression tube.

Like so.

Lubed the barrel latch spring in the breech block.

Pushed the spring forward with an M5 allen wrench. Once the spring was far enough forward to clear the small post on the back of the latch, it fell right into place and the spring held it fast.

Installed the barrel pivot washers using the moly grease to hold them in place,

then attached the cocking lever to the piston and used a dental pick to line up the pivot washers. Installed the pivot bolt, washers and nut.

Coated the end of the cap with moly. The spring guide will bear against it and it should be free to rotate.

Very thin coat of moly on 100% of the spring and guide. Chucked it into the spring compressor and reinstalled the end cap.

Cock the trigger.

Install the safety and spring.

Insert the trigger unit, line up the holes and press the pins home. Pull the trigger--CLICK!--or the gun won't cock and you may think the spring is too long. Not that I've ever done anything like that. Never. Not even twice.

Bought this Air Arms aperture sight last week from West Virginia airgunner Scott T. He lives near some of my favorite backpacking spots in the 900,000 acre Monongahela. One of the most beautiful places I've ever hiked. Thanks Scott.

Fired about 40 shots through and set up the chrony. The gun was clocking in the 640 fps range with .177 cal RWS Hobby pellets. A bit too low even for me. The shot cycle was smooth and short with none of the earlier vibration and buzzy noise. So the first replacement spring is a bust due to the low power. It did shoot rather nicely though.

Stock removed and pulled the trigger and safety--again.

Only need to remove the end cap, spring and guide.

Turned the guide down about 0.013" to fit inside the thicker wire diameter mainspring from the parts box. The guide ended up at 0.630" diameter.

Reassembled the gun and again fired about 40 shots before checking the velocity. The rifle was noticeably faster just from the sound. The chrony confirmed what my ear told me. About 750 fps with the heavier spring. This spring is pretty close to the factory spring. Really just a bit larger in diameter. I'll check it again tomorrow and see how it does after sitting overnight.