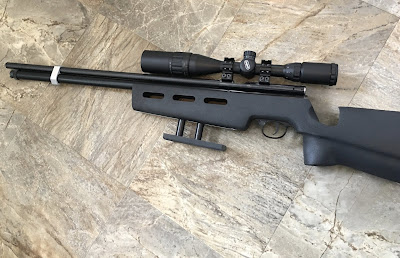
Anyway, with my interest piqued to add yet another accessory to my rail compatible quiver, I mocked one up a couple months ago out of a chunk of cherry and the bottom half of a rather tall Picatinny scope ring. The ring clamped to a section of Picatinny rail that was installed in the forend rail. I didn't expect much, but it actually was pretty nice for standing shots with the QB .25 cal rifle.
Looked around the basement and came up with what I hoped would be a cleaner and more fitting design for the QB.

This is the remainder of some UHMW PE plastic from an adjustable butt plate project. It's 1/2" thick, about 2" wide and 5-1/2" long.
Into the milling machine and squared it up.

Used a corner rounding end mill. It's used to radius the edges.
I just eyeballed the cuts and tried to make it look halfway decent.
As I'm writing this up after finishing the project, I realize now that I should've chamfered the other side, too. Ahhhh... hindsight.
Found the center of the plate and through drilled.

Had concerns about the fasteners pulling through and/or the material exhibiting "creep" as the bolt heads slowly dig into the plastic. Hopefully some screw cups to support the fastener heads and spread out the load over more surface area will help. Counterbored the hole with a 5/8" end mill.
This is easy. With the machine stopped, I bring the cutter down until it just touches the work, then zero the readout. I bored the hole until it was 0.300" deep.

Cranked the milling table over and cut the second counterbore to the same 0.300" readout depth. Set up side note: I'm still centered on the workpiece because the vise is lined up to the table axis.
Through drilled the second hole.
The plate is just about done.
The only way I've found to get a halfway acceptable finish on UHMW has been from bead blasting. Ran over to work and threw it in the blast cabinet.
In a few minutes I had a uniform matte finish.
Some 5/8" diameter aluminum will be used for the screw cups.
Faced.
Spotted.
Another side note: Spotting drills are designed to be stiff and not deflect when making the small starting point for a traditional drill bit.


Clearance drilled for the 5mm bolt.
Counterbored for the head of the 5mm fastener. Believe I used a 5/16" end mill.
Used the bolt itself as a gage. Need to cut this a bit deeper to completely recess the head.
After deepening the counterbore, I parted it off at about .320" in length.

Uno.
Dos.
I faced them to .301" in length and pressed them into the riser block.
Since the barrel on the QB was sleeved in carbon fiber, carbon fiber pillars will continue the theme.
Cut and faced two pieces.
There was some measurement/math involved in cutting the carbon posts to the correct length that allowed for secure mounting--but not running the bolts completely though the nuts chewing into the bottom of the rail.
Mounted up the the QB. This height/rise just allows me to get my off hand position on the forend. The hamster is there if I want some additional height.
Think I'll chamfer the top side of the plate and throw it back in the blast cabinet. Softening those edges will certainly make it more comfortable to use.
More soon.


5 comments:
Lovely piece of work, as usual. I've never messed with risers and such, may have to give it a try some day. Some of the stuff the FT folks come up with looks like it escaped from some Sci-Fi movie. Yours looks more down to earth - and it matches up nice with the rest of the rifle.
I forgot to ask, how do you keep the bolts centered in the carbon fiber tube? I've got a similar setup on a cut down Haenel 300 Super for a butt plate extension, but keeping things lined up before tightening can be a hassle as it's made with 1/2" PVC with no liner. I keep toying with the idea of filling the extension with something to center the bolts, but haven't yet.
Paul, good thought! Just as I was about to assemble the parts, I saw that was going to be a problem. I through drilled a couple 3/4” long pieces of acetal for the 5mm bolts then turned it down to just fit into the carbon tube. Didn’t detail it in the blog because I was running short on time and it doesn’t affect the function.
Always impressed with the work you do and this is no exception. I came to the blog today looking for advice on a Crosman and know this is off-topic for this thread, however, I nave removed the valve nut and expected the valve parts to drop out. Neophyte question: What's holding 'em in and what do I do to remove them? Thanks.
Dried up grease, dirt and oil keeps things from falling out. But even if it's clean it's a snug fit.
Nick
Post a Comment