
Here's the LG55 mainspring and retaining plug/spring guide.

The piston was an absolute devil to remove from the compression tube. Especially in mid-power guns like this, the piston should easily slide out. This one needed a drift and a dead blow hammer to tap out.

Problem was the piston seal was far too tight in the tube. And it looks brand new...???

Some of the schematics floating around on the net seem to show a seal shaped like this one. The schematics are in black and white, so it's tough to compare. As far as I've been able to ascertain, early LG55's had leather piston seals (like my own 55) and the synthetics came at the tail end of the production. No doubt everyone knows that I'm not any kind of authority on Walther technical information. Just piecing together some information from all the various sources. I do know that the trigger unit in this gun is also different than the one in my LG55. Mine has two additional adjustments--for amount of sear contact and first stage travel. The trigger in this gun has been sealed with what looks like an epoxy so that the amount of travel has been factory set and locked so it cannot be further adjusted. The sealing looks to be factory done. The two triggers also do not seem to be 100% interchangeable.

While it was apart, I buffed the rear of the piston body.

Here's how looks when assembled.

The seal is waaaay too large in diameter for the compression tube and that's the culprit for the sub 300 fps the gun was delivering. So, turn it down on the lathe or ??? I had doubts about turning it down. I felt that there was minimal chance of the seal working even with a reduced OD.

Mid power guns were made for many, many years with leather seals. It's a great seal material as it conforms to the inside of the compression tube and requires only occasional oiling. I found a 1" leather seal in my parts box. I can't find these online. I bought it at an Ace Hardware store. It was in a refillable parts bin from a company like Hillman or Jandorf. Think it was labeled as a "leather water pump seal".

Needed a leather backing washer, too. A piece of an old carrying sling and a punch...

gave the center hole. I traced the piston and cut out a disc with some shop shears to the approximate OD. Size really isn't critical on a backer washer.

Installed. Now to soak the leather in silicone oil.

Since I was this far, I removed the locking screw on the right side of the pivot bolt. It serves to expand inside the main bolt's split thread thereby wedging the threads tightly in place.

Unscrewed the main pivot bolt from the left side.

The pivot and the locking bolt.

Pulled the breech block, greased everything with moly, and reassembled the block. This is where it takes a dark turn. I noticed that the end of the sheet metal anti-beartrap lever was slightly bent and had a partial crack in one of the bends. Examining the trigger block revealed similar damage to the folded sheet metal plate inside. Superb. The trigger block is spring loaded to move backward--blocking the trigger from moving. If the anti-beartrap unit fails, the gun can never be fired.
The stock has a fairly large crack at the left front near the front screw holes. That crack has a secondary split on the inside of the inletting visible only after removing the action. The wood is also cracked at the right side screw hole with a few spider veins. Yet another hairline crack at the rear of the compression tube inletting on the right side... Taken all together, I'm pretty certain that the gun was bear-trapped. It certainly explains the damage to the related components.
The stock can, and will be fixed by Guy. He's got more than a bit of gunstock repair experience and seems keen on taking on the project. But I still had to be able to test fire the gun (assuming I could get it to work) so I did a quick repair on all the right side cracks. I hope that Guy will have a hard time finding them and will be able to concentrate his efforts on that left split.
I considered removing the trigger disconnector entirely. In retrospect (and had this been my gun) I'd have done this in an instant and saved a couple evenings. However, one can never for a moment let go of the barrel while loading if this is done. Not that you should ever let go of an open break barrel. Of course, I never opt for the easy way...

The cracked sheet metal tab in the trigger unit almost fell out with a poke with a dental pick. A piece of 1/8" OD brass rod was cut and faced down to approximately 0.250" long. It was then spotted and through drilled with a #39 bit.

The trigger unit was set on a bench block on the drill press and a hole was spotted through a clearance hole into the side of the disconnector. Through drilled the plate with a #47 and hand tapped the hole to #3-48.

Brass pin installed. I've got a new tab!

When the cocking lever is in the closed (forward) position, a connecting rod linked to the cocking lever pulls this pin forward, un-blocking the trigger.
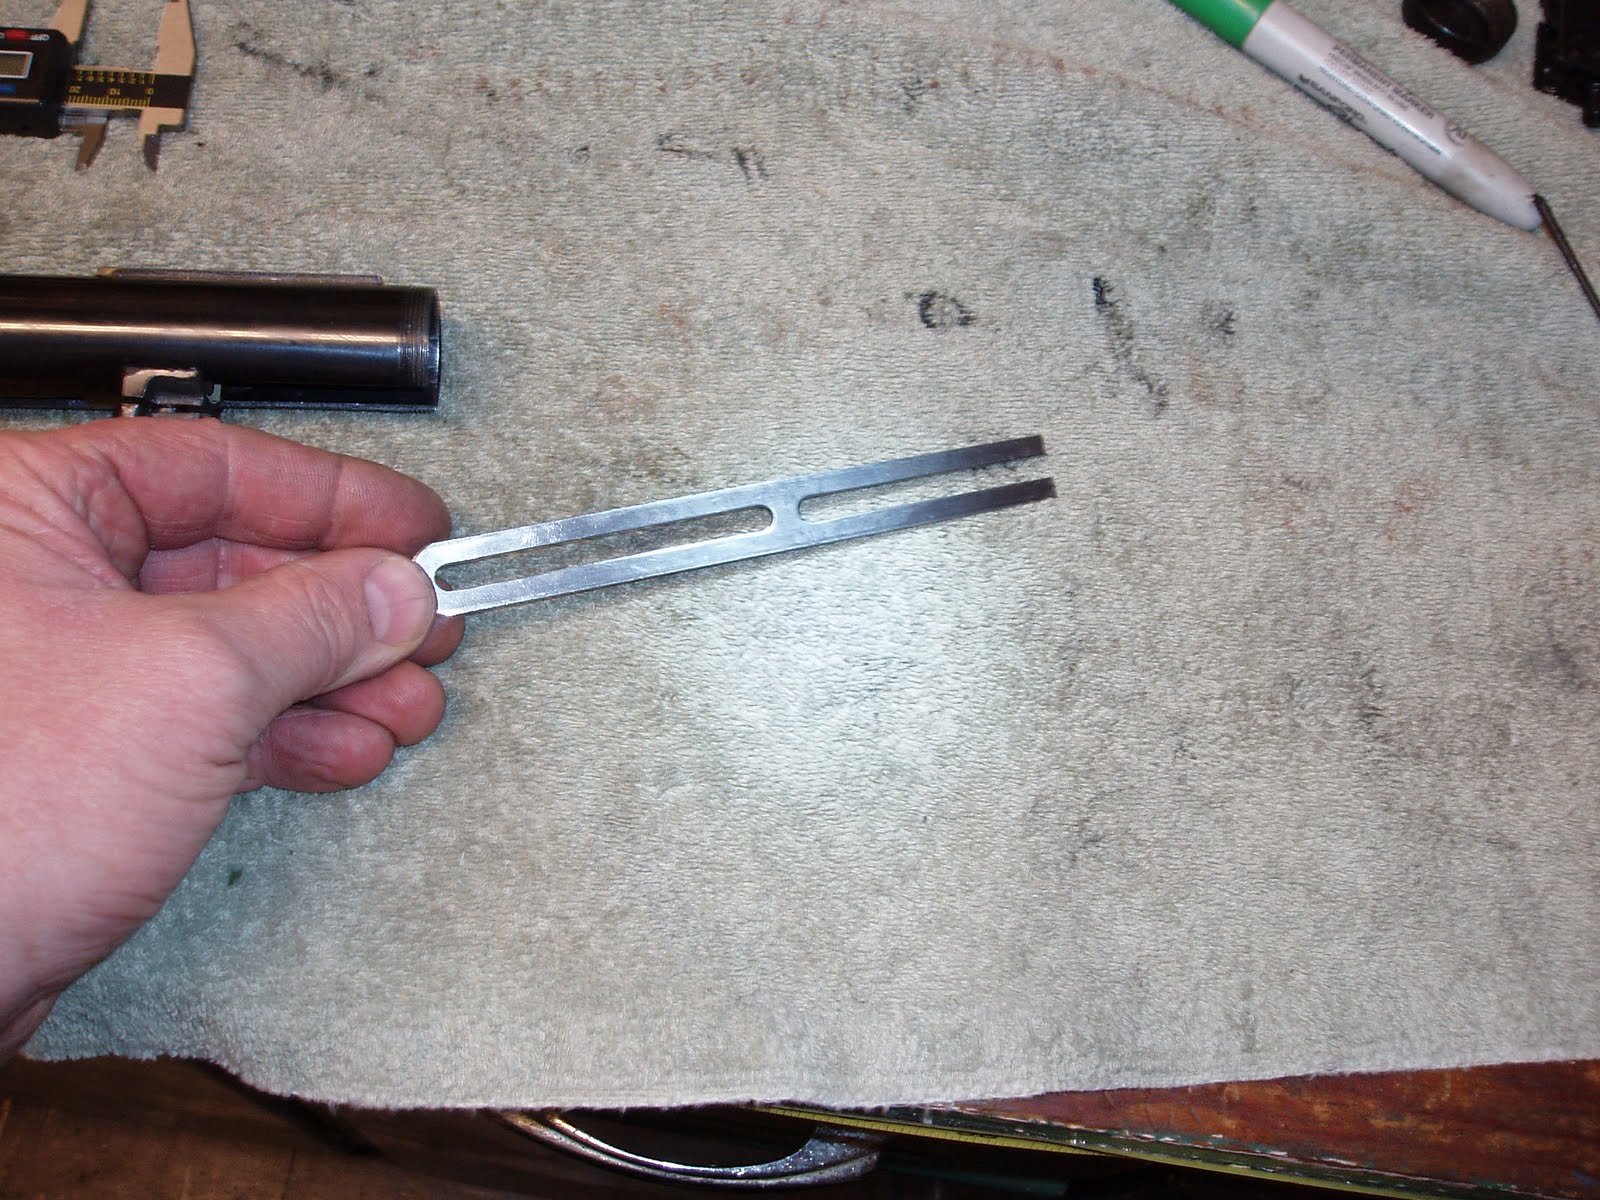
Now for the linkage. I found a spare piece of slotted steel that very closely matches the original lever in width, slot width, slot length and thickness. Crazy, but true. It's the strut for a rear bicycle rack.

One end was cut off.

Another cut to remove unneeded material.

And I started hand shaping the thin end for clearances.


Two bends in close proximity let the tail pass through the side slot in the retaining plug.

Some cursing, grinding, cursing, filing, cursing and starting over from scratch got the linkage to here.

The tab still needs trimmed down a bit. A lot of measuring, eyeballing, cursing and more cursing took place bringing the lever to correct length. By correct length, that means that when the barrel is closed, the cocking lever pulls the linkage forward slightly, unblocking the trigger. When the barrel is broken open, the linkage moves very slightly to the rear allowing the spring loaded trigger block to move backward--yep--blocking the trigger. Did I mention that the length was critical? That's where the cursing came into play. It was also critical that the linkage not bind anywhere in it's minimal movement. Again, more cause for cursing.
A lot of missing pics from this blog. The time put into making this link work correctly was extensive. Taking pics of all the trial and error wasn't in the cards.
Still more to come: reassembly, function testing and I still need to fix the stripped hole in the barrel shroud.

3 comments:
Funny - my bike parts bin is also my go-to bin when I need a random odd part. There's just so much variety found in bicycle bits and pieces.
Helps, too, that the bike parts comprise a much, much larger pile of stuff.
Working on one at present here in the UK nice to watch someone else's take on these, very helpful best wishes and many thanks for you're bloggs
Post a Comment