With the bolt removed I was able to remove the other breech screw.

And the barrel and breech came off. Unlike the previous 140 the barrel was solidly joined to the breech.

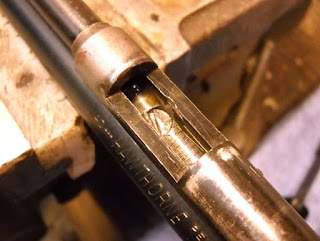
The transfer port seal was really messed up.

Note the stamping "M140" HAWTHORNE", etc...

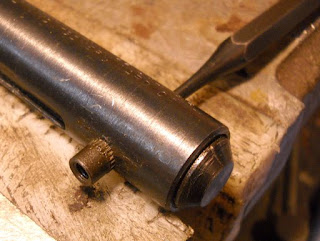
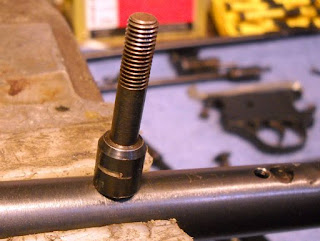
There's a pressed in threaded bushing that I had to remove. I punched it out. Later I would realize that my roll pin pusher works really well for this.

It's straight knurled.

Probably the biggest pain in disassembling the gun.

The tube cap (Sear Block Stop) comes out under a small amount of spring force.

Nothing fancy.

The hammer, "small tube plug" and "valve pin" drop out.

You can see where a guy with pliers attacked the stock screw.

My gentler alternative, a spare 1/2" jacobs chuck used as a wrench.

The transfer port seal. Note the metal part of the "Breech Gasket Assembly" or transfer port seal.

I used a dowel to push the valve out the front of the tube.

The valve and cap.

Unscrewing the cap reveals the white plastic (teflon?) check valve and spring.

Now the trigger.

Opens up with two screws. Unlike the better 160 trigger there aren't any adjustments.

Huge trigger & sear unit...

Nothing to it. That's everything except the pump cup/plunger stripped.

8 comments:
The pictures were VERY helpful. Thank you for such a great write-up. I got my old SEARS pellet rifle working again.
Thanks for the help. I finished my SEARS .22 cal pellet rifle last night and now just need to get some ammo and see how it works. This was a great aid. Again- thanks.
Thanks for the great photos and commentary. It was very helpful in getting my SEARS .22 cal rifle back into service. Now I just need to get some ammo and sight it in. Again- many thanks.
Thank your for this tear down. In conjunction with a seal kit I got off eBay, I got my Crosman 147 that I've had for over 50 years back up and shooting. I don't even remember when the last time it was "shootable" - possibly 25 years ago.
Again, "THANKS"!
Steve
Thanks for this great tear down. In conjunction with a seal kit I got off eBay, I was able to get my Crosman 147 up and shooting again. It's probably been 25 years since it would shoot. I've had it since 1963 and was just pondering how many thousand times I've shot it.
THANKS!
Steve
I recently resurrected my late Uncle Johns Crosman. New seals and fixing the front sight/barrel bands.
The front sight was twisted so far to the right, that it had broken. I fabbed up another band and welded it to the part that goes into the pump tube.
Once I shot it, I found out why the front sight was messed up. My first shot was 6" low and 4" right at 25'
adjusting the rear sight all the way up and left got me within 2", teaking the front sight got me pretty close.
once I got close, it was a lot of fun to shoot.
no chrony, but just 5 pumps "felt" powerful. Cans flew with authority.
John
Thanks for the help was going nuts trying to remove trigger from stock.
In the picture labeled "the valve and cap", which direction does that black "cap" cover with the screw hole go ? The diagram (for the 1400)seems to indicate that the longer end points towards the valve cap and covers the end. The other end of the black part is smaller in diameter and does not seem to fit over the valve, and I wanted to make sure I had it pointed in the right direction. My cap has some dings on the side that fits against the rubber o-ring, so I may need that part - 140-070 in the 1400 diagram. Many I see on Ebay etc. do not seem to have a closed flat end like mine does. Any idea where I can get one ?
Lastly, in the picture labeled, "The hammer, "small tube plug" and "valve pin" drop out." - the round silver ring with the threads, with threads pointed up, WHAT screws into those threads ? Pardon my ignorance, but I'm a novice, and the diagram is confusing.
Post a Comment