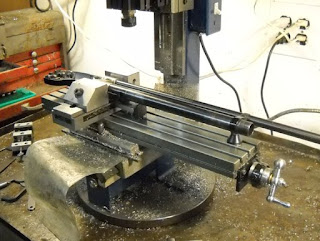
I set up the receiver half with the valve and tube in place.

Carefully aligned, I spotted for one of the cross pin holes with an end mill.
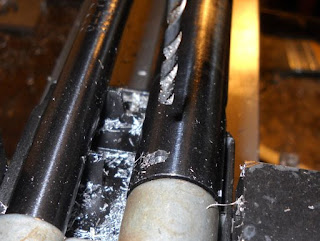
Then I tried to drill through before reaming to 1/8"...disaster! The tube hole started getting oblong as the drill drifted towards the outside of the tube...

I forgot to clamp the piercing assembly in place...if I had just put the piercing guts in and clamped with an empty CO2 cylinder it would have stayed put. But I didn't. At least I caught it before I was all the way through.
This highlights why I buy "beaters", guns that other guys have given up on. If (when) I do screw up I haven't caused some horrible historical loss to the world supply of collectable airguns. Chances are anyone else repairing it would have swapped out a valve assembly that didn't have a big chunk out of it. At least that's what I tell myself as I weep my self to sleep at night.

So now what? Well I do have this hole in the underside of the tube...
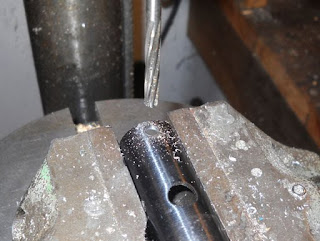
I reamed it to 3/16"

Spotted through the valve body to the piercing assembly.
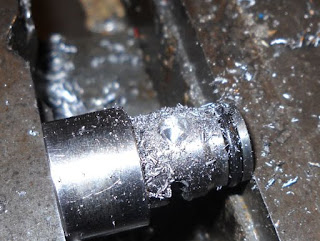
Then removed it and drilled down shy of the gas hole and reamed to 3/16" for a slip fit (not a press fit)
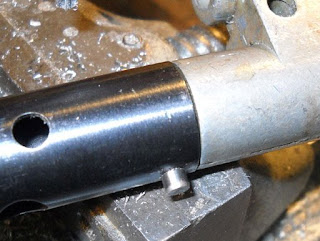
Of course that dowel pin is a little long. It should provide some extra insurance for the tube and piercing assembly.
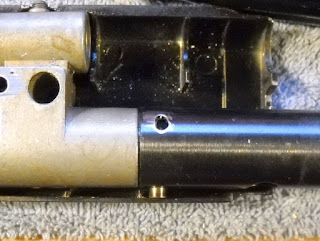
Ground to fit inside the housing.

Here's how the spring goes on the feed pawl.

Small end against the bushing.

That screw, which I thought wasn't stock, but is, in place.

Finally I returned to the reason for getting into the gun...the spring that actuates the magazine index...that is where the end goes. You cock the gun while carefully keeping all the parts together with your hand then use a screwdriver to bend the long end of the spring under that boss.
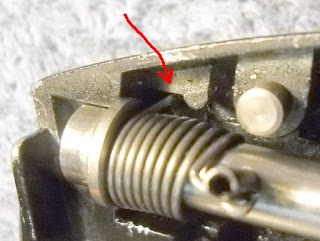
Here's another view.
Otherwise it goes together in reverse of disassembly. Use a pin to hold the trigger in place before you put the housing together and screw the trigger pivot screw in (pushing the pin out).
Well it works! I've shot through two CO2 cartridges so far and it held gas for three days in a row.
I'm getting 380-390 fps with 14.3 grain Crosman wadcutters which is about the same energy as the manual's quoted 375 fps w/ 15.5 gr. pellets. It is possibly one of the most fun air rifles I've shot. You can shoulder the rifle and "blam, click clack, blam, click clack, blam..." You get the idea. Maybe I'll work up the nerve to try porting it and using a heavier hammer spring someday for more velocity but as a plinker it's perfect.

4 comments:
Thanks Nick!
I have an old 622 I bought at an estate sale for $5! I have it apart but haven't had time to fix it yet. Your blog will help me greatly. I hadn't figured out how the index spring or clip unsticker installed.
My valve is is better shape than yours, but I am hoping to do something a little different. I am going to try to build a custom 622 "breech" which will mount on top of a custom tube. Then I will use a Discovery valve in the tube so it will be "Dual Fuel" like the Discovery. I'll have to extend the hammer and might have to play with the hammer and valve springs too.
A.R.
(.22 multi-shot)
Thanks A.R.
Your build idea sounds great. I was mulling something similar if I ever find another beater 622.
Well, a Discovery valve won't work. It is too long behind the tranfer port. A regular 22xx valve is also a little too long. I guess this project goes on hold since it will require a custom valve!
A.R.
Could you please do a re-assembly guide of the crosman 622 i've pulled mine apart following your guide but now i cant get the last side plate back on well i can but it leaves a tremendous gap dunno where I've gone wrong i can email pictures if you like.
Kerrodw_91@hotmail.com
Post a Comment