I cut a piece of 7/16" drill rod to make a new locating stud.

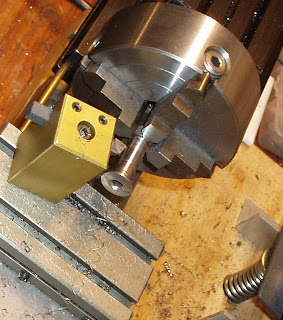
Chucked it into the Taig 3-jaw and faced off. Turned down about a half inch of the end to 0.188" diameter.

Done.

Need a shoulder att the base of the 0.188" section to recess into the wall of the gas tube and anchor the valve. The shoulder was cut to 0.2675" diameter and is 0.062" long.

Threaded the 0.188" portion #10-32 with a thread cutting die.

Cut a relief groove at the base of the thread to allow the thread to bottom against the valve.

Threaded into the valve.

Since I've moved the valve forward by 0.088" in the gas tube, I must also make a new exhaust port in the valve and seal off the old.

A transfer punch provides the mark for the new port location.

Gutted the valve and ready for drilling. You know what's next... Spotted and drilled.

I matched the original hole diameter with a #21 drill bit. I didn't look up the actual diameter. The bit simply fit nicely into the old exhaust port. A drill bit chart says the #21 is 0.1517".

Need to seal off the original exhaust port hole. Just tapped the old hole to #10-32. Catch what Crosman did? They uses the tapping drill for both the exhaust post hole and the #10-32 stud thread. One bit for 2 jobs on the valve.

A short #10-32 setscrew and some permanent thread locking compound should seal the old exhaust port hole.

Installed the setscrew flush with the bottom of the hole inside the valve. This should keep the volume inside the valve the same as before. Again, reassembled and pressure tested the valve. The exhaust port lined up correctly in the gas tube and the valve went "bang".

Back to that new locating stud.

The 180 stock had a 7/16" diameter hole already in place.

Intentionally left the stud long to allow for sizing. Ideally, I want the end about half an inch from the bottom edge of the stock.

Cut the stud off and faced what will be the bottom end.

Nick shows edge finders, I show center drill bits. We cover all the bases that way.

Drilled an inch deep with a #7 bit.

Tapped 1/4" x 20 using a Jacob's chuck held in the lathe's tailstock.

Several months ago, I made a similar recessed nut for a Crosman 147 BP that was never blogged. It worked so well I won't mess with success. What is this? This is the upper pivot bolt from a Shimano rear derailleur. This one is stainless steel and has a very thin, wide head with a 5mm allen key broaching. Gotta have one? Go make friends at the local bike shop. (take good beer!) They'll likely give you a couple scavenged from broken derailleurs from the scrap parts bin. Tell them I sent you. (--only if you take the beer)

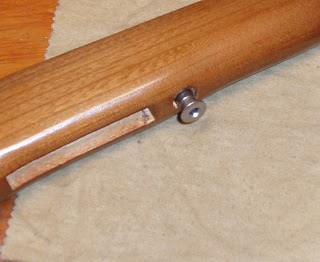
The head recesses into the Crosman stock(s) perfectly. The bolt is also made from top quality steel--which, of course, works against the ease of machining.

Grabbed the threaded end in the 4-jaw and trued. Turned the body of the bolt down to 0.250".

Parted off at the threaded end. Not shown: Cut 1/4" X 20 male threads on the Shimano bolt.

Looks promising.

The new locating stud.

Threaded into the valve.

Valve body tightened. Gun was reassembled--see Part #1 and do in reverse.

Insert action into stock.

Remember the bolt uses a 5mm allen wrench.

Hey! a smooth spot to rest the hand. I tend to shoot these guns from a 10-meter type position. When I set the forend on top of my fist, the old nut was in exactly the wrong place. The gun can still be converted back to original in a few minutes if so desired.

Snugged up. I'll paint the head black to match.
And a few more details to handle: The trigger could stand a tune up/adjustment, and uh, well, there's no rear sight on the gun--just a couple threaded holes. When James dropped off the gun, it had a broken Weaver scope attached with an odd mount clamped to the receiver. I'm not into point or instinct shooting, so I'll have to do something about that. Maybe I should mount a tactical quad rail and a bayonet and call it good? I'll probably just install a nice vintage open sight that Nick sent me in a care package a while back. Wait, what about a laser?
Still more to come in a few more days.

2 comments:
where that stock screw is can you machine something (swivel stud) to use as a mounting point for a sling? just a suggestion
Josh,
That's a good idea. It would be pretty straightforward to make a sling attachment point using the locating stud. But I'd be back to the problem of my support hand placement. On a stock with a forend this short, a barrel band is probably a good solution for the front sling swivel stud. Of course, all this ultimately comes down to shooter preference. I think a stock refinish is in the cards so I'll come up with a sling attachment that suits my shooting position at that time.
Post a Comment