Friday, July 15, 2011

Simple Fix for a Leaking S&W 78G Piercing Cap

Two days ago, I gassed up the S&W 78G with a new 12g cartridge. Heard a faint gas leak from the cap after piercing. It wasn't a fast leak so I went about shooting my targets in the basement range. After about 30 shots, I set the gun aside assuming it'd need some attention. The next day, it was still holding pressure. Even so, I didn't remember replacing the piercing pin seal when I overhauled the gun a while back. Figured it was simply time.

Got another 8 or 10 shots off to empty the gun completely of CO2 then removed the cap.


The outermost o-ring seals the gas tube. It's not the one leaking.

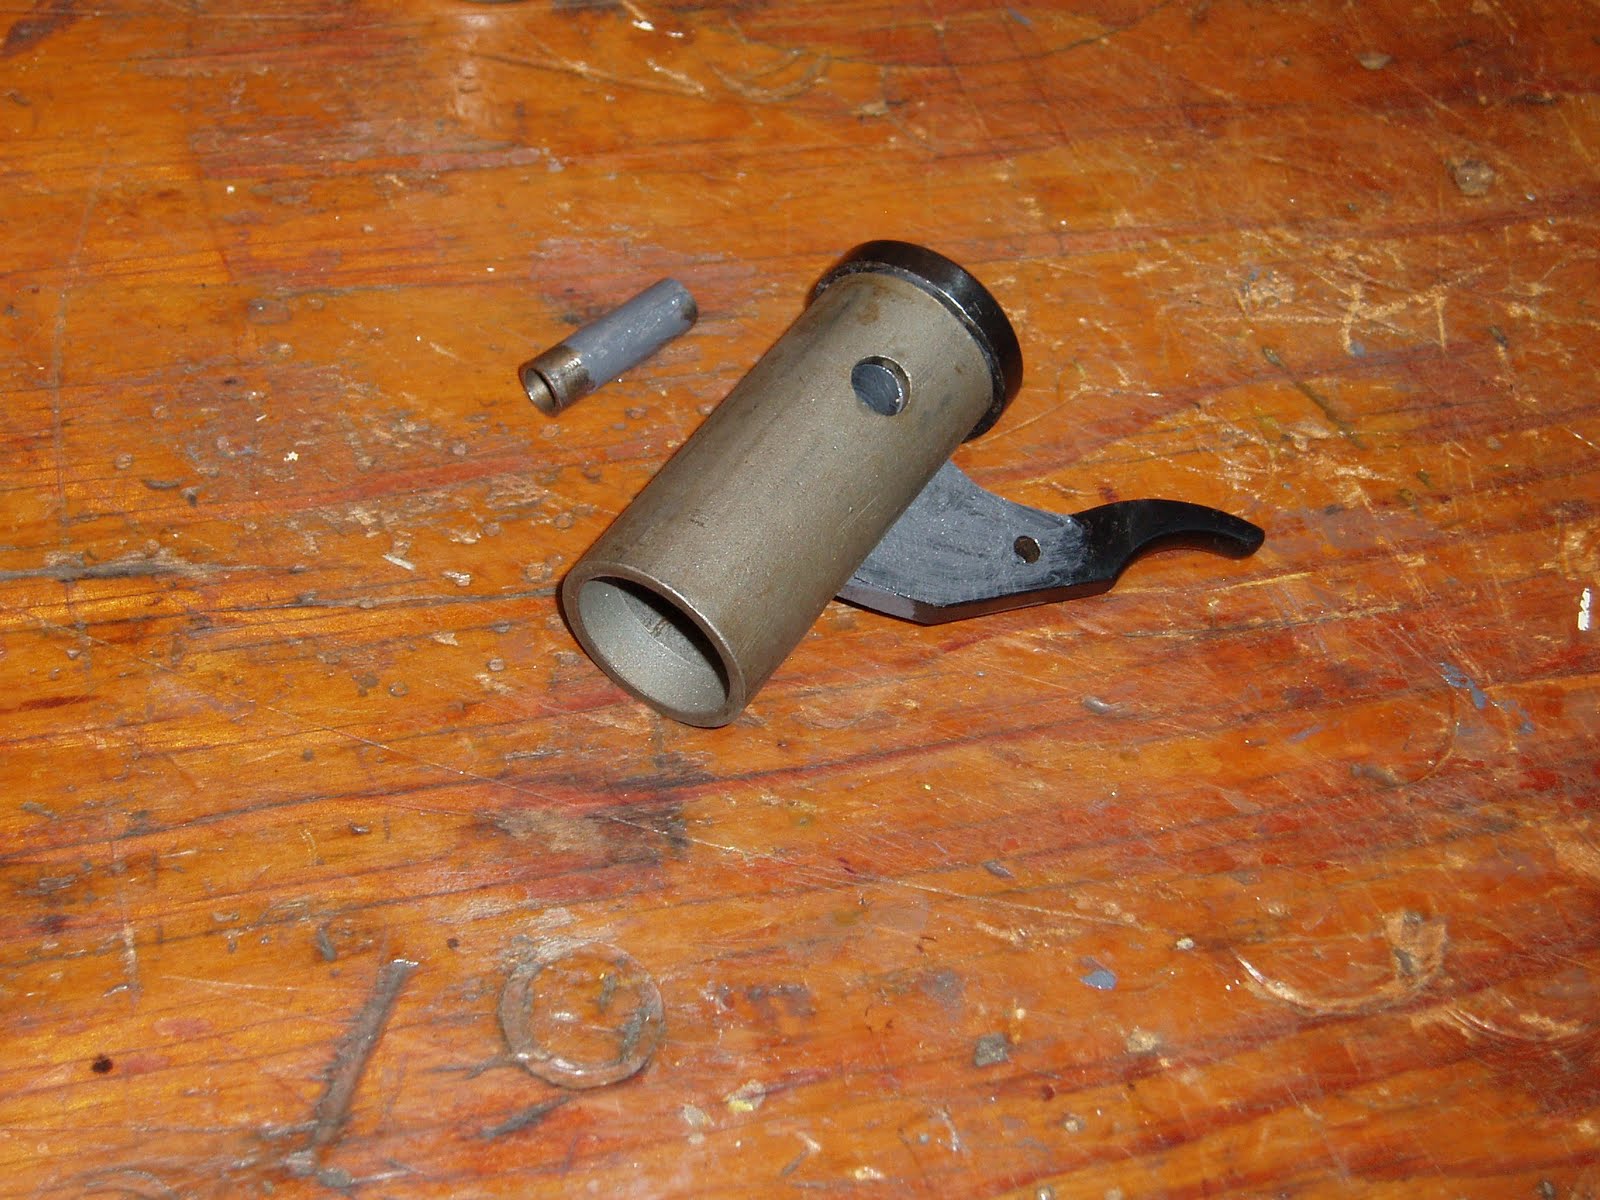
The piercing needle is in the center of the cap and has a tiny o-ring that seals around it's OD. To get to it, I aligned the side hole and drove out the roll pin.

With the roll pin removed, the components of the cap are extremely straightforward.

Unscrewed the small bushing to reveal the o-ring.

Yeah, I probably could have done the entire fix without removing the roll pin, but I wanted to clean and inspect all the parts.

With a dental pick, the seal was out. It's lost it's elasticity. A few small cracks.

After all the years in the gun, it's difficult to accurately measure. A #006 o-ring looks like a good match.


Reassembly was simple.

Smeared the o-rings with a bit of Buzzy's Slick Honey. Gun works perfectly.

Note: I often get emails about where to find Slick Honey. Local bicycle shops can source it from the largest parts wholesaler, Quality Bicycle Products. QBP part numbers are: LU2004 1 oz--about $8, LU2005 2 oz--about $11. Super thin, seems to almost melt between your fingers. A little of this stuff goes a loooong way. Supremely tenacious, hard to displace. Will not harm o-rings. We use this stuff religiously in the shop on suspension fork bushings and seals to reduce stiction. QBP does not sell to private individuals.

More stuff soon.

Wednesday, July 13, 2011

IZh-60, Some Semi-Final Notes

I know that I need to address the lack of sights and the missing front plug in the stock, but first I thought I would add a few notes taken during reassembly.

07131102
The Piston seal. Look at how burned it is!07131101
The breech end plug.
07131103
I removed the ratchet pawl and spring for cleaning and lubing.07131104
Another shot.
07131106
As I may have mentioned, the bolt was hanging up in the breech when cocking. So I set it up on the Taig lathe and chamfered the end of the large diameter.07131107
I used this long center drill to debur the bolt hole transition.07131108
Much smoother.
07131109
I put a seal from the IZh-61 on the piston (seemed a bit loose) and the IZh-61 spring. Notice the proper orientation of the spring guide, which is really a more of a “top hat”, except it isn’t.
All reassembled and shooting at about 478 fps with Crosman premiers which is bang on the money.

Sunday, July 10, 2011

The Belgian Hy-Score Part--2

Got back to the Belgian tonight.

At first, I thought these were small nails someone tried to shoot that had fallen through the transfer port and embedded in the leather.

Then I realized they were pins that held the center leather washer to the cup seal.

Straightened them out, realigned with the holes in the leather washer and reinstalled.

Gave the leather a very liberal coat of silicone oil.

Deburred the cocking lever slot. Polished anything and everything important. ie: sear contact, center of trigger pivot pin, rear of piston...

Some moly on the trigger and the pin. Reassembled the end cap.

Replaced the bent trigger spring with something a bit lighter.

Rebuilt the plunger in the breech block then took a look at the smashed fiber seal.

The breech seal looks completely flat. I dug it out with a dental pick. Came out in a few hundred pieces. The groove looked like it would work well with a small o-ring.

Went through the various kits and came up empty. Found some that were close, but a hair large. Cut some sections out until I got a good fit in the groove.

Super glued the ends together and pressed into place. The curved metal bar above the breech is a built-in pellet seating gizmo. I'm holding it away from the breech for the picture. It's spring loaded to center on the breech when the barrel is cocked. A pellet is inserted like normal then the center of the "U" is pushed in. The pointed end shoves the pellet into the rifling to the same depth each time.

When the barrel is closed, the pellet seater flips up and sits on top of the breech block neatly folded out of the way.

Found a spring--probably a spare from an IZH-61. The ID and OD look good. Might be a bit too long.

As usual for low-powered guns, I like to use Buzzy's Slick Honey.

Reassembled in reverse of part 1. Cheated and didn't use the spring compressor. The spring tension was so light, it was easy enough to compress the spring and get a transfer punch through the pin hole then seat the pin afterward. The mainspring was exactly the correct length. Don't think it could've been 1/8" longer.


A better shot of the tapered barrel mentioned in Part 1.


You can see the pointed end of the pellet seater.

The trigger pull lost almost 2 full pounds of pull with the polishing and moly grease. The gun shoots even smoother than before--if that's even possible. Velocity, however, is only slightly higher. The gun is averaging 394 fps. About 60 fps faster than before, but still on the low side. If anyone reading this has a .22 cal Belgian, please let me know if I'm in the ballpark.

As the IZH-60/61 aren't powerhouses in .177 cal, I obviously didn't expect to see anything spectacular happen by using the spare mainspring. I suppose I could source a different spring and make a new guide. There's probably 50 to 75 more fps by going that route, but I'm having a hard time finding the motivation to hot rod the gun all the way up to, what? Well-under 500 fps? It's beautiful for what it is--so, I think I'll leave it at that.

Tuesday, July 5, 2011

The Belgian Hy-Score 801 Part--1

And still another of the Findlay, Ohio Toys that Shoot airgun show finds--a Belgian Hy-Score 801. These are really nice little guns made in the late 1940's through the 1950's by Piepers. Quite diminutive in every way if you cut your teeth on Feinwerkbau 124's and HW80's. But think slender and graceful--not dainty or delicate. There's massive amounts of checkering. It wraps the forend, the grip, even the butt is covered.

Been shooting the gun on and off for a couple months now, just putting a few pellets down the barrel each time it comes out. There's something cathartic about taking one of these and having to "aim off" a bit to hit the center of the target--or better yet a soda can at forty feet. The trigger is a direct sear connection and it's obvious with the pull ranging between four and a half to six pounds that some grease is required. I made the mistake of shooting the little Belgian over the chrony the other evening. It was a mistake because I'd been perfectly happy until I saw how dismal the velocity was. Barely breaking 340 fps with .22 cal RWS hobby pellets and I was hoping for at least 348...

So, the gun is old and a bit tired and needs some attention. The gun is so simple and has a minimum of parts.

The two forend stock screws and forward trigger guard screw were removed and the action separated from the stock.

There's the trigger spring. The end cap is a relatively hefty piece of steel.


The barrel tapers from breech to muzzle. Imagine the cost of making that today. I'll get a better pic of the barrel in the next post.

Looks like there's a single cross pin retaining the end cap and trigger. A short piece of PVC gave a better fit rather than a block of wood on the domed end cap.

Blurry, but the cross pin pushed right out with a bit of load on the cap.

Backed out the cap. There's a tube though the trigger block.

The trigger pivots on the hollow pin which also holds the end cap to the block.

The spring guide and the mainspring pulled right out. Not a bit of grease to be found.

Selected a transfer punch that closely matched the OD of the hollow pin.

A couple taps and it pushed through.

Really doesn't get much more basic than this. The trigger shape is the only true fault I can find with the rifle so far. It should have at least another half inch of setback to the blade. It's difficult to reach in the trigger guard--and I have large hands. I jealously look at the trigger blade position in Nick's IJ-22--the Russian designers nailed that one.

The mainspring is about 6-3/4" long. It's pretty straight--no pronounced cant.

The locknut on the pivot bolt was the only difficulty in disassembly. It was pretty tight and I didn't have a spanner that gave enough purchase.

Filed down a small socket until the tabs fit snugly in the notches.


With the locknut removed, the pivot bolt came right out.

Uh, grease anyone? Guess not. With the bolt out, the breech block came away from the compression tube. Fished out the end of the cocking lever.

Pulled out the piston and found a small surprise. A piece of broken off mainspring.

Only, the mainspring just removed has finished ends. Stranger still, the sliver of spring looks identical to the mainspring in size and metal finish. Is it a remnant of an earlier, original spring perhaps used as a spacer? Looks like I'll need a new (longer) spring.

Piston seal looks dry. Seems like the theme so far. Thought I'd given the rifle a pretty hefty shot of silicone chamber lube. Obviously, it wasn't nearly enough.

The sprue of leather in the center of the piston is from the transfer port hole. The hole is angled at the breech to the center of the compression tube. Note the two small metal pins or nails embedded in the face of the seal.

More soon.