Monday, July 20, 2015

Quick Look at the CP1-M CO2 Pistol

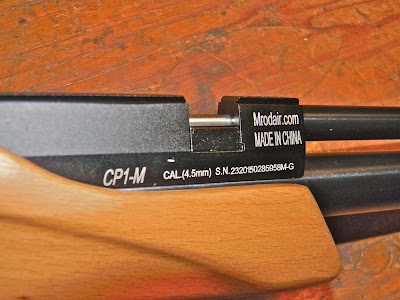
Bought a .177 cal CP1-M from Mrod Air.  It arrived last Thursday.  I've been a bit pressed for time, but I wanted to get a few pics up to maybe help anyone on the fence about getting one.  There aren't many images of the gun online--especially with the changes Mrod requested.


Grip is uncheckered.  I was grateful.  I thought the checkering on the original version cheapened the look of the gun. 


I'm sure I'll refinish the grip in the future--probably with some stippling.


Trigger guard is on the small side.  If you've got big hands, this is gonna be tight.  I've already got a chunk of aluminum on the milling machine table.  Can't see it without removing the grip, but the trigger is drilled and tapped for a sear adjustment screw.  A factory oversight/miscommunication prevented said screw from being installed  The thread is metric.  It's M3 x .5mm.   Mrod Air didn't catch the oversight on the screw until after the guns arrived.  Apparently, screws are being mailed to all who ordered.  If you can't wait, you'll need one about 4mm long.  It makes a big difference.


Front sight is steel.  It's screwed to the muzzle weight, which is in turn, attached to the barrel with a set screw.


Rear sight has a metal blade attached to a plastic body. 


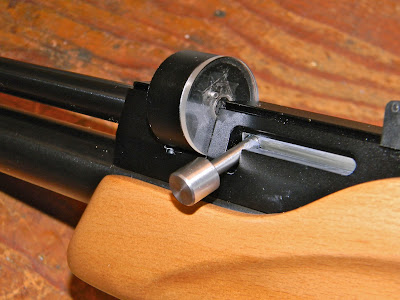
Haven't checked, but the bolt and bolt handle look like stainless steel.


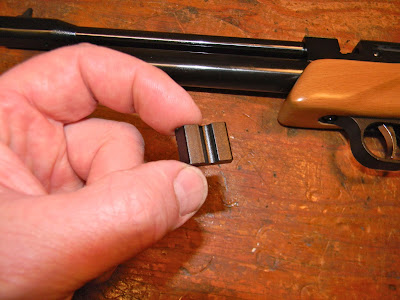
Here, I've removed the single shot tray.  It slides right out from right to left.  It's retained by a small rare earth magnet.


The aluminum single shot tray.


Bottom view.


One of the 9 shot .177 cal magazines.  Black anodized aluminum and plastic.


Installed.  These are also retained with magnets.  You can swap back and forth between the single shot tray and a magazine in, oh, about 5 seconds.


Can't tell from this angle, but the magazine presents absolutely no interference with the sights.


For comparison's sake, the CP1-M magazine is on the left next to a Benjamin Marauder mag.


Quick notes:  The pistol points more like a European 10 meter or .22 cal target gun than a Colt 1911.  The grip angle forces you to drop your wrist to line up the sights.  I'm a big fan of 10 meter match guns, so I like it.   It was very quiet at first.  So quiet, I was skeptical about the velocity.  A quick check on the chrony showed it to be in the mid 360 fps range with RWS Hobby pellets.  Added a second spring inside the hammer spring, and the velocity went to 518--525 fps with those same .177 cal Hobby pellets.

I'll have some additional info here in the next few days.  Thanks for reading.

Monday, July 6, 2015

An Extra Pellet Sizer

Been temporarily waylaid from the QB project with a nagging neck/shoulder injury.  Nothing serious, just annoying enough to not want to spend time sanding.   Figured out something to make.

Is pellet sizing coming back?  There have been several threads lately on the Yellow Airgun Forum regarding pellet sizing that made me recall my old Beeman Pell-Size.   I've got a couple of guns that seem to benefit from pellet sizing--enough that I modified my plunger to make it easier to use here


Here's the old pellet sizer. 


Over the years, I've had to add a few additional set screws to better retain the sizing die.


Here's good pic of the die.  The die is just the steel insert that the pellet is pushed through by the plunger unit to resize the soft lead pellet.  Dies with different hole ID's are swapped in and out of the unit as needed.  A couple decades ago, these were available from Beeman's in graduated sizes within each caliber.  For example, .177 caliber dies were offered in .1785", .1780", .1790" and .1800".   At one point, eleven different dies were offered spanning the .177, .20, .22 and .25 caliber spectrum.   The idea was that resizing the pellets would help with uniformity leading to greater accuracy.  The recently released Pelletgage tool ( I have no affiliation) makes it easier to help sort pellets by head size...


I've got five dies to cover my (perceived?) caliber needs.  Since we all like instant gratification, changing the die head in the plunger handle is not on my to-do list when I just want to shoot.  The little allen wrench is never handy and it's, you know, not... instantly...gratifying. 


I'll likely use two of the dies the most--that means I'm one plunger assembly short.  Being off the market for so long, the sizers now bring collector prices.  That's fine, but I don't want to collect pellet sizers.  The plunger unit itself is pretty simple--just an aluminum outer sleeve with a delrin plunger.  The dies, thankfully, all have a 1/2" OD.  So that makes this project pretty easy.  I had a piece of 3/4" OD aluminum tubing with a 1/2" hole in my meager metal stock.  A 5' piece of 1/2" delrin (also known as acetal) was sourced for about $7.  


Chucked the .750" aluminum in the lathe and ran a .500" reamer through to clean up the hole and make sure it was round and true to size.


Mounted the aluminum tube in a 5C collet and a square collet block.  Set it up in the milling machine.


Adjusted the limit stops for the length of the cut.  Just eyeballed it--this looked about right. 


With a 7/8" endmill, I side-milled the cut for the pocket.


Stopped when I was about halfway through.  Again, more eyeballing.


Rotated the collet block 90 degrees and centered with my quick and dirty center-finder.


Milled a 0.125" slot for the plunger retaining pin.  This'll let the plunger open a bit further than the pocket alone.


Without moving the Y-axis, I cranked over and drilled for a set screw to hold the die.


Tapping for the set screw. 


Out of the mill and back to the lathe.  Parted off.


Next, chucked the delrin and eyeballed the pellet pushing end.


Spotted, then drilled about halfway through the delrin plunger with a 0.125" bit for a stop pin.


An odd set up:  My Taig lathe jaws are bored out and will not currently hold stock as small as 0.125".  Rather than replace the jaws, I chucked a short piece of .125 drill rod in a pin vise and clamped the pin vise in the lathe chuck.  It's a quick work around when no real accuracy is required.  The piece is only about 5/16" long.  Just a tiny pin.


Almost done.  Here's the housing after minimal clean up.


The delrin plunger, the tiny stop pin and a spring from the local hardware store.


Plunger goes in here...


Pin into the hole.


Set screw locks the die in place...


Spring will go here.  The delrin was left purposefully too long to allow for some trial and error length adjustment.  Aside:  The "standard" Beeman sizer forgoes the spring.  However, having the sizer pop open automatically for the next pellet is a really handy feature.


Found this 1/2" ID steel ring with a set screw.  It's probably a bushing for a drill depth stop. 


Whatever it is, it fits and it'll keep the spring attached to the delrin plunger.  


Back to the lathe with the aluminum housing and hit the end with a "scissor-type" knurling tool.


The diamonds formed up nicely.


The drill bushing.


The knurling isn't true to Doc Beeman's original, but I think it's a useful touch.

Thanks for visiting.