Special thanks to Dan, Angie, and Dave and everyone else for bringing this great event to the Midwest for almost a decade.
Almost done with the Crosman MK2. The pistol needed a front sight, and I couldn't find a suitable piece of flat stock in my scrap box. Eventually, gave up and used a piece of round free machining steel. Need to turn it into a rectangle, then into a sight.
Faced the ends in the Taig lathe.
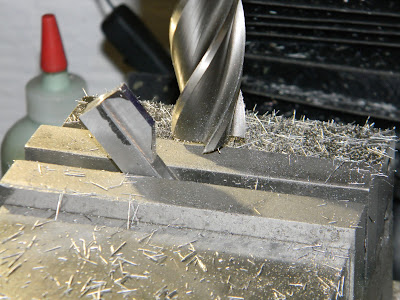
Clamped it in the mill on parallels and milled the top flat.
Here it is after a few rotations in the milling vise.
Final pass and I had a rectangle.
Found center.
A couple passes with a 7/8" ball mill gave the correct radius to fit the shroud.

Wanted the width of the sight blade to be around 0.150"-- or roughly 3.8mm. Figured I'd use the gun on 10-meter pistol targets and 3.8 to 4mm is usually in the ballpark for me.

If you can cut one side to depth, turn the work around in the vise and cut the opposite side, there's no need to touch the Y-travel on the machine. Can't do this on heavy cuts, but it worked here. Gonna leave the blade absurdly tall and cut it down after doing some shooting.
Milled the back edge of the blade. Just stuck the sight in the vise and eyeballed an angle and the depth of the cut.
Still too tall, but I cleaned up and finished the base with various hand files.
Found center and spotted for a mounting screw.

Through drilled.
Countersunk.
Found center of the shroud as well as the amount of setback from the front edge (including the thickness of the endcap) and spotted.

This drill bit is about 0.098"--roughly 2.5mm. I first installed it in a pin chuck.

The pin chuck is then held in the larger chuck.

Tapped the shroud M3 x 0.5mm. As much as I hate to mix imperial and metric thread on a gun, the wall thickness of the shroud dictated a finer thread pitch than I had on hand (or wanted to attempt to track down) in imperial. Metric was the logical choice as I had both the tap as well as an assortment of suitable screws. Had I gone with imperial, I'd have needed something like a #5-40 or #5-48. There's nothing available at any local hardware store in those fastener sizes.
Took off most of the blade height, but that's easier than starting from scratch.
The procedure is simple: Shoot the gun, look how low the POI is, file (or mill) the sight down and shoot some more. When the POI is centered on the aim point, it's done.
Blued the blade. A 10-shot quick group confirms the height is correct.

Above a Ruger MK2 Government. The Crosman is a touch longer, but the balance is about the same due to the MK2's hollow shroud vs. the Ruger's solid bull barrel.
A coat of black gloss epoxy paint on the shroud. Blued the endcap.


A few parting shots.
Next up: Rebuilt a co-worker's Crosman Quest 1000 spring piston rifle. Should have the post ready in a few days.


No comments:
Post a Comment