So, after almost three years of looking, I was finally able to pin down a .25 cal barrel/breech block last week. The replacement Weihrauch barrel assemblies don't come with a cocking lever arm attached. The cocking arm is riveted to the bottom of the breech block. A spare rivet is not provided--but can often be ordered. I opted to not order the rivet.

No pics of rifle disassembly as we've covered it before here. I pounded out the rivet holding the cocking lever to the .22 cal breech block and set the .22 cal assembly aside--maybe for good.


Often, the rivet can be reused, but not this time. The pin has a 5mm shaft diameter.

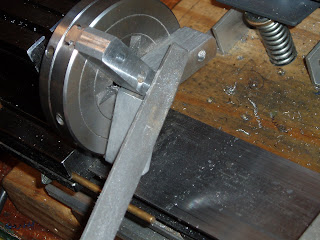
Lacking a piece of metric drill rod, I turned down a piece of 0.250" W-1 steel to the required 5mm diameter. Actually, it needed to be 4.99mm.

Cut the new pin a few thousandths longer than the width of the breech block.

Used a file to bevel each end into a slight dome.

I've seen a couple one-off replacement cocking lever pins that have used e-clips on each end. That looked like it would require widening the slot in the forend of the stock. Too much work for a guy like me. Figured there was another way.

Center punched the breech block.

Didn't bother to fixture the breech. I lined up and drilled through with a #36. Not shown: Tapped the hole with a #6-32 plug tap.

Filed a small flat on the pin for the set screw to bear against. This will lock the pin in position yet make it easily removable.

Breech block, pin, set screw and cocking lever. What more could a guy ask for?


Blued the pin with Birchwood Casey Permablue paste.


Set screw snugged down. Lucked out on the length of the screw. It's flush with the block. I like this more than the factory's method of assembly.

Done! Reassembled the rifle and now I can work my way through those thousands of .25 cal pellets that have been mocking me on the shelf. Should I ever want to revert to .22 cal, it's now a ten minute swap with the replaceable pin.
Something else soon.

4 comments:
Dang...
That's a great idea! I never would have thought of adding a setscrew to hold a linkage pin like that. Hope you don't mind if I steal that idea sometime.
It's not like any of us alive today can lay claim to most of these ideas. The flat on the pin is important for the setscrew to bear otherwise you bugger up the shaft of the pin and won't be able to slide it out of a close tolerance hole.
Derrick
So how does it shoot now? Does it measure up to your previous .25? That must be a rare gun in that caliber.
I read one of your older posts recently where you used copper anti seize paste in lieu of moly. Would you recommend using this? I have a ton of it. Also, is there anything you know of that can be used as a substitute for heavy tar? I know the lubricant by itself can't be that expensive, it must be those tiny little tubs.
SL,
Love it. Shoots big pellets into small groups.
I've used copper anti-seize on several spring piston guns and been quite happy with the results. Beeman used to include some with their R1 upgrade kit.
There's lots of greases out there that work quite well. The moly based "open gear greases" should work well as a heavy tar substitute.
Post a Comment