
The tank is no problem, as I have one or two around here somewhere. Though, I've been using paintball tanks and an adapter to fill my bulk guns. I can only imagine the lecture Dan would give me at Underground Sports where I get my tanks filled. I'll take one down there next time just to raise his blood pressure.
Anyway, the gun works, but the finish has seen better decades. Want to tear it down, check out the seals, massage anything that looks troublesome and respray the metal.

Odd, but the old grips look really good considering the rest of the gun has been dragged behind a truck.

With the grips off...

The grip frame goes next.

Two retaining bolts for the gas tube plug were removed.

There's a power adjuster. Nice feature for a gun from 1950-something. The hammer spring came out, too. The spring looks kinda ratty. I'll scrounge up something to replace it.

Bolt and hammer

Top of the bolt is grooved for the cocking pin.
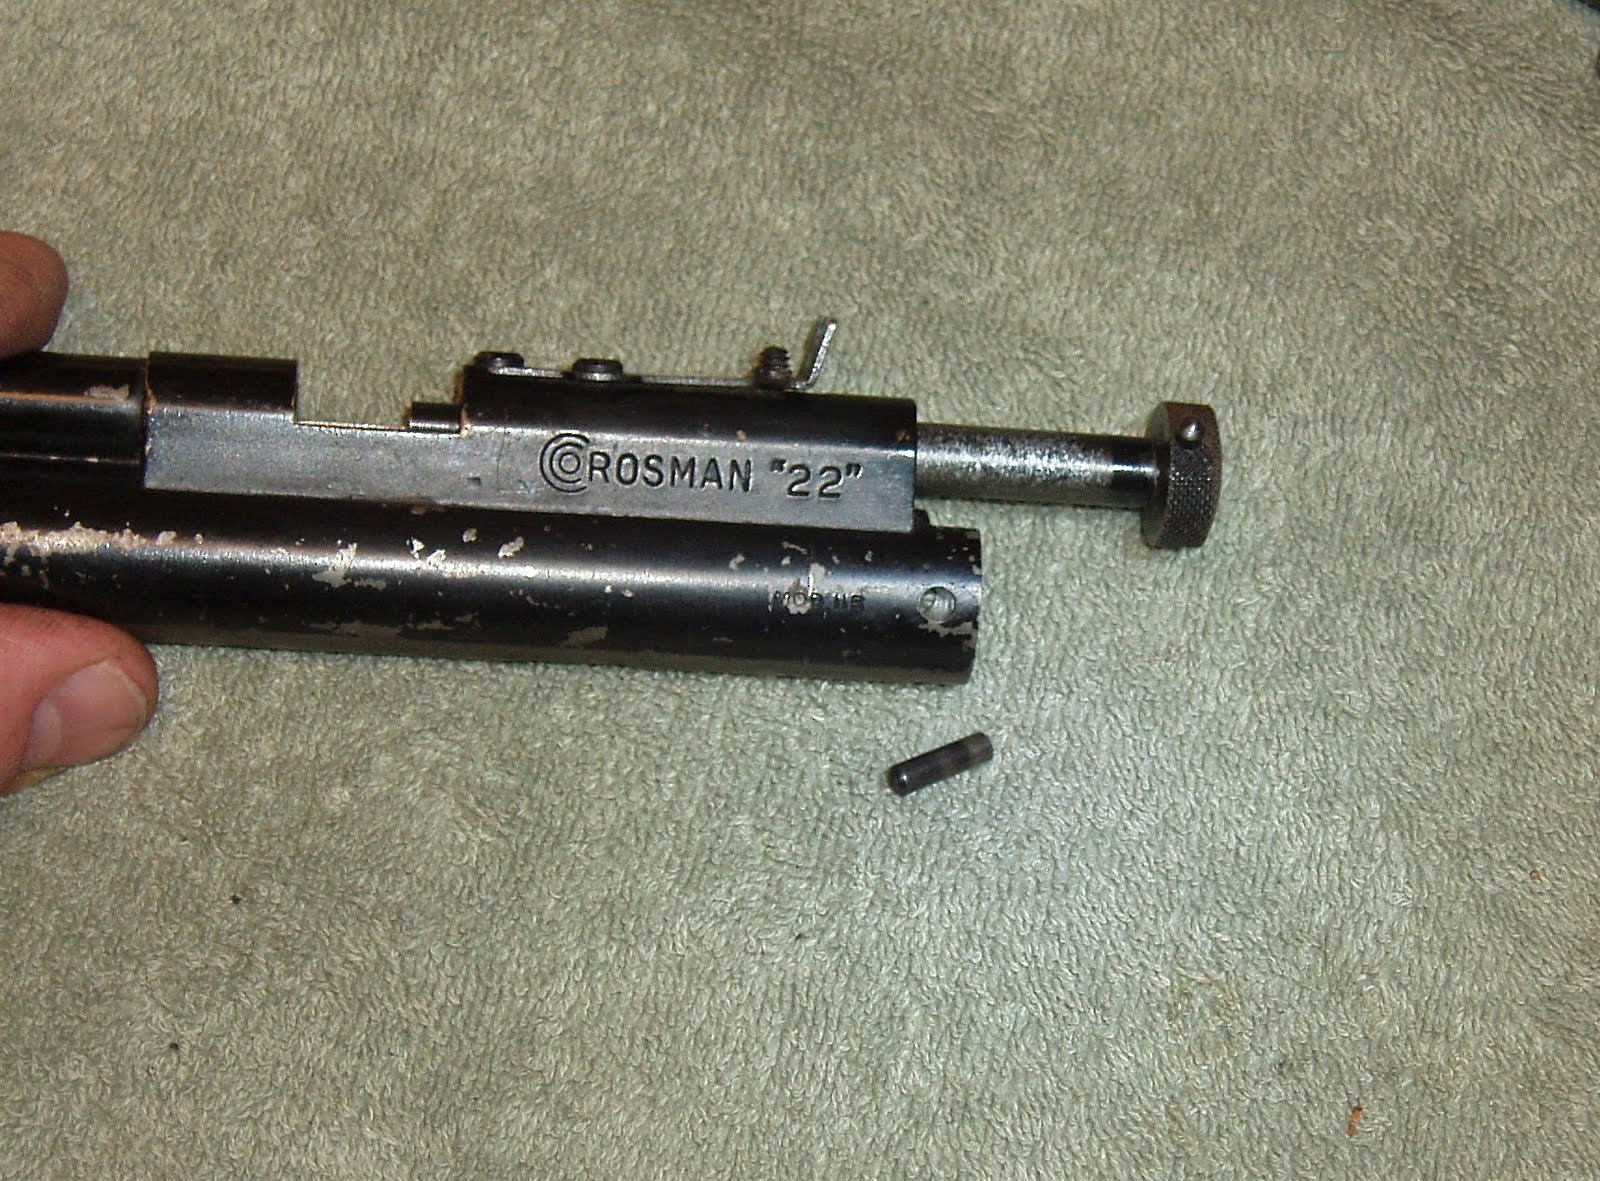
Speaking of which...

And the bolt came out. Notice the protruding spring. There's supposed to be a small ball bearing at each end of the spring. Yeah, the bolt rides on bearings. Another nice touch.

Rear of the bolt.

Just for posterity, I took it apart.
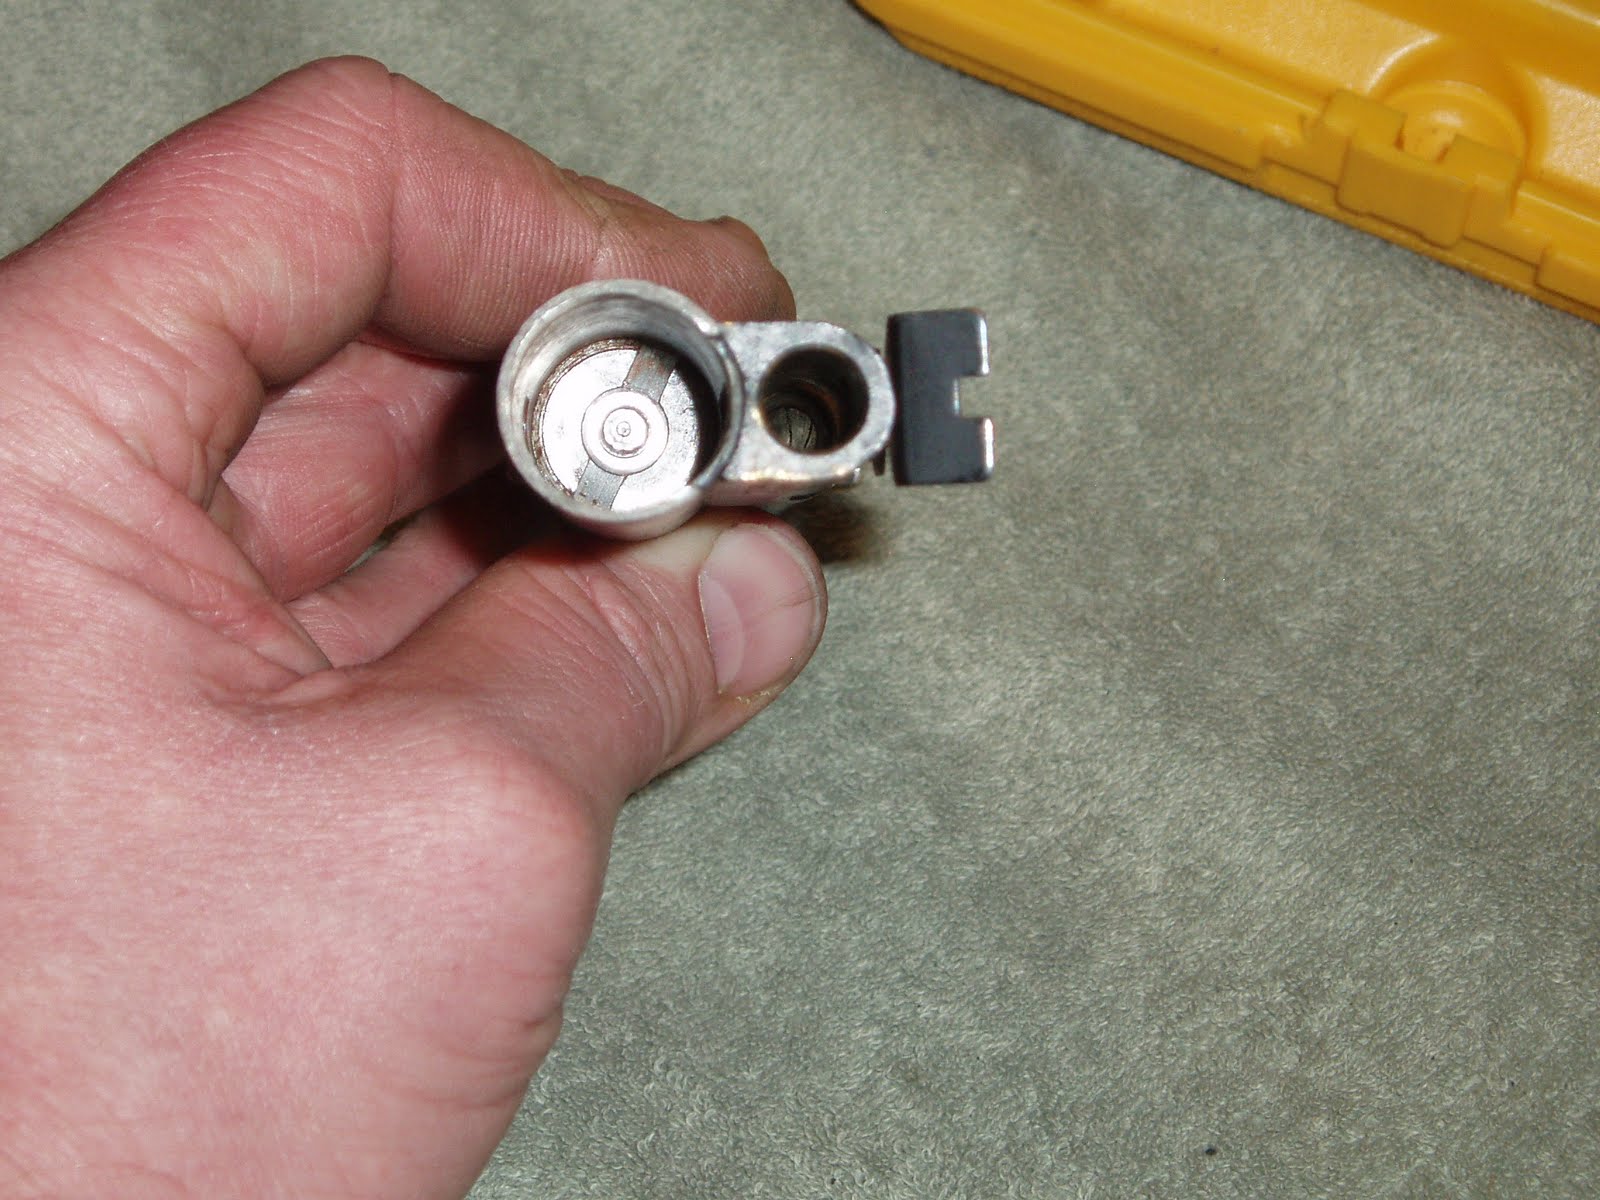
The valve. It needs a two-pronged spanner for removal. I tapped the valve pin several times with an aluminum rod to make sure there wasn't any gas left in the tube.

Next up is the bulk-fill cap.
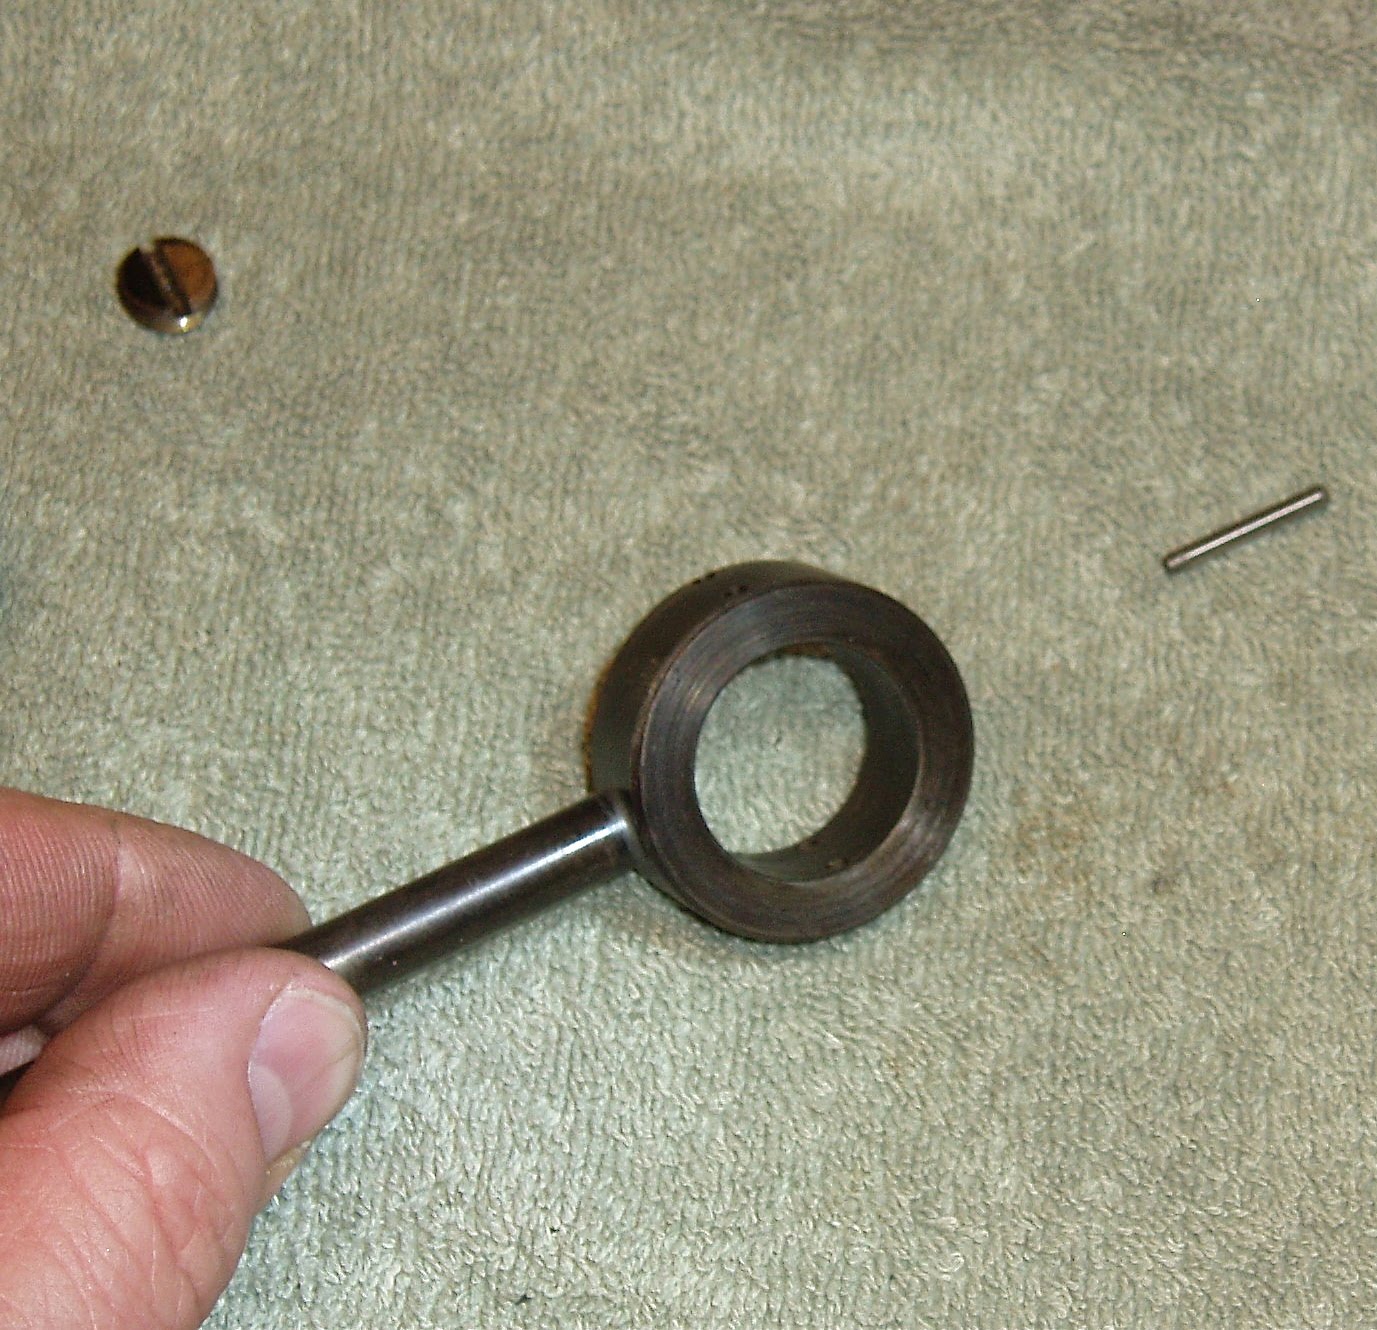
A few years ago, I bought a removal tool from eBay or the Yellow Airgun Classifieds. It's simply a ring of steel with a small handle.

A few holes drilled through the side accept a small steel pin.

Tool goes over the cap, pin through the tool and into the cap's vent hole.

The cap is then unscrewed. I think that sliver is the remains of the seal. That was probably at the base of the cap's threads. A small o-ring or maybe just some teflon tape should do the trick upon reassembly. I'll worry about it later.

I think all that's left is the valve. I sacrificed a 13mm socket. Cut and ground it until the notches fit the valve nut inside the gas tube.

Blurry, but you get the idea.

The retaining nut.

And the valve parts. The valve body is soldered into the gas tube, so that's that.

Ah, and I had to remove the front sight.
I'm going to strip what's left of the finish off and hunt down some crinkly, wrinkly, krackly kinda paint.
More soon.

3 comments:
Woot for "crinkly, wrinkly, krackly kinda paint." Looking forward to what you come up with. I just got a C 150 to fiddle around with, and it's needing some vintage paint repair - and a power boost too.
Replaced all the seals, still barely sinks a 22 pellet into soft pine. Stuck a C 1400 barrel on there, slightly more guts, but no real glory. My QB78 blows through the same piece of pine and leaves an exit wound the size of a quarter. Dunno what to try next.
I am having trouble w the placement of the cocking pin and it’s is driving me ca
crazy since it seems as it should be so simple. I got the .22 model 116 from my grandfather and took it apart to restore it but because of it seemingly simple build did not pay as much attention as I should have. Any help you could provide would be greatly appreciated. Michael.
Hmmmmm it's been a while since I've worked on a 112 or 116. Pretty sure the bolt with the spring and bearings goes in first, then the cocking pin in installed with needle nosed pliers into the bottom of the bolt by reaching in the gas tube--maybe try holding the gun upside down for this. Finally the hammer is installed followed by the hammer spring and end cap/power adjuster. At least, thats how my squirrel brain remembers it.
Post a Comment