
I'd never seen one up close before. I did some quick research looking at velocity and basic operation. I also found a V-3 schematic on a Spanish site.
The V-3 weighs just over a pound. The slide is metal, while the frame and grips are plastic like many modern autoloaders. Feels light--but doesn't feel "cheap".

Installed a 12g CO2 cartridge and loaded the magazine. The first shot literally dribbled out the barrel. Wheeeee! The second shot sounded good. The next--more dribbling. The bbs made it about 12 feet. Mostly by rolling across the tile floor. Not quite every other shot was like that. The trigger pull was pretty high--seemed like it broke around 15 pounds. The gun also has fake "blowback" where the slide moves rearward during the trigger pull. But not, um, realistic.

Removed the "magazine". The mag houses the CO2 cartridge, valve and bbs. Set the mag aside-- I'll rebuild the valve in a few minutes.

The slide is removed by first pulling the trigger about half way then pulling the slide backward then upward at the rear, lifting it off the frame.

Barrel and spring slide out. Whoops, the barrel is upside down in my pic. The rectangular positioning lug should have the long side facing down.
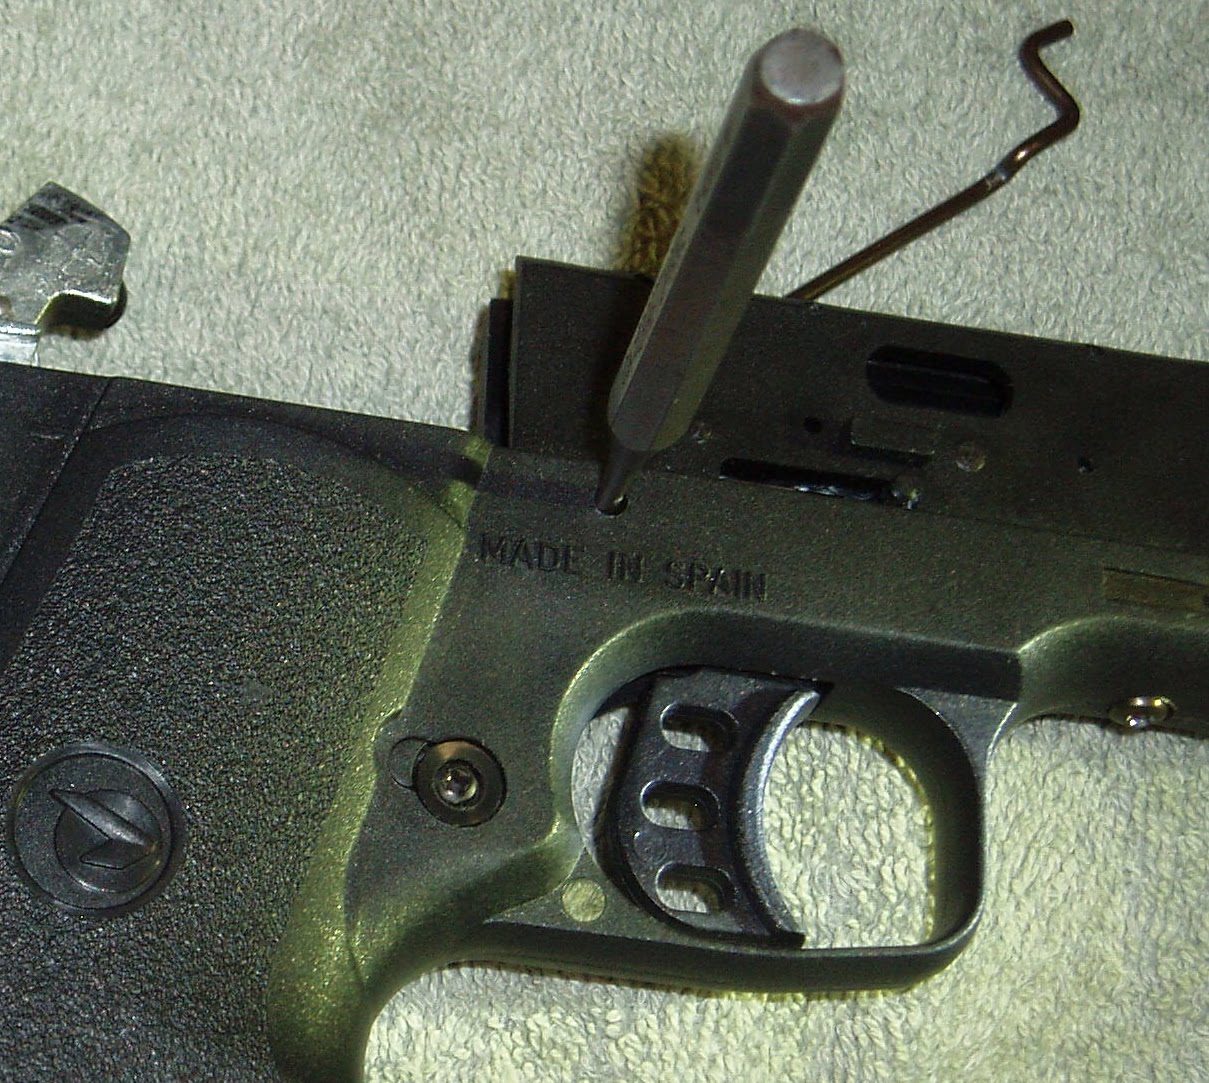
Pushed out the cross pin holding the rear of the trigger group. It's a friction fit.

Removed the small screw on the underside of the front lug.

Entire trigger pack lifts right out.

Trigger felt absolutely fine so I didn't take it apart any further. I cleaned the gummy factory grease out of the unit...

And relubed it with Buzzy's Slick Honey.

Reinstalled.

Back to the magazine. There's a small catch at the heel that opens the floor plate. Inside the floor plate is a thumbscrew for the CO2 cartridge. I emptied the cartridge and removed it.

Pushed out the cross pin the floor plate hinges on. Slid right out.


Then removed the three tiny phillips head screws...

And the magazine halves separate. The center piece is a spring loaded cover that pops up and covers the CO2 valve pin when the mag is removed from the gun. I assume this is so you can't drop the mag on a hard surface and fire a bb right out the front of the mag.

Valve and strap assembly lift out.

These pull right off the valve unit.

Like so. Looks exactly like the valve Nick repaired on that PT-80 fiasco.

Nick would notch a strip of steel. I've got a Campagnolo chainring nut tool. Just unscrew the brass valve cap. Total bicycle dork notes: Only the Campy tool will fit. The similar looking Shimano, Sugino, and Park tools all have a peg in the middle of the tool to center on the chainring bolt. I don't know if the VAR will fit. Doesn't matter. The VAR tool is probably 30 years old anyway and will fetch collector prices. So, notch that steel, Nick. You're on the right track.

Cleaned up and ready to go back together. Nothing really unusual in the valve to account for the weak shots--just a small amount of grunge. There's a third steel washer not shown in the pic. And, wow, that valve spring seems awfully stiff.

Put it all back together in reverse. No real tricks to the reassembly, except to note that all the parts fit into the right side of the magazine body--and don't forget to align the bb follower like I did the first go round.

One nice aspect is the mag can be gassed up outside the gun. Makes it much faster to spot a leak and pinpoint the exact location.

Barrel slid into place and the long end of the lug is in the correct spot.

Goes back on in reverse. Fit the muzzle end first and pull the slide back compressing the barrel spring, then hook the back of the slide over the rear frame rails.

Like so, then press the slide forward and it's done. Note the slide lock safety.

The magazine loaded. Fifteen bb's--or .177 cal lead balls--can be used. Almost forgot--this gun has a rifled barrel. In theory, that means better accuracy but the heavy trigger pull and fake blowback movement effectively kill whatever accuracy could've been gained.
Anyway, I slapped the magazine home and just like that--the gun worked fine. So what fixed it? Pffffffttt? I've absolutely no idea. Perhaps one of the internal components was slightly out of position and the tear down and cleaning was all it took?

I thought it was a bit too plain Jane, so I filled in the lettering on the gun with white enamel.
There's a mark about the size of a dime on the left grip near the top. I think it's superglue from a pressure switch. Guessing that Mike had a small laser or light mounted on the accessory rail on the bottom of the slide.

A bit of acetone took the glue off. Can't tell it was ever there. I did finally manage to check the trigger pull with a gauge. It varies quite a bit and breaks between 11 and 13 pounds. Lighter than I thought!
I think this gun has a bad rap judging by the reviews that I've read. Forget about it as an airgun. It's not "target" accurate enough for most of us due to that trigger. The trigger pull is too high for most kids, too, so it's not really for them, either. So, I finally figured out what to do with it. It looks like a great practice tool if you carry a concealed handgun--especially if your primary carry gun is DAO. In that scenario, the trigger pull isn't a big hurdle. I've shot several of the various Kahr K/P series guns and don't think there's much trigger difference compared to this gun. Same goes for the Glocks fitted with New York triggers. And the trigger pull would certainly be safe(r) when practicing drawing from a concealed holster and putting rounds downrange. The gun's modern shape especially lends itself to fit a ton of different concealment holsters, as I found out.

I rummaged through the holster pile and came up with a few good candidates to practice with. Fits really well in a size #16 Uncle Mike's Super Belt Slide model.

 Perfect fit in a very early model Galco SOB.
This one carries horizontally in the small of the back.

And it worked fine in a minimalist Yaqui slide style.

I think this is a first generation Yaqui model from Galco. What can I say? I like options.
Thanks again, Mike. Awfully kind of you to send off your old airgun to a guy you've never met.
More stuff soon.

1 comment:
Right on the money Derrick, that was super glue on the side, for a pressure switch. It cleaned up real nice, and looks good in those holsters!
Post a Comment