Wednesday, December 14, 2016

Mounting a Red Dot Sight on the Aeron B96 Part 2

Picking up from Part 1 

Finished the adapter by drilling and tapping two M4 x .7mm threads.


Gave it a coat of cold blue.  Normally, I'd polish out the machining tool marks, but it'll all be hidden by the scope base. 


Worked out the hole locations in the base to line up with the adapter and drilled away.


Flipped over, picked up the holes and counterbored.


Guess I took this pic before blueing the adapter.  Anyway, here's all the related components.


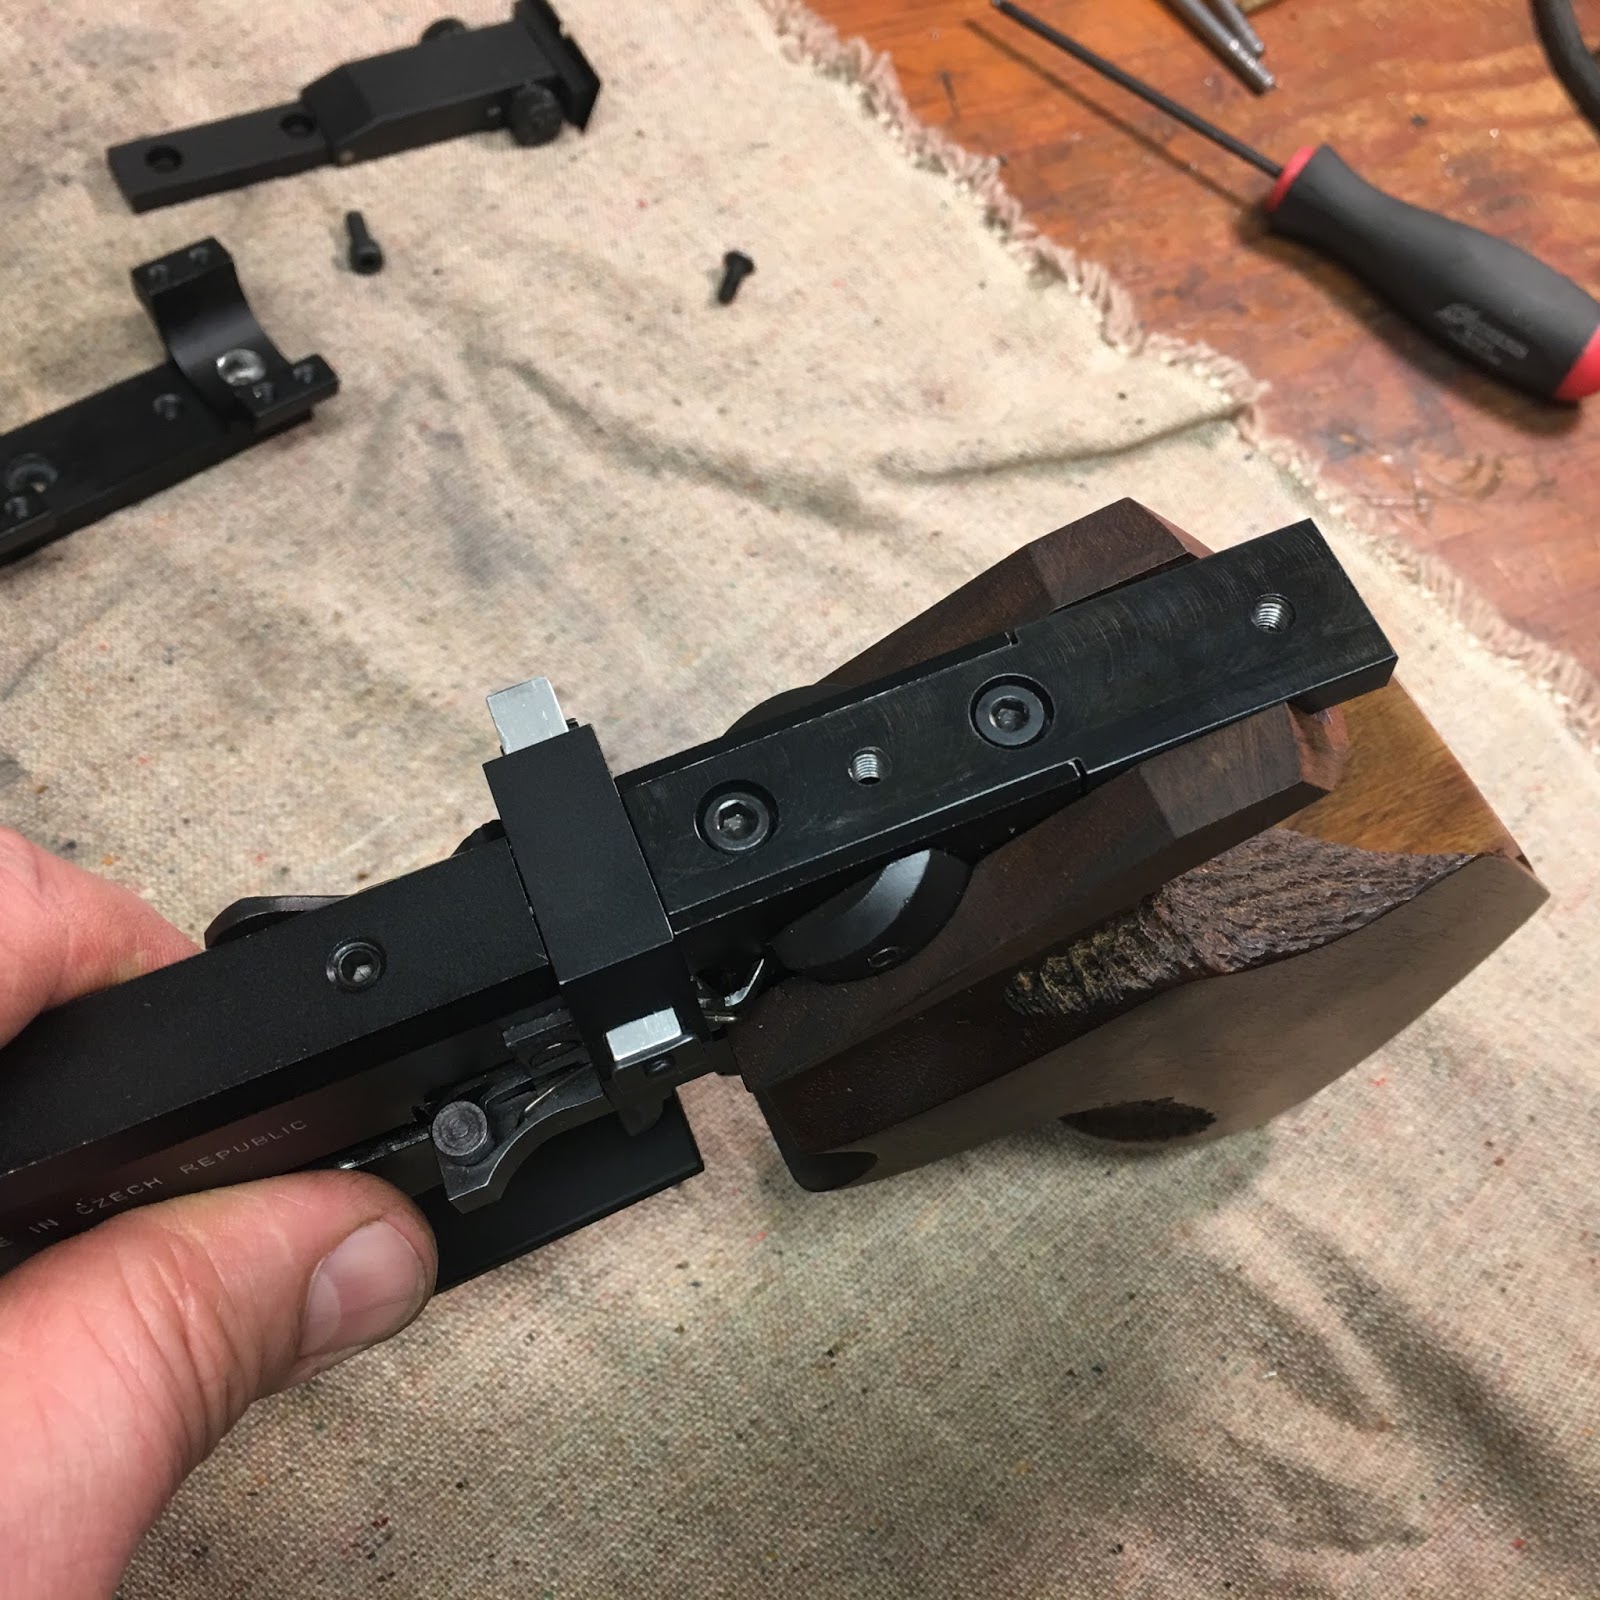
Ahhhhh, there's the blued adapter.   The adapter replaces the rear sight.


The scope base bolts to the adapter.


Blends in almost perfectly.


And, finally, the red dot is mounted nice and low to the bore axis.   A few sighting shots later, it was dialed in.  Should I ever need to add a picatinny rail to the pistol, it'll only take a few minutes to cut a piece to length and drill two holes.  And in even far less time, the iron sight can be refit and the pistol returned to original condition.

Monday, December 12, 2016

Mounting A Red Dot Sight on the Aeron B96 Part 1


Hey!  Back after a loooooooong hiatus.  Recently purchased a small red dot sight from Millett.  Thought its compact and lightweight size would make for a nice addition to a 10-meter style pistol.  The only hurdle?  Most 10-meter pistols have zero mounting provisions for anything save their iron sights.


I thought the five shot, semi-auto BRNO Aeron B96 would be an interesting pistol to adapt. It's a great trainer for rapid fire .22 pistol so the red dot would make it similar to the guns used for bullseye pistol matches.


Removed the two screws holding the rear sight.


They're M4 x .7mm thread.


The sight fits into a pocket in the frame.


Here's the Millett SP1 dot and a small selection of picatinny, Weaver, 11mm dovetail rails/mounts and assorted junk stuff on hand.   


The original sight has a width of 0.5515" at the forward end and 0.705" aft.  The pocket depth was about 0.230". After measuring all the various options on hand it became pretty clear that an adapter plate to fill the pocket would be necessary.  


This 1"/11mm UTG offset mount was also selected from the pile for my carnage.   Reasoned that it would be lighter than a separate rail and a set of rings.  Especially after I mill the dovetail clamp off.


Struggling to hold the mount, I used small insert vise to clamp the mount then clamped the insert vise into the milling vise.  Used a shop made fly cutter...


And shaved the mount down until it was completely flat.


Leaving this.


Checked the bottom to the lowest part of the radius at each end.  They're within half a thousandth of each other.  


A small piece of 12L14 free machining steel will be used to make the adapter.   I'll mill the thickness first.


Found some parallels.


They're used in vises to get short work above the tops of the vise jaws.


Here's the bar of steel  on the parallels clamped into the milling vise.


A few minutes later, the bar was 0.236"  Roughly 0.005"/0.006" taller than the pocket in the gun. 


Milled the 0.705" width down next.


I intentionally left the end hanging out of the vise to make it easy to measure as I worked it down.


Now we're here. 


The scope mount--I think it's now just a scope "base" will be bolted to the adapter, which will be bolted to the gun.


If you look at the pictures #3 and #4 above, the original sight is narrower in the front and wider in the rear--at the grip.  The front needs notched to fit.  A stop was clamped to the fixed jaw and the work butted against it.  The vise stop allows the work to be removed and relocated to the same place in the vise. 


Milled the first side.


Flipped the part over and cut the same depth/length on the second side, finishing at 0.550"-- a bit under the 0.5515" for some additional clearance.


Now I've got this cute little plate. 


That almost press fits into the gun's rear sight pocket.


Measured the hole locations from the gun and transferred that to the adapter.  Spotted, drilled, counterbored to recess the screw heads.


Uh, twice.


After I add a couple threaded holes to this plate, I can simply drill mounting holes into the scope base.  If that doesn't work out, I can drill a chunk of 11mm dovetail or picatinny rail.  With this adapter plate, the top of the gun becomes modular.

More in a couple days. 

Thursday, April 28, 2016

Tony DeMurray’s MMM Mondial Roger BB Pistol Repair

Tony DeMurray sent me the following showing his repair of his MMM Mondial Roger BB Pistol:
MMM Mondail Roger BB Pistol
Since parts are difficult, if not impossible to come by, workarounds have to be done.
Problem:
Air gun leaks in two places:
Piercing pin
Valve assembly
The reader should refer to Nicholas Carter’s blog pages as to how to disassemble and reassemble the gun. He has great pictures and good commentary.
First, let’s deal with the Piercing pin area.
Since original seals are hard to come by, I used one from Walther Makarov pistol.
mmmpic1
The green end seal is from a Makarov.
This seal requires the center hole to be slightly enlarged to fit snuggly around piercing pin. Also, a little sanding to reduce the outer circumference is needed for a good fit. (I’ve read where some put pipe tape around the threads of the collar. I did not)
Secondly, let’s move to the valve assembly area.
mmmpic2
The original seal was virtually gone.
The stem is pushed out.
The little O-ring in the base discarded. Its function of sealing the back stem inside the cap is not needed.
The cap is ground down to remove any lip. Again, not needed since original valve seal is unobtainable.
Clean the valve stem. Notice the vent opening.
I made a valve seal from 1/8th Urethane/Polyurethane sheet. (Red)
Cut out a 1” X 1” section from the sheet
The center hole was drilled out to fit around the large part of the valve stem. I used a #3 0.213 drill bit.
(place the collar back onto the valve stem, insert into the drilled hole and circumscribe the outside diameter using an ultra fine point Sharpie.)
This outside circumference including the black ring was trimmed using an Exacto knife.
Do not cut inside the black ring. Trim the outside only enough to allow the seal to fit into the cup cavity.
It is necessary that this seal is a flush fit to the sealing ring inside the valve body.
Assembly the valve stem, seal and cup.Notice how the seal comes up to the vent on the shaft.This is a critically important assembly step.
mmmpic3
I drilled a 7/32nd shaft into a dowel. This tool helped to push the seal around the stem and into the cup.
mmmpic4
Notice how the valve stem is almost flush with the end of the cup.
Disassemble one last time.
Put a small drop of metal Epoxy into the small hole. This is going to hold the valve stem in place and seal up that end of the cup. (This is why the little O-ring was no longer necessary.)
Reinsert the valve stem to the original depth. Don’t worry about a little dome of epoxy. The spring will fit over it.
mmmpic5
Let cure the appropriate amount of time.
mmmpic6
Insert the seal flush with the edge of the vent and level. Do not worry if cup was not ground level.
Insert valve stem assembly into air valve housing.
Try blowing into the piercing pin and moving the hammer. Even if properly sealed, a very small amount of air escape may be notice. The CO2 will supply far greater pressure to fit the seal.
If not, disassemble and reseat the seal again. It took me three tries to get it right.
Reassemble gun. (I had significant trouble getting the barrel out. I took a Dremel tool and ground off the painted surface from the tip and a little more so that the barrel would slide into the housing. The set screw is all that is needed for a firm fit.)

mmmpic7
This is very important!
Place the gun in the Open position. This takes the pressure off the hammer.
Pierce a CO2 cylinder. A slight hissing will occur until the neck of the cylinder is sealed by the end seal. Then, the valve assembly will jolt into its sealed and ready position.
Load BBs. And remember, this is not a pure repeater. Each shot requires the gun to be pointed up to drop a BB into the loading chamber.