Thursday, August 23, 2012

Custom Crosman Breech--Part 6 Rework and Loading Bolt

The loading bolt is up next.  Cut off a few inches of 0.250" diameter drill rod.


Chucked it in the Taig and cleaned it up.  Started to turn down the end for the loading probe.


This has to carry the pellet from the mag into the breech and seat the pellet into the rifling just in front of the transfer port.  Didn't like it.  Started with another piece of metal.


Playing with the shoulder just past the tip.  Needs to fit the o-ring in the breech end of the barrel.  Didn't get very far, but scrapped this one, too.


Changed cutters and another piece of steel.


Getting there.


This looks promising.


Except it doesn't work.  The barrel and the bolt boles in the breech aren't aligned quite enough to work.  Looks like the 0.250" drill bit wandered while drilling the through hole.  It's just enough that the o-ring in the barrel isn't going to pressure seal to the bolt.   Had to stop and regroup.


Clearly, I need to re-drill the hole for the loading bolt from the muzzle end.   It's difficult to re-drill a hole in a slightly different location as the bit wants to simply follow the old path.  Going to go up a size to 3/8" and hope the larger diameter (and accompanying boost in drill bit rigidity) is the solution.  Also concerned that the extra-long 3/8" bit will wander all over as it passes through the 7/16" bore of the breech.  I'll make a drill bushing that acts as a guide.  Polished up a couple pieces of hobby brass tubing.  I sleeved a few pieces of the tubing to get a 7/16" OD--for the bore of the barrel with a 3/8" ID--to guide the drill bit.


With a 7/16" aircraft bit chucked and slid into the breech for alignment, the breech was blocked, shimmed and clamped to the table.  Removed the drill bit and chucked a spare Crosman barrel.    Moving the x-travel on the carriage slid the barrel into the bore of the breech verifying alignment.


A 3/8" aircraft bit.   Checking the ID of the bushing.


Pressed the bushing into the breech, and chucked the 3/8" bit.


You can see how much breech that 3/8" bit would have to travel unsupported until it hit the bolt hole.


Contact.  Kept it flooded with cutting oil and constantly stopped to clear chips.


Break through.


The only additional re-work on the breech was a slight deepening of the counterbore for the rear hold down screw.


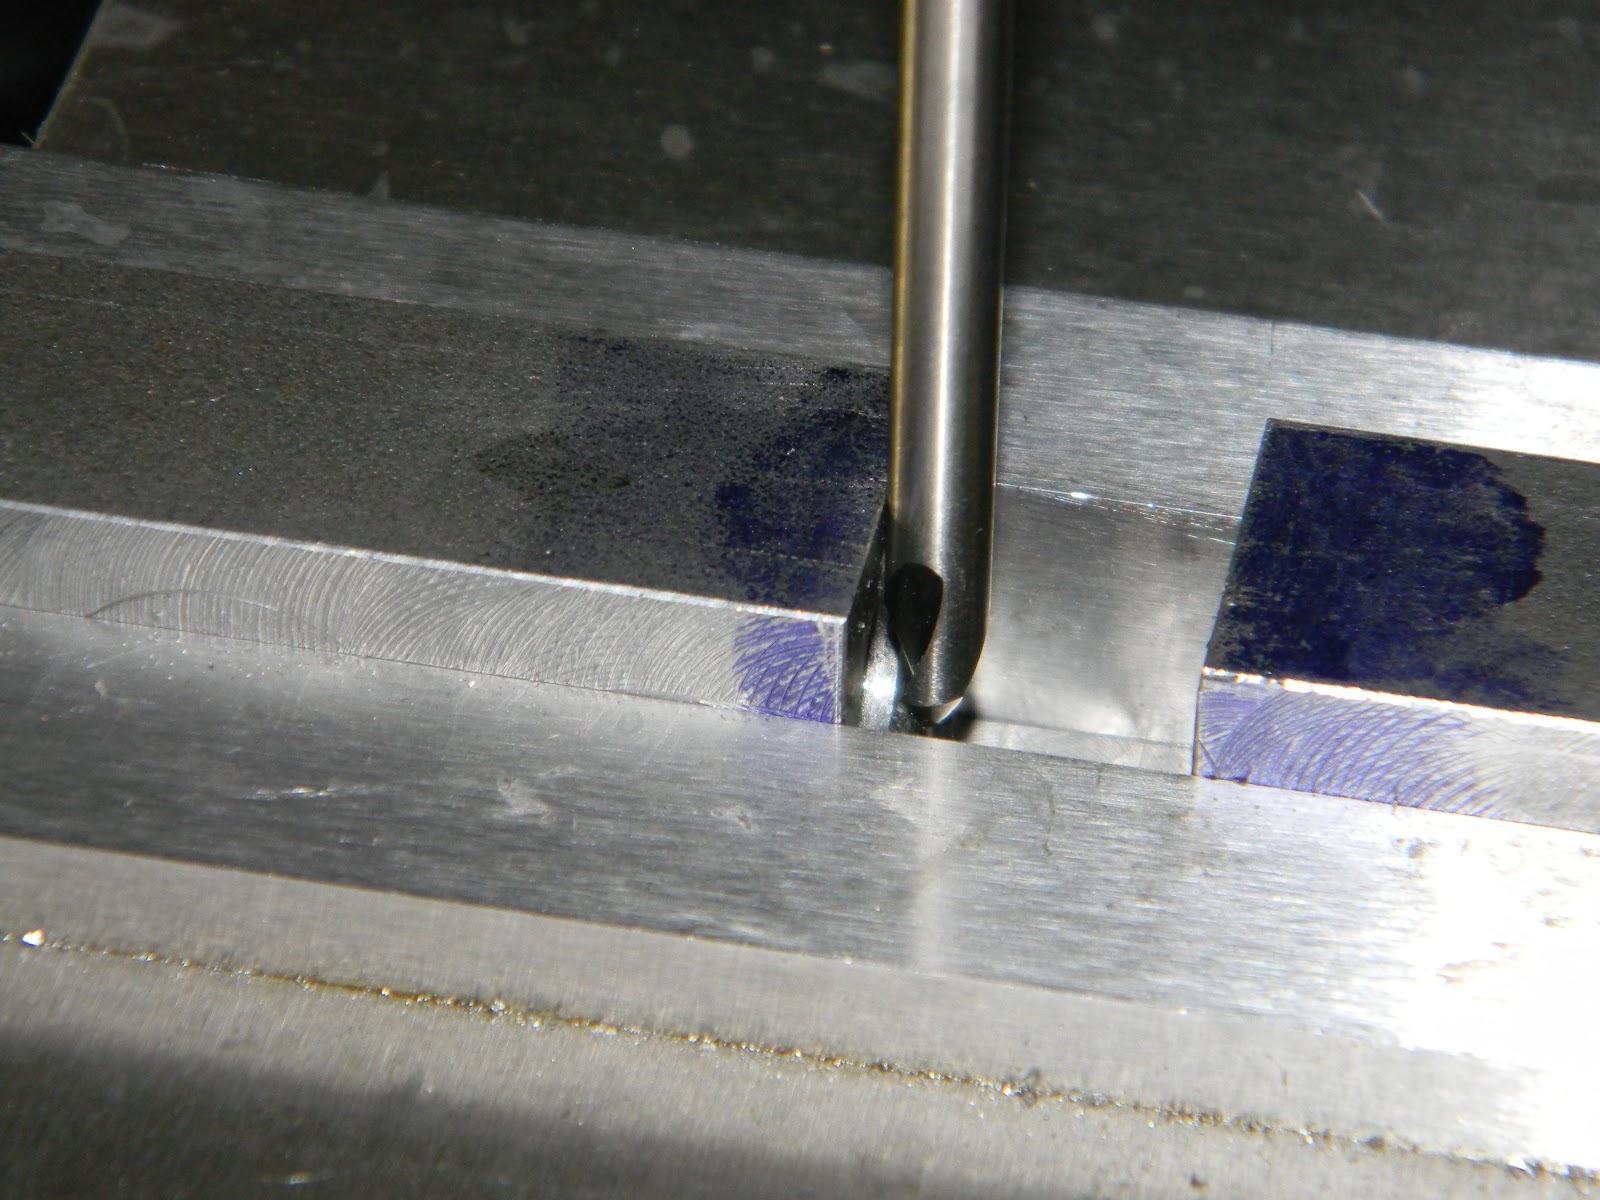
Ran a 3/8" reamer to clean up the hole and found a 3/8" diameter pointed indicator.


It actually worked.


So the loading bolt will be made from a piece of 3/8" drill rod rather than 1/4".


The bolt is three diameters.  The probe seats the pellet.  The middle is just big enough to fit through the Marauder magazine and then passes through the o-ring in the barrel.  The rear of the bolt is 3/8" diameter to match the new hole.  Those scribed lines in the layout fluid are reference points for bolt location during loading and cocking.


I slid a 3/8" piece of drill rod through the bolt hole to use as a reference before cutting the cocking handle slot into the left side of the breech.


Assumed that the hole wasn't quite parallel to the length of the breech.  Figured I'd have to bump the milling vise slightly to cut the slot in line with the hole.  With a pointed wiggler, I centered up on each protruding end of the rod.  Huh?  Don't have to adjust the vise.


Centered and spotted.


Touched off with a 5/16" bit to get the full diameter.


Followed with a modified 5/16" bit to deepen the hole and produce a flat counterbore.  Didn't drill deep enough to reach the bolt hole--yet.  Repeated the 5/16" counterbore near the rear of the breech.


Set the table travel stops and milled a 3/16" wide slot between the two counterbored holes.   Milled the slot through the side into the bolt hole.  The holes at either end of the cocking handle slot will be  locking positions for the bolt.


Another disaster averted.  More soon.


Friday, August 17, 2012

Custom Crosman Breech--Part 5 Barrel Modification

Next up are the barrel modifications.


Chucked up about a 10" cutoff from a Crosman 2260 barrel into the Taig lathe and faced the breech end.  Deburred, beveled, polished... Essentially squared it up and cleaned it up.


Installed the barrel into the breech, and adjusted the barrel protrusion into the loading slot for a Marauder magazine.  Used a transfer punch to mark location for the transfer port.  Spotted with a center drill.


Followed by drilling the actual port with a #29 bit.


Added a .250" counterbore.


While the barrel was still in the milling machine, I milled small flat seats for the two set screws that lock the barrel into the steel breech.


And another flat for the shroud set screw.


Back to the Taig for the pellet leade.  A #2 bit was used.  Drilled to the front edge of the transfer port.  If the transfer port was drilled after the leade was finished, it would be very difficult to deburr the inside of the barrel.


With a small modified boring bar, I cut an internal groove between the end of the barrel and the transfer port hole.


Some cut and try until a #A009 o-ring fit into the groove.


Test fit.


Transfer port centers up nicely.   Next up will be the loading bolt.    Slowly getting there.

Thanks again for following along.  More in a few days.

Tuesday, August 7, 2012

Custom Crosman Breech--Part 4 Lots of Holes

Still plugging away on this breech project.  I'll try to explain at each step what I'm doing and why.


With the slot cut for the Marauder magazine, I needed to drill a hole for the tiny #4-48 Crosman breech screw.  Want to locate it as far forward in the slot as possible.  The head of the #4-48 needs to be recessed in a 3/16" diameter counterbore or the magazine will bind.


A standard length center drill wasn't long enough to reach the bottom of the slot.  Found an extended length #2 bit.


A #2 is 3/16" in diameter, so I was able to use the bit itself to gauge clearance to the edge of the magazine slot.


Just using this to spot (start or mark) the hole.  Center drills don't have long flutes to channel material up and out.  This lack of flutes makes them stiffer, so they don't deflect and wander across the work surface under starting pressure.  Gives you an accurate spot to start drilling with a conventional twist drill.


Next up was a #42 clearance drill for that #4-48 breech screw.


Not shown:  Counterbored with a flat bottomed 3/16" bit to recess the head.  Here's a test fit.  It's right when the head is at or slightly below flush.


With the breech screw hole located, it became the primary reference point for the next several holes.  Going to through drill for the alternative breech screw hole that Crosman uses on the more recent gas tubes--though the head will not be counterbored.  If I ever need to swap this breech to a newer gas tube, the hole is in the correct place and I'll just need to mill clearance for the head of the fastener.

Also using the first hole as a reference for the transfer port hole and the rear breech screw location.  Stacked a few gauge blocks then set the caliper to the exact size to transfer each location.  --It's more accurate than just using the caliper scale.


Spotted for the transfer port.


1/4" hole drilled. Not 100% sure yet what the final transfer port will entail, but 1/4" is a nice, standard size to work with if I need a sleeve, piece of tubing, o-rings, etc.


Spotted for the alternative breech screw location.


Drilled a second #42 clearance hole. There's not quite enough room for the head of the fastener without some additional work on the top side.  Again, this hole fits the newer Crosman gas tubes with the #4-48 breech screw hidden under the bolt.


And finally, used a #19 bit for clearance for the #8-32 rear breech screw.


Deburred.


Turned the breech over and counterbored for the head of the #8-32 screw.  Actually drilled through the top and counter bored in the channel for the loading bolt.  Sunk the head of the #8-32 so the loading bolt won't drag.


Typically, the set screw to hold the barrel to the breech is on the top side.  There's plenty of metal on this breech to hide them on the bottom.  Gonna use two.  No specific locations.  Picked a couple spots that won't interfere with anything else.  Used a #29 (tapping drill size) for #8-32 setscrews to secure the barrel to the breech.


Now, I wish I'd drilled that 5/8" shroud counterbore a bit deeper into the muzzle end of the breech. I was only concerned with recessing the end of the shroud, not securing it at the time.  I'm sure not gonna revisit that insane set up just to deepen the hole.  Besides, I can also use set screws or even epoxy to secure the shroud to the barrel.    A #43 tapping drill size for a single #4-40 set screw.  Of course, the #43 bit is too small for the drill chuck to grab, so it first goes into this adapter chuck.


Chuck in a chuck--in a collet.


With the tapping hole drilled, used the set up to guide the small #4-40 tap.  Tapped the larger #8-32 threads without a guide.


A 1/8" four flute center-cutting end mill was used to cut the clearance slot for the hammer's cocking pin.  The Crosman steel breech I referenced had a slot 0.140" wide.  So...


...after cutting the slot through, the y-axis was moved +0.008" then -0.008" from center with a clean up pass of the end mill widening the slot to 0.141".


Next to a Crosman long steel breech for comparison.


Wow, there's still a lot of ground to cover.  I think the next steps should entail whatever barrel modification is required to connect the transfer port, making the actual port, then starting the loading bolt.

More in a few days.