Tuesday, August 7, 2012

Custom Crosman Breech--Part 4 Lots of Holes

Still plugging away on this breech project.  I'll try to explain at each step what I'm doing and why.


With the slot cut for the Marauder magazine, I needed to drill a hole for the tiny #4-48 Crosman breech screw.  Want to locate it as far forward in the slot as possible.  The head of the #4-48 needs to be recessed in a 3/16" diameter counterbore or the magazine will bind.


A standard length center drill wasn't long enough to reach the bottom of the slot.  Found an extended length #2 bit.
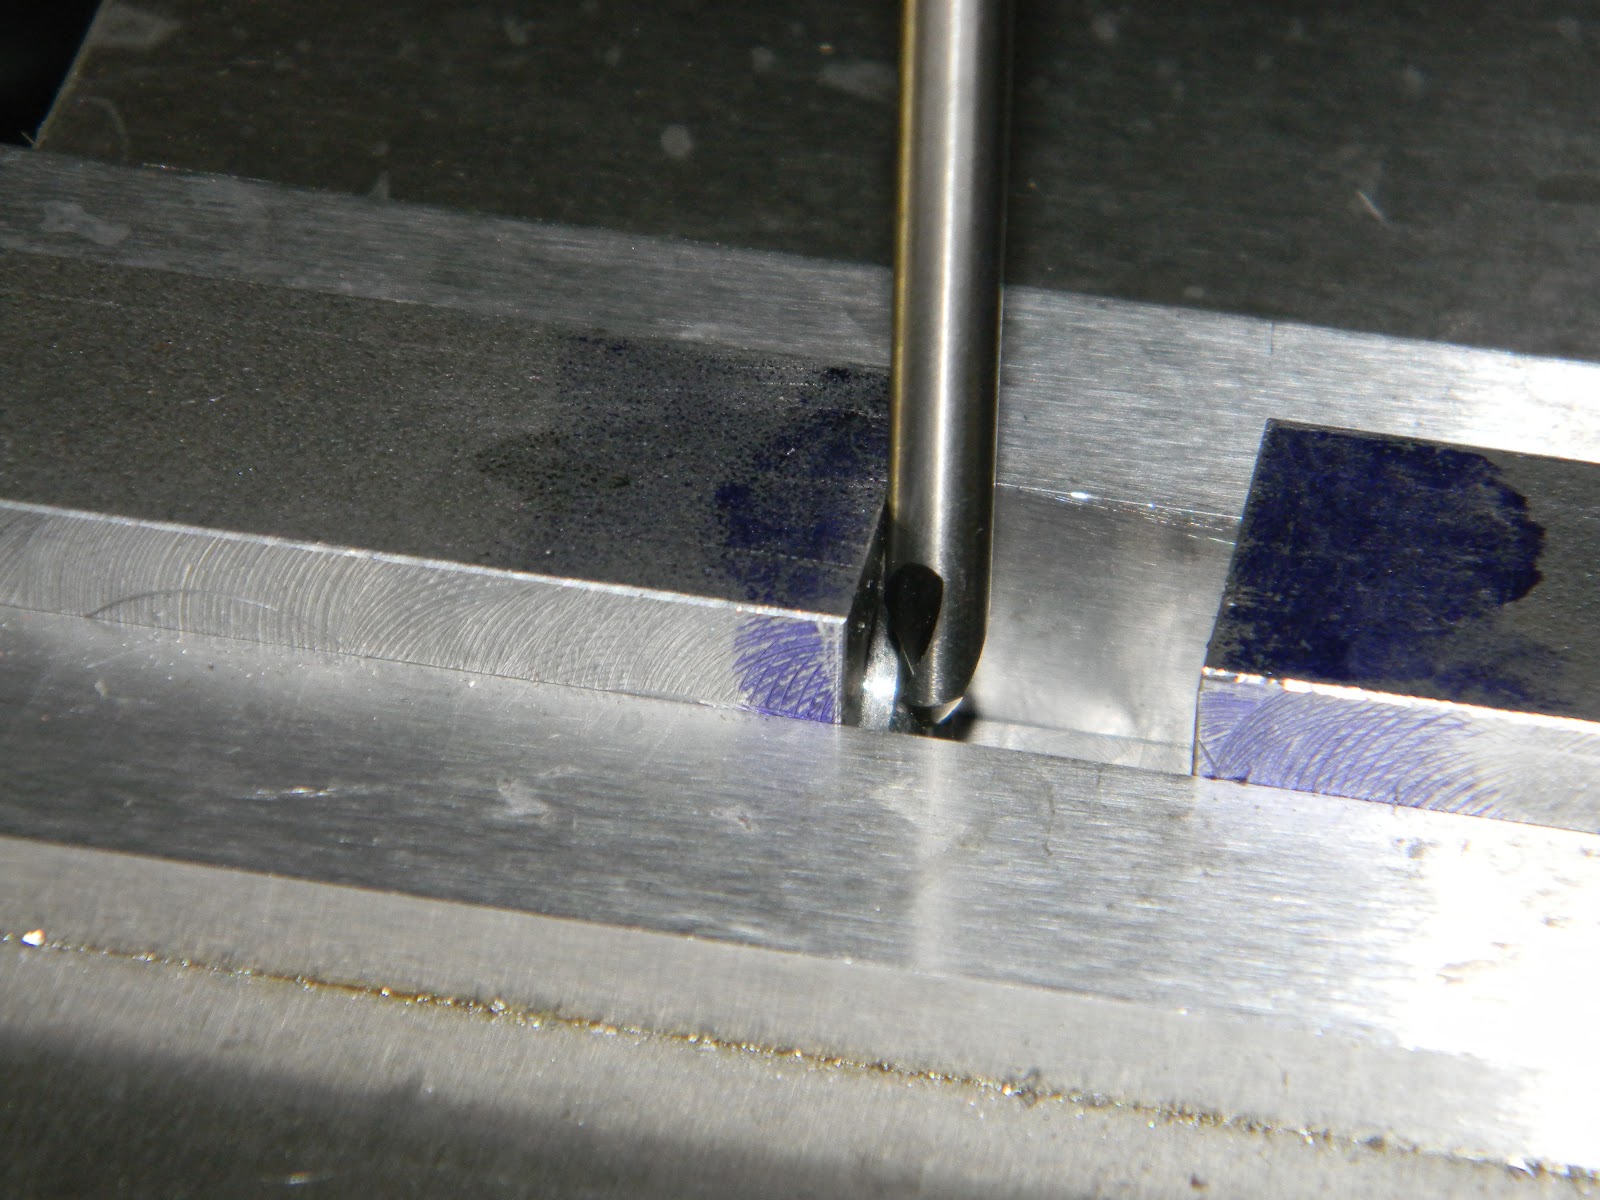


A #2 is 3/16" in diameter, so I was able to use the bit itself to gauge clearance to the edge of the magazine slot.


Just using this to spot (start or mark) the hole.  Center drills don't have long flutes to channel material up and out.  This lack of flutes makes them stiffer, so they don't deflect and wander across the work surface under starting pressure.  Gives you an accurate spot to start drilling with a conventional twist drill.


Next up was a #42 clearance drill for that #4-48 breech screw.


Not shown:  Counterbored with a flat bottomed 3/16" bit to recess the head.  Here's a test fit.  It's right when the head is at or slightly below flush.


With the breech screw hole located, it became the primary reference point for the next several holes.  Going to through drill for the alternative breech screw hole that Crosman uses on the more recent gas tubes--though the head will not be counterbored.  If I ever need to swap this breech to a newer gas tube, the hole is in the correct place and I'll just need to mill clearance for the head of the fastener.

Also using the first hole as a reference for the transfer port hole and the rear breech screw location.  Stacked a few gauge blocks then set the caliper to the exact size to transfer each location.  --It's more accurate than just using the caliper scale.


Spotted for the transfer port.


1/4" hole drilled. Not 100% sure yet what the final transfer port will entail, but 1/4" is a nice, standard size to work with if I need a sleeve, piece of tubing, o-rings, etc.


Spotted for the alternative breech screw location.


Drilled a second #42 clearance hole. There's not quite enough room for the head of the fastener without some additional work on the top side.  Again, this hole fits the newer Crosman gas tubes with the #4-48 breech screw hidden under the bolt.


And finally, used a #19 bit for clearance for the #8-32 rear breech screw.


Deburred.


Turned the breech over and counterbored for the head of the #8-32 screw.  Actually drilled through the top and counter bored in the channel for the loading bolt.  Sunk the head of the #8-32 so the loading bolt won't drag.


Typically, the set screw to hold the barrel to the breech is on the top side.  There's plenty of metal on this breech to hide them on the bottom.  Gonna use two.  No specific locations.  Picked a couple spots that won't interfere with anything else.  Used a #29 (tapping drill size) for #8-32 setscrews to secure the barrel to the breech.


Now, I wish I'd drilled that 5/8" shroud counterbore a bit deeper into the muzzle end of the breech. I was only concerned with recessing the end of the shroud, not securing it at the time.  I'm sure not gonna revisit that insane set up just to deepen the hole.  Besides, I can also use set screws or even epoxy to secure the shroud to the barrel.    A #43 tapping drill size for a single #4-40 set screw.  Of course, the #43 bit is too small for the drill chuck to grab, so it first goes into this adapter chuck.


Chuck in a chuck--in a collet.


With the tapping hole drilled, used the set up to guide the small #4-40 tap.  Tapped the larger #8-32 threads without a guide.


A 1/8" four flute center-cutting end mill was used to cut the clearance slot for the hammer's cocking pin.  The Crosman steel breech I referenced had a slot 0.140" wide.  So...


...after cutting the slot through, the y-axis was moved +0.008" then -0.008" from center with a clean up pass of the end mill widening the slot to 0.141".


Next to a Crosman long steel breech for comparison.


Wow, there's still a lot of ground to cover.  I think the next steps should entail whatever barrel modification is required to connect the transfer port, making the actual port, then starting the loading bolt.

More in a few days.

Wednesday, August 1, 2012

Custom Crosman Breech--Part 3 Magazine Channel

For some reason, this still isn't in the trash can--I'm as surprised as anyone.


Need to cut a slot in the breech for loading the pellets.  Figured out where the breech end of the barrel will be located and drew some lines.


With some 1-2-3 blocks and an insert vise clamped to the table, I fashioned a work stop.  This should allow me to insert/remove/insert the breech from the milling vise with some level of repeatable accuracy.


Hopefully, if I cut between the lines...   Yeah, right.  I set the table travel stops for added insurance.


Kept deepening the slot and eventually didn't think there was enough breech left in the vise for a secure hold.  Figured I'd grab as much of the breech in the vise as possible.


Blocked up the free end with a jack screw and a clamp.


Right up against the jaws.  I think (hope) this was the clutch moment for the project.  Getting the slot cut to the correct width and the proper depth was key to making the breech fit the Benjamin Marauder magazines.


As I seem to have only .22 cal Marauder mags on hand, I guess it's gonna be a .22.


The mags lock into place on the end of the 7/16" diameter barrel.  They require a bit of barrel protrusion into the slot, but that's just a matter of adding a setscrew to hold the barrel in location.


Mag snapped in place.


Still a ton of ground to cover and lots of ways to screw up.  Marked a center line on the bottom of the breech--this fits against the gas tube.


A 7/8" ball mill will match the curve of the gas tube.


I think that'll be OK.


Still need to deal with the cocking pin and bolt handle slots, transfer port hole, a transfer port, a longer cocking pin, bolt handle, mounting screw holes, provisions for sights/optics...   Probably a couple more posts.

As always, thanks for following along.

More soon.

Saturday, July 28, 2012

Custom Crosman Breech--Part 2 Starting the Shroud

Picking up where I left off... 


Chucked a Crosman 22XX barrel in the lathe jaws and pushed it into the counterbore in the breech.


Just using the barrel for alignment.  Used several setup blocks as well as some shim stock underneath the breech until the through hole was centered up on the lathe's headstock.  I need to paint that window frame in the background...


Then I clamped the breech down to the crosslide.   Aluminum sheet was used between the setup blocks as well as the clamps to prevent marring the breech.


Removed the barrel and mounted a 5/8" center cutting endmill in the lathe chuck.


Very slowly shaved metal to produce a stepped hole at the front of the breech.


No measurement as the depth isn't critical.  About 1/4"+ will do.


The plan is to sleeve the skinny 7/16" OD Crosman barrel for additional muzzle weight and stability.


The step will accept the end of a 5/8" OD barrel sleeve.  The sleeve will be made from the piece of DOM tubing on the right.


The DOM tube is both too long and too small in the ID for the Crosman barrel to fit into.


With a parting tool, I cut about 3" off the end of the tube.


Then through drilled with a long 7/16" bit in the tailstock.  Had to flip the workpiece around and drill from both ends to the center.


Cleaned up the ends of the tube.  Not shown:  After drilling, a 7/16" reamer was run through the tube for clean up.


Couldn't take the humidity outside any longer.  Brought the tube indoors and wrapped the Taig bed with foil protection and polished the tube to 400 grit.


Test fitting.


Barrel slip fits into the breech.  It'll get set screws later.


Sleeve installed over the barrel.  Could've just butted the tube against the end of the breech, but recessing the end is cleaner.

More soon.  The next step is make or break.