Sunday, March 6, 2011

Installing the T/C Sight and Making a Front Sight Adapter

With the T/C sight essentially finished, it was now just a matter of finishing the installation.

Removed the steel breech from my 1750 pistol project.

The curvature of the base of the sight just covers the dovetail in the Crosman breech.

Removed the elevation screw from the sight.

And pivoted the sight forward. Forgot to show the spring. Note the two mounting holes in the sight base.

The sight is hinged at the front with a small roll pin. I'm not going to remove it.

The rear hole in the sight lines up perfectly with the rear hole in the Crosman breech. However, the hole was sized for a #6 screw rather than the required (for the Crosman breech) #8. Drilled out the hole with a #16 bit to gain the necessary clearance.

Installed an #8-32 bolt and nut to temporarily affix the sight to the breech.

Spotted right through the sight for the front mounting hole.

The supplied front mounting bolt for the T/C is a #6-48. The T/C sight requires extremely low profile bolt heads for mounting as they sit inside the housing. Rather than make a second bolt (I have to modify a #8-32 for the rear location) it makes sense to use the correct T/C front bolt. I drilled through the top of the breech with a #21 bit then started the #6-48 plug tap.

Finished the tapping by hand. I only had a plug tap in this size, so it made sense (well, to me) to through drill. Carefully de-burred the inside of the hole in the breech then checked the clearance for the loading bolt. Moves without a hitch.

Hole is nicely aligned and relatively inconspicuous should I ever remove the sight to use something else.

Almost forgot to enlarge the rear counterbore. A centercutting endmill in the drill press did the job in seconds. Not shown, I thinned the head of a #8-32 panhead screw for the rear mounting hole. The head is very flat and sits inside the sight housing nicely. Cleaned out the metal shards and set it aside.

I'm using a muzzle brake from the Crosman custom shop on this gun. It's threaded for a simple post sight. It's just a steel rod that threads into the tapped hole. Unfortunately, the additional height of the T/C sight will require a correspondingly taller front sight. A couple spare front sight inserts from an IZH-46M look like they're a good match. A scrap of aluminum will allow attachment of the blade to the brake. Coated it in dykem and found the center.

Lined it up with the center of the headstock by using a pointy indicator in the jaws.

Removed pointy and installed a 7/8" ball mill. Don't try cutting steel like this. 3-jaw chucks are not made to hold cutting tools. I took my time and made many fine passes on the aluminum.

The radius is a "close enough" match.

More dykem on the aluminum adapter. Sort of traced the sight blade into the front. As usual, I'm just winging it.

Milled about half the height away.

Angled the sides to make it interesting...

cut a shelf for the base of the sight blade...

Then drilled the #25 clearance hole on top for the #6-32 mounting bolt.

And drilled the front of the adapter with #40 then tapped the front hole M3 x 0.5mm to hold the sight blade.

A few minutes of clean up sanding and I had a nice satin finish.

Sight blade is bolted to the adapter.

Note the tiny shelf the sight blade sits on.
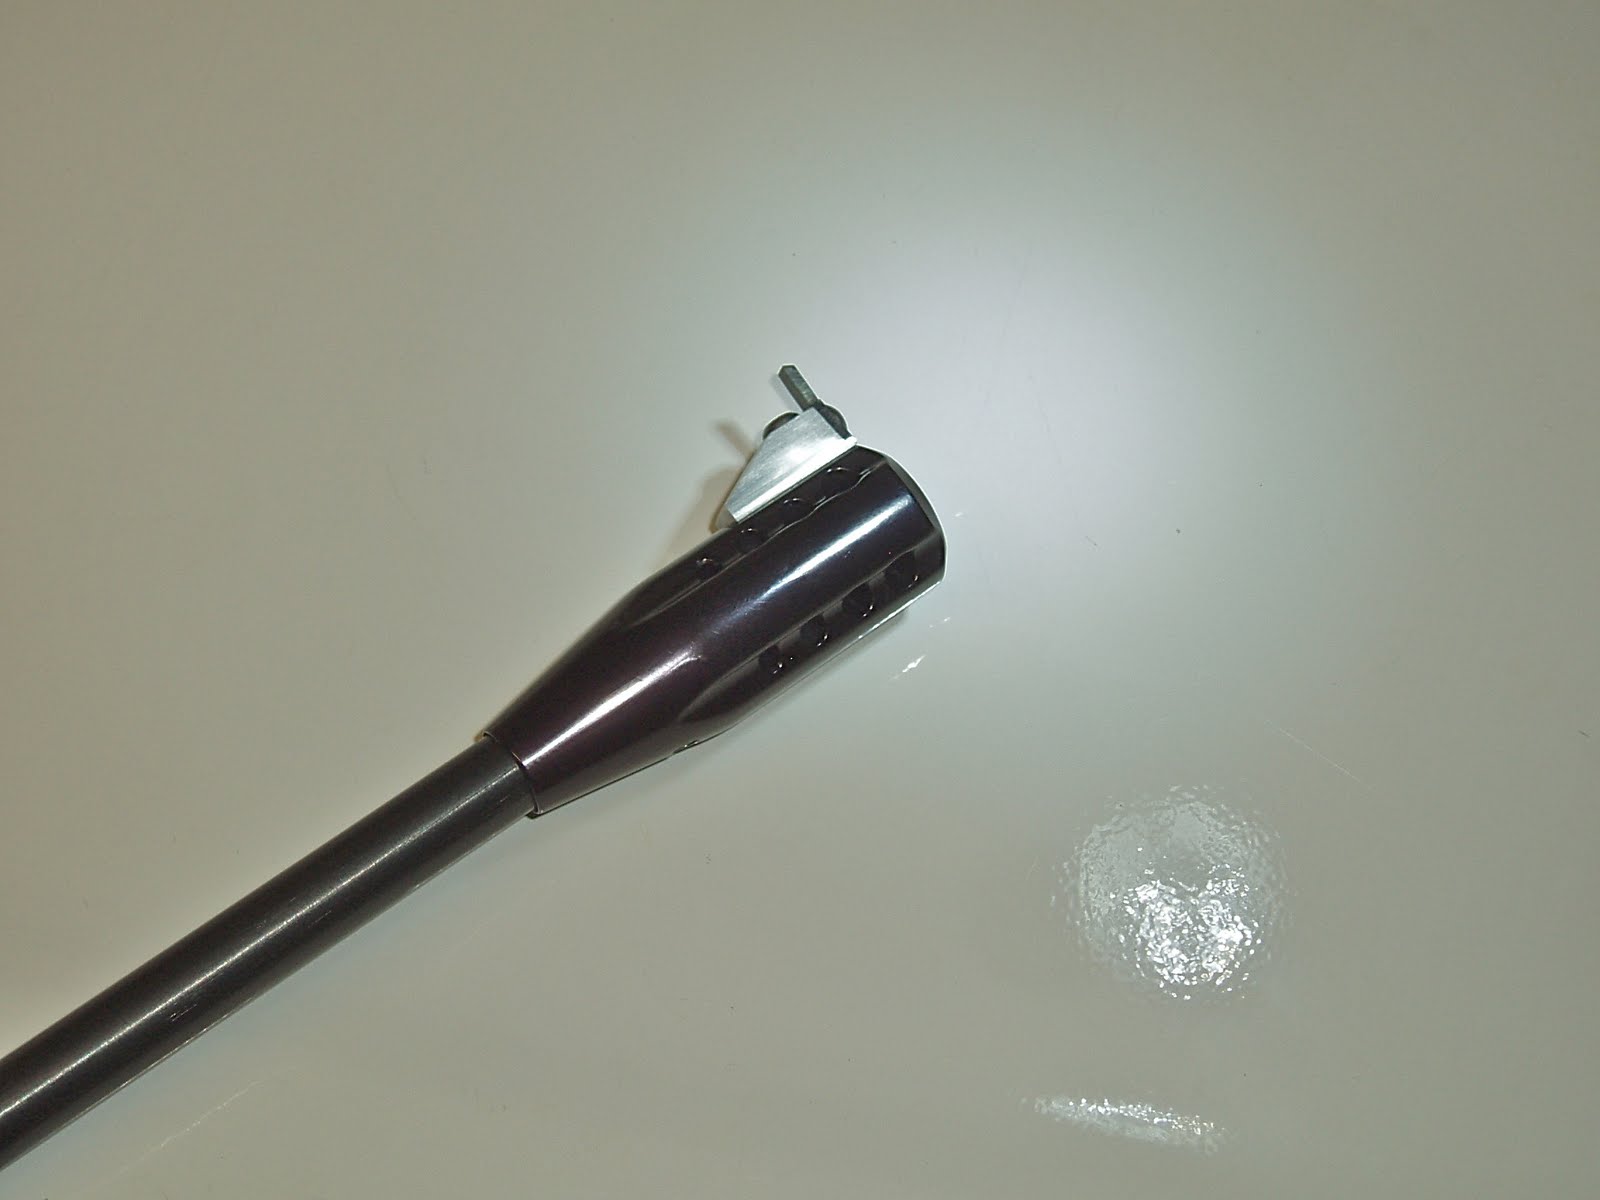
Adapter is bolted to the muzzle brake. The radius aligns it and prevents it from rotating.

Rear sight installed.


Compared to the LPA sights I removed, shooting targets is night and day better with these. All the corners are sharper and clearer producing a crisper sight picture.

Tuesday, March 1, 2011

Modifying a T/C Rear Sight for a 22XX--Part 2

Ugh, got stuck for a couple days on this one. The adapter needs a simple through hole threaded for the windage adjustment bolt. Except the windage adjustment bolt is a #6-72. 72 threads per inch. Seventy-two. Most fine threads are around 32 to 40 threads per inch. I seriously thought about using a different size bolt--like a common #6-32. Would've saved an evening at the least. Except the base of that windage screw has a very fine serration to provide precise indexing detents that I'm quite sure I'm unable to duplicate. Hit my standby machine tool supply company, but Kromhard was out (or maybe never had) of 6-72 taps. Unfortunately, they had a threading die. "Unfortunately", because if they'd had neither one, I'd have either just ordered up a tap like a normal person, or switched out that bolt to something common and figured out a reasonable solution to the detents. (Like gone without them). Instead, I bought the die and figured I'd make a tap. Sure. For 72 tpi. Kromhard counter guy, Terry, thought I was borderline delusional. I didn't disagree.

Chucked and faced a piece of 0.250" drill rod. Centerdrilled in case it actually works and I ever need a piloted tap...

Then hand filed a square shank.

This part really didn't take long--maybe 10 or 15 minutes.

Then I turned about 1" down to 0.136", tapered the end and threaded 6-72. The low helix angle of the thread makes fine threading extremely easy.

Using the 13/16" end of the Taig die holder.

Heated the threads until a magnet was no longer attracted to the steel then quenched to harden the piece.

Then slowly reheated to approx 450 deg F in my Easy Bake oven for about 15 minutes to temper.

Ground a single flute.

Spotted the windage hole in the adapter and mounted it in a small vise.

Through drilled with a #33.

Then counterbored the right side approx 3/16" deep with a #7 for the coil spring.

Flattened the bottom of the counterbore with a modified bit.

And tapped 6-72.

Started in the drill press for alignment, but finished by hand. It actually worked.

Test fitting the adapter. I could just notch the top of the adapter and be done with it, but no, too easy.


Here's that spare leaf from the IZH-46M. It's double-sided.

Did some quick layout on the adapter. Scribed a line for the center of the mounting screws then did some math so the leaf would be centered.

The holes in the leaf are, in fact, already threaded by IZH. They're threaded M4 x 0.7mm. I'm not going to use those threads.

Center punched the marks.

As the rear of the adapter is angled, I wanted the threads 90 degrees to the face so the leaf would be drawn up flush. Drilled both holes with a #43.

Followed by a #4-40 tap.


Test fitting.

The threads need to be flush with the rear of the adapter for the windage adjustment to function. Cut the screws off with an Excel jeweler's saw.

Ran a piece of emery cloth across the piece to remove any remaining burrs.

Not shown. Blued the adapter with Birchwood Casey Perma Blue paste and assembled.

The original Thompson/Center sight leaf is there for size comparison.

Rear sight is done. At some point, I scratched two lines on the adapter and filled them with white paint. The middle of which is the center to act as a reference for the windage scale on the base.

Still need to attach it to the pistol and figure out an appropriate front sight. More to come.
