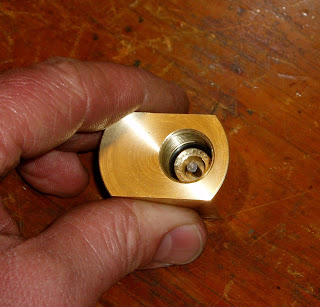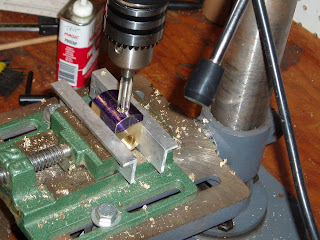
Spotted with a center drill.

Gradually drilled out the hole to 1/2".

Modified a 1/2" bit to drill flat-bottomed holes. Works incredibly well. I can literally shave brass foil from the bottom of the hole that's less than a hair in thickness. Deepened the hole to 0.493". If you're paying incredibly close attention, this isn't enough depth to get full thread engagement on an AirSource cartridge--it's just enough depth for the pin valve I made to refill my A/S cartridges.

With a small boring bar, I opened the hole diameter to 0.520"--roughly the nose diameter on an A/S cartridge.

I couldn't measure to the very bottom of the hole, so I used a telescopic bore gauge and referenced various depths. I had enough confidence that the bottom was at, or extremely close, to my number.

Need to cut the o-ring at the bottom of the hole for the A/S cartridge to seal on. Made a boring bar from a blank 1/4" lathe tool bit. Used the bench grinder and Dremel tool. Cut it so just as the side bottoms on the side of the hole, the tip has cut the o-ring seat to the correct depth.

Not shown: Bored the hole above the o-ring seat to 0.570--roughly 14.5mm--my tapping size.

Tapped the hole to the o-ring seat M16 x 1.5mm. Used a bottoming tap.


I need a pin to depress the A/S valve.

Spotted the bottom of the hole then drilled about 1.150" deep with a 1/8" bit. Depth not critical.

Used the 1/8" bit as I have some drill rod in that size for a pin. Not shown: Used a 1/4" endmill to make a counterbore as a gas flow passageway. You can see it three or four pics below.

Cut a piece off with some heavy side cutters then flattened one end. Started by holding it with the vise grips, but then I remembered that I have a really sweet set of pin vises.

The pin vise uses a collet to clamp the pin and gave me more dexterity.

Fit an o-ring and the pin, then test fit the A/S cartridge a few times. Tweaked the pin length until it opened the valve just as the cartridge was sealing against the o-ring. I think the pin ended up somewhere around 0.598" OAL.

Another view. You can see the 1/4" counterbore around the pin. It's just space for the CO2 gas to flow out from the A/S cartridge as its valve opens.

Did some more layout and found the centerline on the bottom of the adapter. Picked a spot.

Spotted then drilled with an 11/32" bit. Followed with yet another modified bit to drill flat bottomed holes. Drilled approx 0.260" deep.

Then tapped 3/8"-24. Why? Safety first.

This hole is for a paintball tank burst disk

The M16 A/S and 9/16 valve hole bottoms aren't even with each other . They're offset slightly. Scratched a rough angled line to connect them.

Before I make the connection, I used a homemade pointed indicator to find the center of the 9/16 hole.

Then drilled about 0.250" deep with a 5/32" bit.

Angled the piece and sighted my scratched line with a small machinst square. Then centered up on the 3/8"-24 tapped hole and connected to the opposite 9/16" valve hole with a 1/8" bit.

Test fit and checked for leaks. There's the burst disk on the bottom right of the adapter. A 3K is installed now--same as all PB tanks--though I also have a 1.8K on hand.

Just a quick ad hoc arrangement at the Crosman valve end for pressure testing.

To seal the gun end, I used the front half of the Crosman valve. Added a small bolt with an o-ring at the base of the head to make a hasty seal to prevent the CO2 from escaping at the outward facing end seal. A quick and dirty pin valve if you will.

A drop of Crosman Pellgun Oil at each connection showed only a tiny leak at the burst disk. A fraction of a turn tighter and it held fast.

So, that piece of Crosman valve will be discarded from the design. A threaded tube will replace it and screw into both the gun's main valve body and this adapter. The hard part now will be getting the thread depth and o-ring seats correct so the A/S cartridge sits directly underneath the gas tube. Still a few design decisions, but I'm leaning toward cutting down a 2240 gas tube rather than make the conncting tube 3 or 4 inches long.
More in a couple days.


