Showing posts with label crosman 2260. Show all posts

Tuesday, May 19, 2020

Building a Cool Crosman 22XX for a Cool 10 Year-Old

This is sort of an extension of a previous blog detailing the addition of an AR-15 adjustable stock to a Crosman 22XX platform.    I've abbreviated much of it so this wouldn't turn into a five part mini-series of madness.  It does jump around a little.  It'll probably be OK. 


Backstory:  Two years ago, with the goal of teaching gun safety and shooting fundamentals, my neighbors purchased a Crosman Custom Shop 2240 with the optional 1399 shoulder stock for their 12 year old. They quickly found out that a 1399 shoulder stock has a rather LONG length of pull.  By LONG, I mean it's too long for 6' tall knuckle-draggers like me.  Completely unsuitable for their 12 yr-old daughter.  The easy solution was to copy my wife's Crosman/AR 15 stock set-up as described in the link above.  We sourced an MFT stock and buffer tube, made another stock adapter and it all worked out perfectly.

Now, it's the brother's turn.  Except he's 10--and this time we know going into this what he needs.  A used UTG Pro AR stock and buffer tube were purchased online for cheap.  His gun is being built from an assortment of Crosman 2240 and 2260 parts rather than starting with a preassembled gun. 


I've seen some of the AR stock adapters for the Crosman 22XX guns.  They're OK, though I find them a bit long and bulky because they utilize the buffer tube thread.  That works, but I'd rather cut the buffer tube threads off and sleeve the buffer over the adapter.


This knocks about an inch off and allows the adapter to be smaller in diameter.   The largest diameter of the adapter fits inside the tube.


So, here's a truncated version of machining an adapter.   It replaces the Crosman tube plug on the gun.


Detour #1:  As I did for my wife's project gun, a Benjamin Marauder pistol forend was fit after modifying a Crosman 2250 barrel band and hardware.


Turned an acetal plug to fill the hole for the pressure gage.


Detour #2:  A forward sling swivel.  Rifles need slings.  Ask anyone.


My current favorite way of adding a sling to a Crosman 22XX platform--a modified 2250 barrel band.  Set screws added to the sides at 4 and 8 o-clock. 


Made this.


Used a permanent loctite on the threads for the sling stud. 


OK, enough detours.   Back to making the rifle fit the kiddo.
 
Here's the (WAY too long for me!) Crosman 1399 stock.  The six-position AR stock is at full extension and fits my 6' frame perfectly.


And more importantly, the UTG stock at it's shortest compared again to the 1399.   Of course, I forgot to write down the LOP.  Think it was 8".  It's really short.


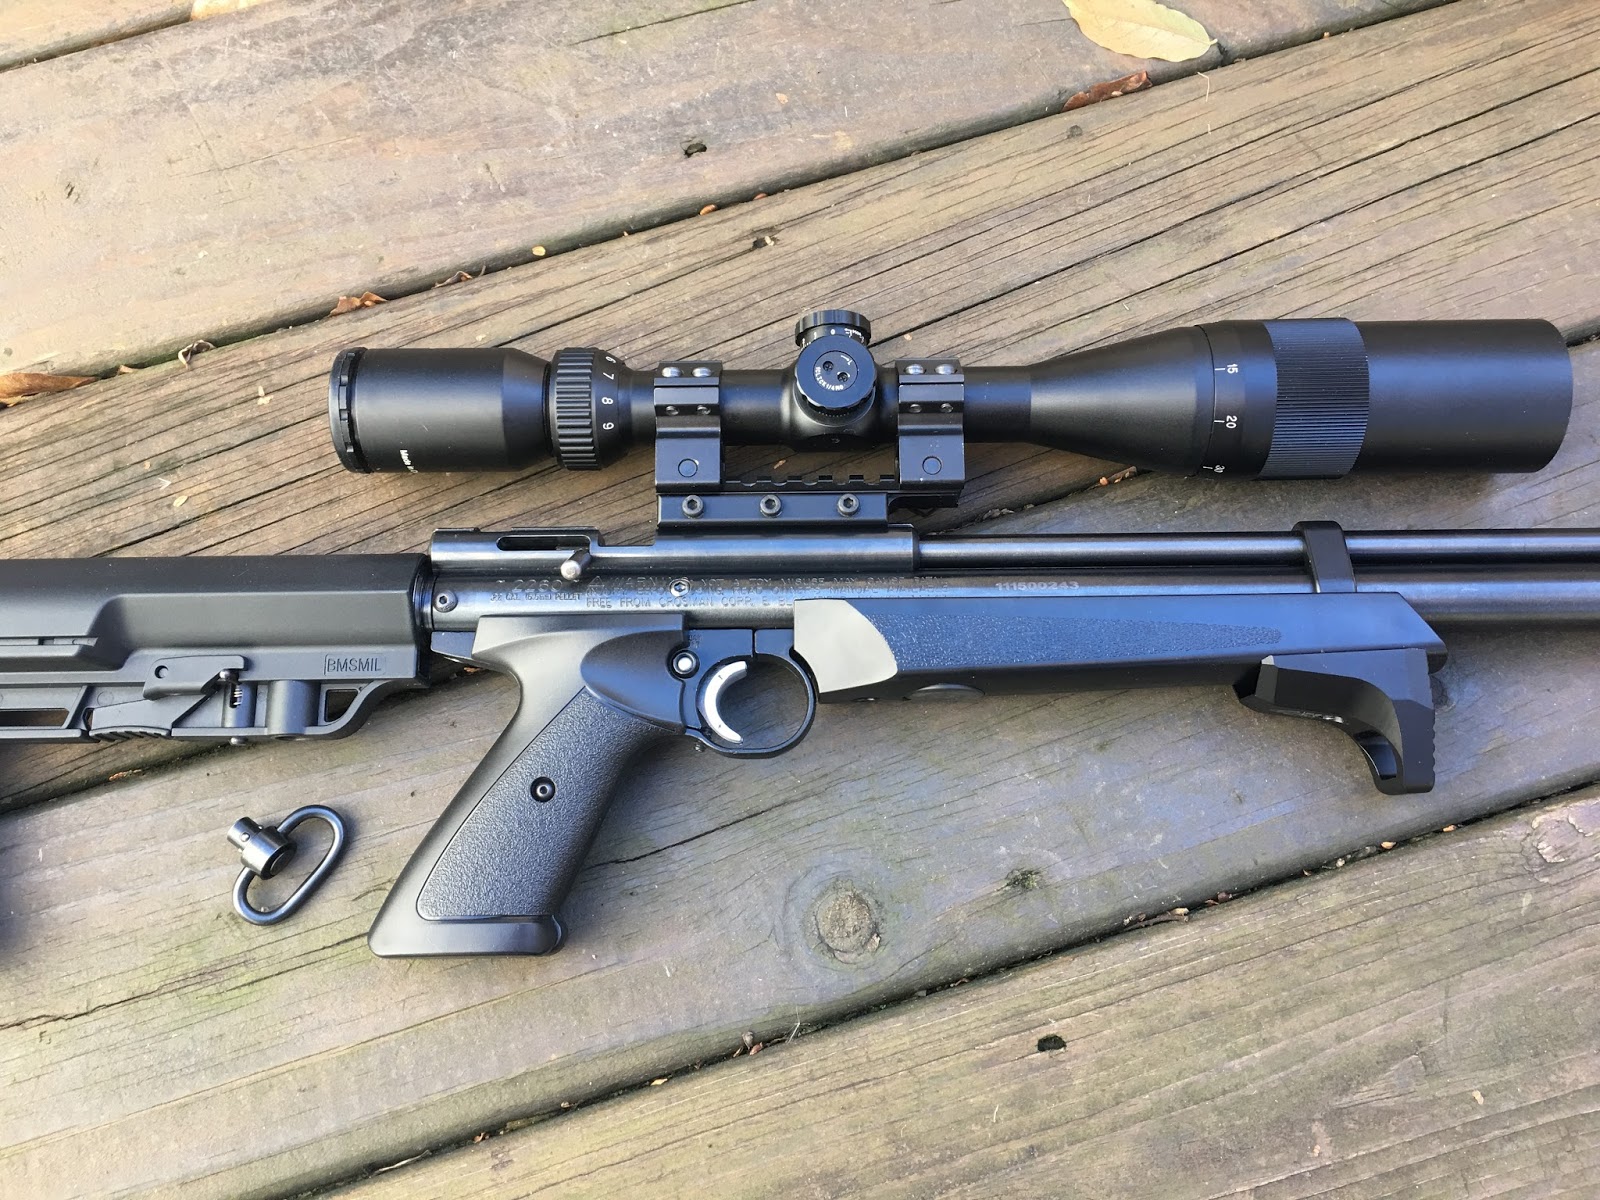
Here's what I gave his father.  It's my jaded take on a 10 year-old's first air rifle.   A 2260 gas tube and a cut to length barrel.  Keeps it short and in proportion for a 10 year-old.  Used a Crosman steel breech with a simple red dot sight.  Made sense to give him a similar sight to what he was already comfortable with from using his sister's gun.    It's a .22 caliber.  The bigger pellets are easier for the kids to handle--and its the same caliber as his sibling's.

Before dropping it off, I shot it for the better part of a week and a half.  The carbine length is appealing.  Fast, light, easy to carry slung.  Really liked it.  If he wasn't such a good kid I would've kept it, grinch that I am.


Yeah, you know how this ends.  He was elated with the rifle.  He's allowed to use it with his parent's supervision.  They're happy it actually fits and appreciate that it's not a cheap toy, but is accurate, easy to use and can be adjusted as he gets taller every week.

Anyway, I'm hoping Crosman redesigns the 1399 stock.  I've read several online posts about parents running into this same problem.  It'd be pretty slick if they made a length adjustable stock that would retrofit to all the zillions of 22XX and 13XX guns out there.  Oh, and a longer forend. With a built in sling QD socket.   And while we're talking about it...


More soon.  Thanks for reading along.


Wednesday, December 20, 2017

AR-15 Stock Adapter for a Crosman 22XX -- Part 2

The Crosman project for my wife continued to evolve over the last few weeks.


I replaced the short 2250 forend with a longer forend from a Benjamin Marauder pistol.  Cut down a 24" Crosman 2260 barrel to 20" and made a carbon fiber muzzle brake.  The grips were also updated to the newest style from Crosman's P1377 pistol. 


Mounted a UTG hand stop.  A long #8-32 screw holds the hand stop as well as anchors the front of the forend to the barrel band.


This is an AR-15 accessory designed for the KeyMod rail.  The radii don't match, with a gap between the hand stop and the forend, so no modification to either part was necessary. 


Turned a press fit plug from acetal to fill the unused pressure gauge hole.   It actually doesn't look so bad in person.  Think the diameter ended up at 1.025".


A UTG 11mm to Picatinny adapter carries the theme.  I was pushing for a UTG 4-16X scope, but my wife thought it was getting a bit heavy.  A Crosman labeled 3x9 with AO is lighter and should provide all the magnification a CO2 rifle really needs.


MFT stock fully shortened.


And extended.


We'll need to get some range time before taking it much further.  I'm still debating whether or not to convert it to .177.  I expect that might give a flatter trajectory and a bit more range for those tin cans.

Thanks for checking in.


Monday, September 7, 2009

Modified Mount for Crosman Steel Breech

I've got a 2260 with the Crosman steel breech. While I've had a couple different scopes on the rifle, a big full-sized scope is overkill for a five pound gun. The Leapers mini scopes seem to be a good match for lightweight, medium powered rifles. However, getting the correct eye relief, unobstructed space for loading a pellet, and scope ring securement on this particular gun has been a bear. The breech dovetails limit ring placement due to the pellet loading trough. It's not at all uncommon for shooters to resort to a single scope ring for mounting due to all the clearance issues. That can work, but it can also be temperamental. I found that an Accushot offset mount from Leapers solved the eye relief issue as well as the extremely limited ring space.

My only gripe was the amount of overhang the offset base had on the short section of rear dovetail. The rear section of dovetail on the Crosman steel breech measures out to about 2.116" long. The offset base, however is 2.415". The solution seems to be to shorten the base of the mount.
Just to make sure I had some flexibility for the future, I tried a couple different Leapers short scopes, and verified that several will work in this exact location. I settled on the 4X32 AO "Bug Buster" due to the close focus feature. The scope will parallax adjust from 3 yards to infinity.

After verifying eye relief a final time, did some quick layout for the cuts.

Upside down. There's an M5 threaded hole in the base for a recoil stop pin for use on spring piston guns. Unnecessary for the CO2 powered 2260, so it goes unused. Also, note that there's not a ton-o-room between the clamp hole on the side and the recoil stop hole on the bottom. I'll cut the mount off at a point in between the holes.

A 1-2-3 block makes a fine 90 degree square. I scratched a line midway between the clamp hole and the stop pin hole.

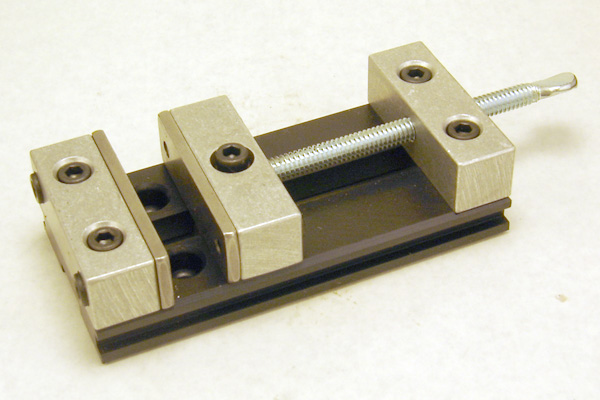
I was gonna use a hacksaw, then I remembered Nick would beat me since this blog occasionally makes use of machine tools. There's a milling adapter from Taig that turns their standard lathe into a horizontal mill. It's perfect for a small job like this. The scope mount was clamped into the milling vise and a suitable end mill was chucked into an arbor.

Took a few passes to get to depth. Used copious amounts of an aluminum specific cutting fluid.

Not shown: Flipped the part around and also took a skimming cut off the front to shorten the entire base by about 0.395". Also bolted on the clamping plate and faced the front to match.

Eyeballed the fit against the gun and it looked good. Transferred the base to the drill press and spotted a new rear clamp hole. Through drilled with a #19 bit. Clamped the base against a scrap of aluminum stock as a backer. Drilling through the mount and into the scrap aluminum left no burr on exit side of the hole.

More cutting fluid, then tapped the hole to M5 x 0.8mm. I intentionally cross-drilled (and tapped) though the stop hole. There's plenty of metal to hold threads to secure this to a zero-recoil CO2 rifle. Was it ideal? Well, no. It was almost 5% harder to keep the tap aligned.

In this shot, you can see where the front of the clamp was milled down as mentioned earlier.

With the front bolt tightened down, a transfer punch marks the location for the clearance hole in the side plate. Not shown: Drilled the clearance hole through the side plate with a #1 bit.

Bolted the side plate back on and milled the rear to length. I think that this set-up is completely wrong. Ideally, the base would be turned over so the cutting forces from the mill go downward, pressing the side plate into the base to gain suppport. This arrangement puts the load into the side plate mounting bolts. I did this for better visibility of the cut as I milled the piece by eye. But, since the part was aluminum and cutting like butter, it was a non-issue.

Looks good. Managed to not mar the rest of the base, too--always a plus.

The flip side.

I'm OK with the fine milling marks on the bottom, but the front edge needs some clean up. I sanded the front edge on a piece of emery paper set on top of a granite plate to 220 grit. It was then polished on a piece of newsprint with a smear of buffing compound. I quit when I couldn't see any more scratches.

Sent it to the paint department. Some quick masking and a shot of Rust-Oleum satin black enamel on the raw surfaces provided a virtually perfect match.

It's really tough to find the paint lines.


It fits! With proper clamping pressure and no ugly overhang. The gun is even easy to load.

Looks good. Now, I just need to make another custom bolt handle...