Sunday, October 20, 2013

Diana Model 16 Disassembly, Part 2


Just a bit more

10201330
The spring guide slides out.

10201331
The spring guide.

10201332
Two pieces joined together. The use of sheet metal in this design is interesting.

10201333
The spring is a bit wiggly…also there is little if any lubrication evident.

10201334
The cocking arm is captured by its little ears.

1020133510201336
The cocking arm slides out the back end of the receiver tube.

10201337
The barrel detent. Staked in place.

10201338
The piston, also made entirely of sheet metal, welds and rivets.

10201339
The sear is an insert.

10201340
Oh, there’s some lube, reduced to putty by age.

10201341
The leather piston seal is riveted in place. That is inconvenient. I hope I can massage it into shape in place.

10201342
The other end of the rivet.

10201343
It doesn’t look as bad now, although that leather is really pliable.

10201344
I pried the breech washer out.

10201345
Ii was backed by a cardboard domed shim.

10201346
Interesting. The seal should be fine for reuse.

10201347
The breech end. The barrel is brass (or a yellow alloy of some sort). The entire barrel assembly is best left as-is I think.

10201348
That’s all the parts. Now to clean, steel wool the rust, lube and reassemble. Not happy about the spring but I don’t have a spare that size. May hit the hardware store and see what they have.

Diana Model 16 Disassembly, Part 1

Well I finally found an airgun at a yard sale. In the past couple of years I haven’t seen anything but the most common Crosman and Daisy airguns for sale. Finding something Derrick and I haven’t already torn down is harder still! So I was happy to find a Diana Model 16 “rifle” (it’s a smoothbore) at a yard sale yesterday. I have always wanted one because of the odd hinge system for the break barrel. It is definitely sized for a small child. This one is postwar as it’s made in Great Britain rather than Germany.
10201301
That’s a 2’ ruler.10201302
DIANA      MOD. 16      MADE IN GREAT BRITAIN10201303
10201304
Most of the screws use the cool looking, yet annoying to remove, slotted nut.
10201305
That’s a front sight!
10201306
This is the unique hinge. Notice that the barrel locking detent is in the cocking arm, not the receiver or barrel.
10201307
You can see the piston sear.
10201308
There is a bit of rust…The breech washer is carried by the receiver rather than the barrel assembly.
1020130910201310
Removing the trigger guard. I don’t like that it relies on a wood screw, as this does need disassembly from time to time. That said, the screw hole was not stripped.
1020131110201312
I used snap ring pliers to engage the slotted nut while I removed the cross bolt/trigger pivot. See my spiffy new Panavise? It came in handy.
10201313
Front screws have a lock washer…it doesn’t want to come out of the wood.
10201314
Action removed.
1020131510201316
The spring rests in an angled pocket in the stock.
10201317
The only real damage to the stock was a small chip in the butt.
10201318
The trigger.
1020131910201320
Removing the cocking arm pivot bolt.
10201321
Punched out the retaining pin. There is no preload on the spring.
10201322
The pin.
10201323
Had to tap the end cap off, it’s a friction fit.
10201324
Not particularly exciting.
10201325
The spring & piston wouldn’t come out.
10201326
Problem #1, the edge of the slot is folded down past the end of the spring guide. Not sure if this is intentional.
10201327
What’s up with all of that lint?
10201328
The spring guide also has a twist detent…
1020132910201330
Now it comes out…I had to rotate/pry it with a stout pick.
More to come…

Saturday, September 14, 2013

Daisy 747 rebuild

Sorry about the dearth of postings lately.  I recently made a career change and found myself working two jobs for a couple months before taking the plunge.  There was simply no time for anything else.

One of my friends sent me a Daisy 747 to have a look through.  The valve wasn't sealing properly on the compression stroke of the lever.  You can generally assume that's the problem when the air is coming out of the barrel during charging or immediately after.
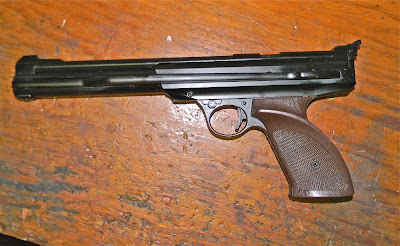


It's Matt's 747!


The basic tear down is identical to the 717 and 727 guns that Nick and I have previously covered. 


I cycled and dry fired it a few times.  It was immediately apparent just how much better this adjustable trigger is compared to the trigger unit in my 717 model.


The adjustable piston head had the typical chewed up notches.  Daisy should really make this from something more robust than a zinc die casting.


Left panel removed.


Pump lever removed.


The compression tube is aluminum.  I'll have to check my older 717, but I think the older guns have brass tubes.


Piston head.  I don't think this seal is bad, but it still gets replaced. We're this far, so why not?  This o-ring is a #115, by the way.  


Injection seam from the mold.


This flashing is the problem with using a die casting.  I found pieces ranging from dust sized to this throughout the compression tube.  Most of it was on the piston.


Chucked the head in the Taig and took a clean up pass to remove the seam.  Also cleaned up the adjustment notches.


Here's the likely leak offender--the valve stem seal.


I stoned off the face of the valve both to square it up and remove any potentially loose casting material. 


This o-ring seal is also not really suspect, but like the other, it gets replaced.  And like the piston head seal, it's also a #115.


I used a grease on the o-ring seals.  Should last longer than the oils that are typically used.


Matt supplied a repair kit when he delivered the pistol.  The valve stem seal is an earlier design. 


Looks like it's been sitting around for a while.  It's probably 20 years old.


Fortunately, I bought several replacements from Daisy when I was fixing my 717.  Because one is none and two is one...


New style on top, old on bottom.  My guess is that they're actually interchangeable, but I'd prefer to take one more variable out of the equation.


Reassembly was simply a reversal of the procedure.  Did grease the cocking linkage with moly as well as re-stake the cocking lever pivot pin.  (It was so loose, it fell out of the cocking arm at one point)  Not shown:  Polished and cleaned up the trigger pull a bit more.  After all this, the gun still had a tiny leak when initially charging the gun.  Went back in and reseated the valve stem seal using some minimal pressure to get it to conform to the valve seat.  A week and 100 shots later, there's not even a tiny hiss of air when charging--all the air is now going (and staying) inside the valve. I still want need to chrony the gun before sending it home to Matt.

Really astonished at how superior this trigger is compared to the one in my gun.  Looks like the grip frame is different as well as the trigger itself and trigger return spring.  I'm calling Daisy and upgrading the parts in my gun next week.  The 747 is absolutely worth the $40 premium it brings over the basic 717.

Thanks for checking in.
