Saturday, April 7, 2012

Yet Another Grip for a 22XX -- Part 2

Some additional progress on those rosewood grips.


After the maple spacers were dry, I cut them to the profile of the grips with the scroll saw.


This was supposed to be simple, but the casting seam around the grip frame was really bothering me for some reason so it had to go.


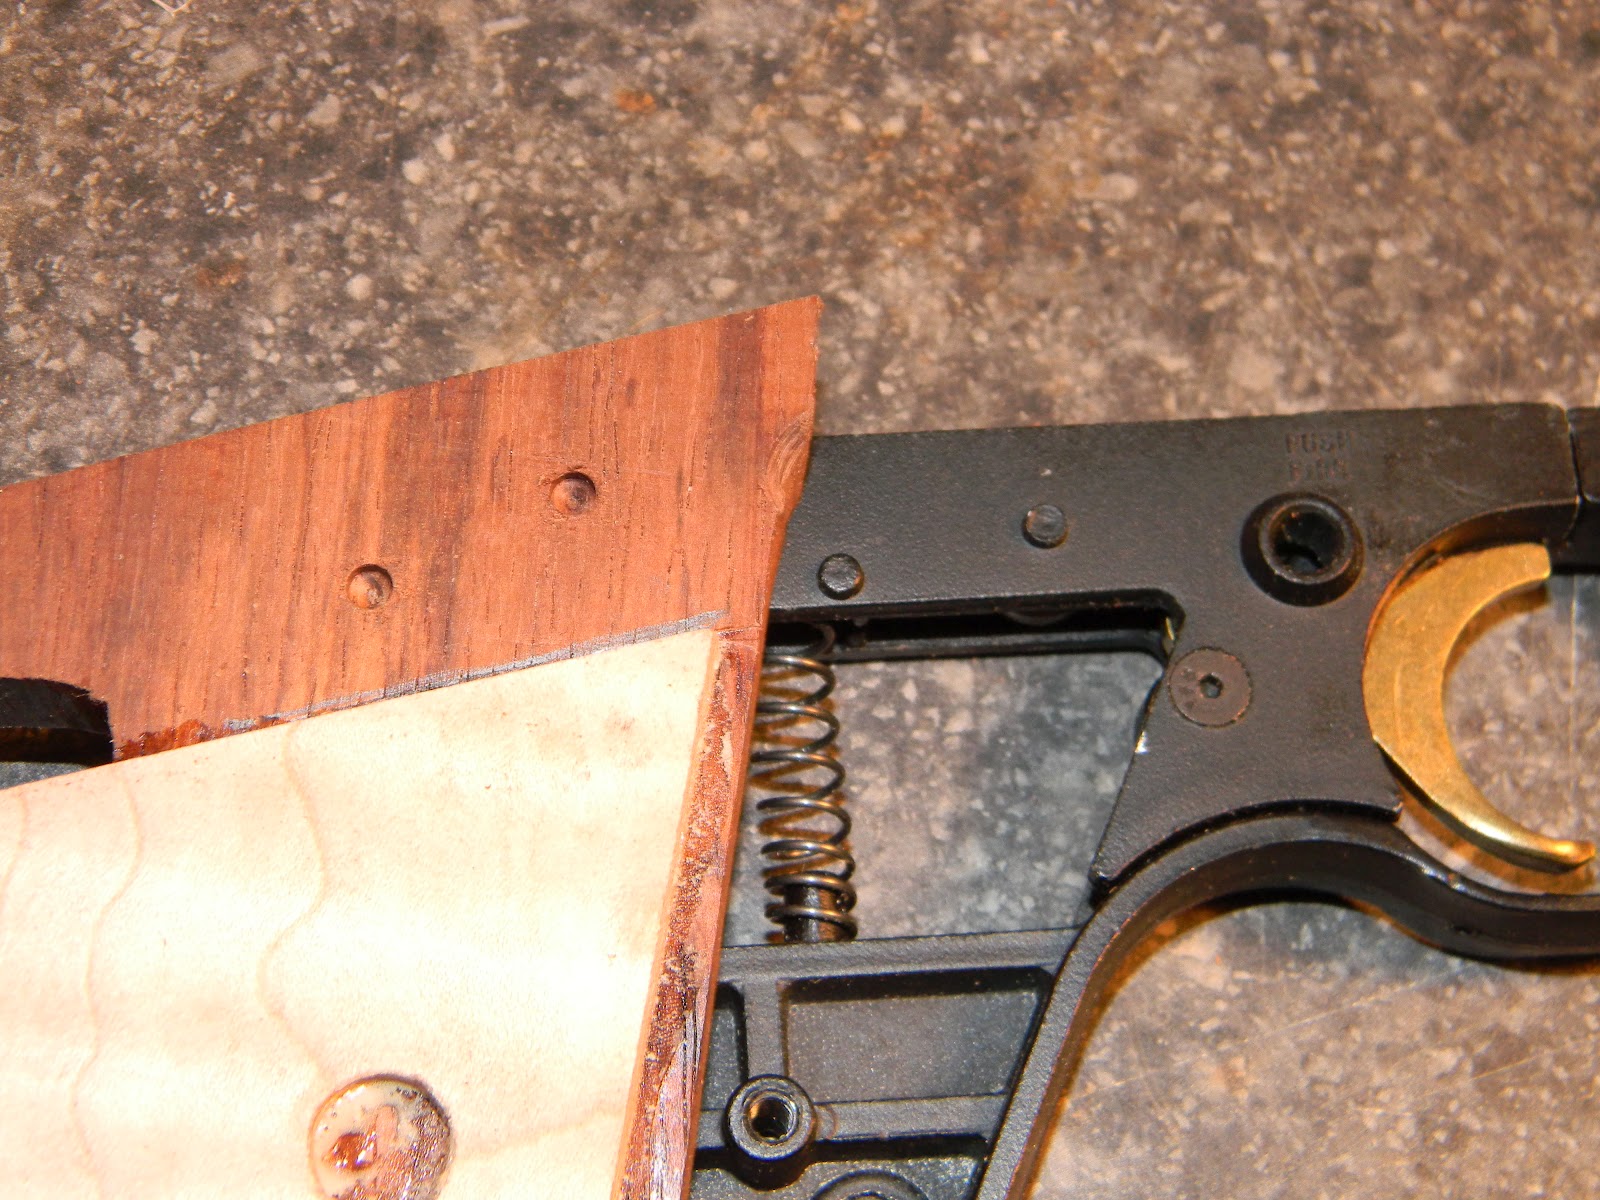
I'll take it to a higher grit later then repaint it.


And what is this second hole for exactly?  


Mixed up some J-B Weld epoxy.


Backed with electrical tape so it doesn't sag inward.  Overfilled it and let it dry for a day.


Then sanded flush.


The mystery hole is gone. 


Fitted the rear of the right grip panel to the backstrap.


Penciled in a guide and started removing wood.


The belt sander makes for pretty quick stock removal.


Burned through several sanding drums.  3/4" 50-grit is probably my favorite for shaping thumb rests.


When I started shaping the left panel, the top edge came off.  Happens.  Sometimes there's a hairline crack in the grain.  It's no big deal.


Yellow wood glue, Gorilla glue, epoxy would all suffice the repair.  I went with a Titebond brand cyanoacrylate for speed.


No overnight drying times.


Overfilled it to soak it into the wood.


A bit of sanding and it'll be pretty much invisible.


Still shaping.


Getting there.  I'll need to tweak the fit here and there to my hand as well as do some final fitting to the grip frame--then some more sanding.  Oh, and then re-spray the grip frame...

Check back soon.

Sunday, April 1, 2012

Yet Another Grip for a 22XX pistol- Part 1

Yeah, another detour away from making that rear sight.   These grips are a higher priority on the list of needs/wants right now.  I've got way, way too many Crosman 22XX pistols and I harbor a strong distaste for the stock grips.  I'd really like to make three or so sets of wood grips, but the tedious nature of the work gets to me.   A few months ago, I cut out the rough outline of the grips from the leftover plank of rosewood from the Crosman 150 grip project.  The blanks were set aside as I worked on other things. 


As I wanted to move these along, I opted to cut some maple spacers rather than inlet the rosewood to the frame.  I'll gloss over a bunch of stuff here since we've covered making grips so many times.  The key to making the spacers work on the 22XX frame is using a piece exactly 0.125" thick.  This should save the time and effort of routing the inside edges of each grip to properly fit the frame.  I rough cut the maple with a small Japanese pull saw and sanded two edges.  It wasn't exactly precise.  The spacer really only needs to be fitted at the top and leading edge.  The other sides will be worked down later with the rosewood.


Drilled a through hole for the grip screw boss.  Hole is oversized.  It could be slotted, notched...as long as the boss fits through.  Note:  sacrificial board underneath so the maple doesn't splinter.


Again, the boss just needs to pass through.


Here's the only place I'm really concerned with fitting at the moment.  The top, back corner against the grip frame.  It's 1/8" thick and just acts as filler.


Wiped the rosewood with acetone then glued the maple spacer to the grip with Gorilla glue.


Clamped it in rubber vise jaws and a couple clamps.  The goal is no air pockets.


After the glue dried, I trimmed off the squeeze out then finished the minimal fitting to the frame.  Trimmed the grips to clear the safety boss on each side.


Used a small sanding drum.


Then transferred the two small locator boss protrusions from the top of the grip frame.  Pressing the grip hard against the frame indented the spots to be drilled.


With the grip now flush to the frame, I sorted through the number drill bits until I found one the just cleared the threads in the frame and used it to mark the grip underneath.  A transfer punch also would've worked, but the drill bits were already on the bench.


Drilled through with a slightly larger bit to clear the necessary #6-32 grip screw.


Flipped over and used a forstner bit to counterbore for the head of the screw.


Just showing one side, but it's tight against the frame.  Sanding to shape will be the next step.

More soon.

Friday, March 30, 2012

Crosman Trapmaster 1100 Disassembly, Part 6

Last disassembly post, next post will be me trying to fix it in my typical hamfisted manner.

03241255
I made the plastic drift even longer.
03241256
Finally got it out. Look at that rust(?) on the barrel.
03241257
Or glue? Maybe someone though the forearm was loose and tried to tack it in place?
03241258
It’s interesting rust.
03241259
The tube seems ok although dirty inside.
03241260
The piercing cap should come apart easily.
03241261
Ok, I can remove this.
03241262
Bent my much modified tool.
03241263
Finally unscrewed the top piercing pin. But I was unable to go further. The piercing cap pieces are stuck together. I’m soaking them and may need to apply heat. It’s not as bad as some guns I’ve taken apart but a few issues will need to be dealt with.

Thursday, March 29, 2012

Crosman Trapmaster 1100 Disassembly, Part 5

A little longer…
03241238
Just two pieces left…
03241239
Rear cartridge piercing.
03241240
I braced it in a vice and unscrewed it.

03241241
Well two pieces came out…
03241242
The o-ring has an old nick.
03241243
The piercer won’t come out…soaked it in some WD40.
03241244
So the valve tube assembly end won’t come out because one screw is sheared off. I drilled it down below the surface.
03241245
Finally. Man, look at that rust. I was hesitant to take the Trapmaster apart as it looked ok, but clearly it needed this.
03241246
Even the o-ring is rusty.
03241247
Valve spring.
03241248
Valve assembly.
03241249
At least the valve seat looks good.
03241250
Valve parts.
03241251
That seal looks ok.
03241252
Finally was able to jimmy out the piercing pin with a broken dental pick.
03241253
The screen retainer was so rusty it broke when I removed it.
03241254
Dang, that’s nasty.
One more post…