Monday, February 17, 2014

The KL-3B Fast Deer -- Part 3 Final?

With the ID of the compression tube cleaned up, I decided to lose the leather piston seal and go synthetic. 


Just unscrews from the head of the piston via a M5 phillips head bolt.


I've used these seals before.  Get them from Crosman (part #B18-04-1A) for about $1.10 each.    Cheap and they work.


Had to make a simple adapter from aluminum rod.  It's exactly like the one I made for the Benjamin Sterling.


Through drilled to clear the M5 bolt.


Countersunk for the flat head.


Cut the taper to interface with the 60 degree (included) angle on the new seal--


--and parted off.


Scrounged up a stainless flat head M5 bolt.


Installed.  Not shown--chucked the entire piston in the lathe and dusted a couple thousandths off the edge of the seal to get a better fit to the compression tube.


Test fit.


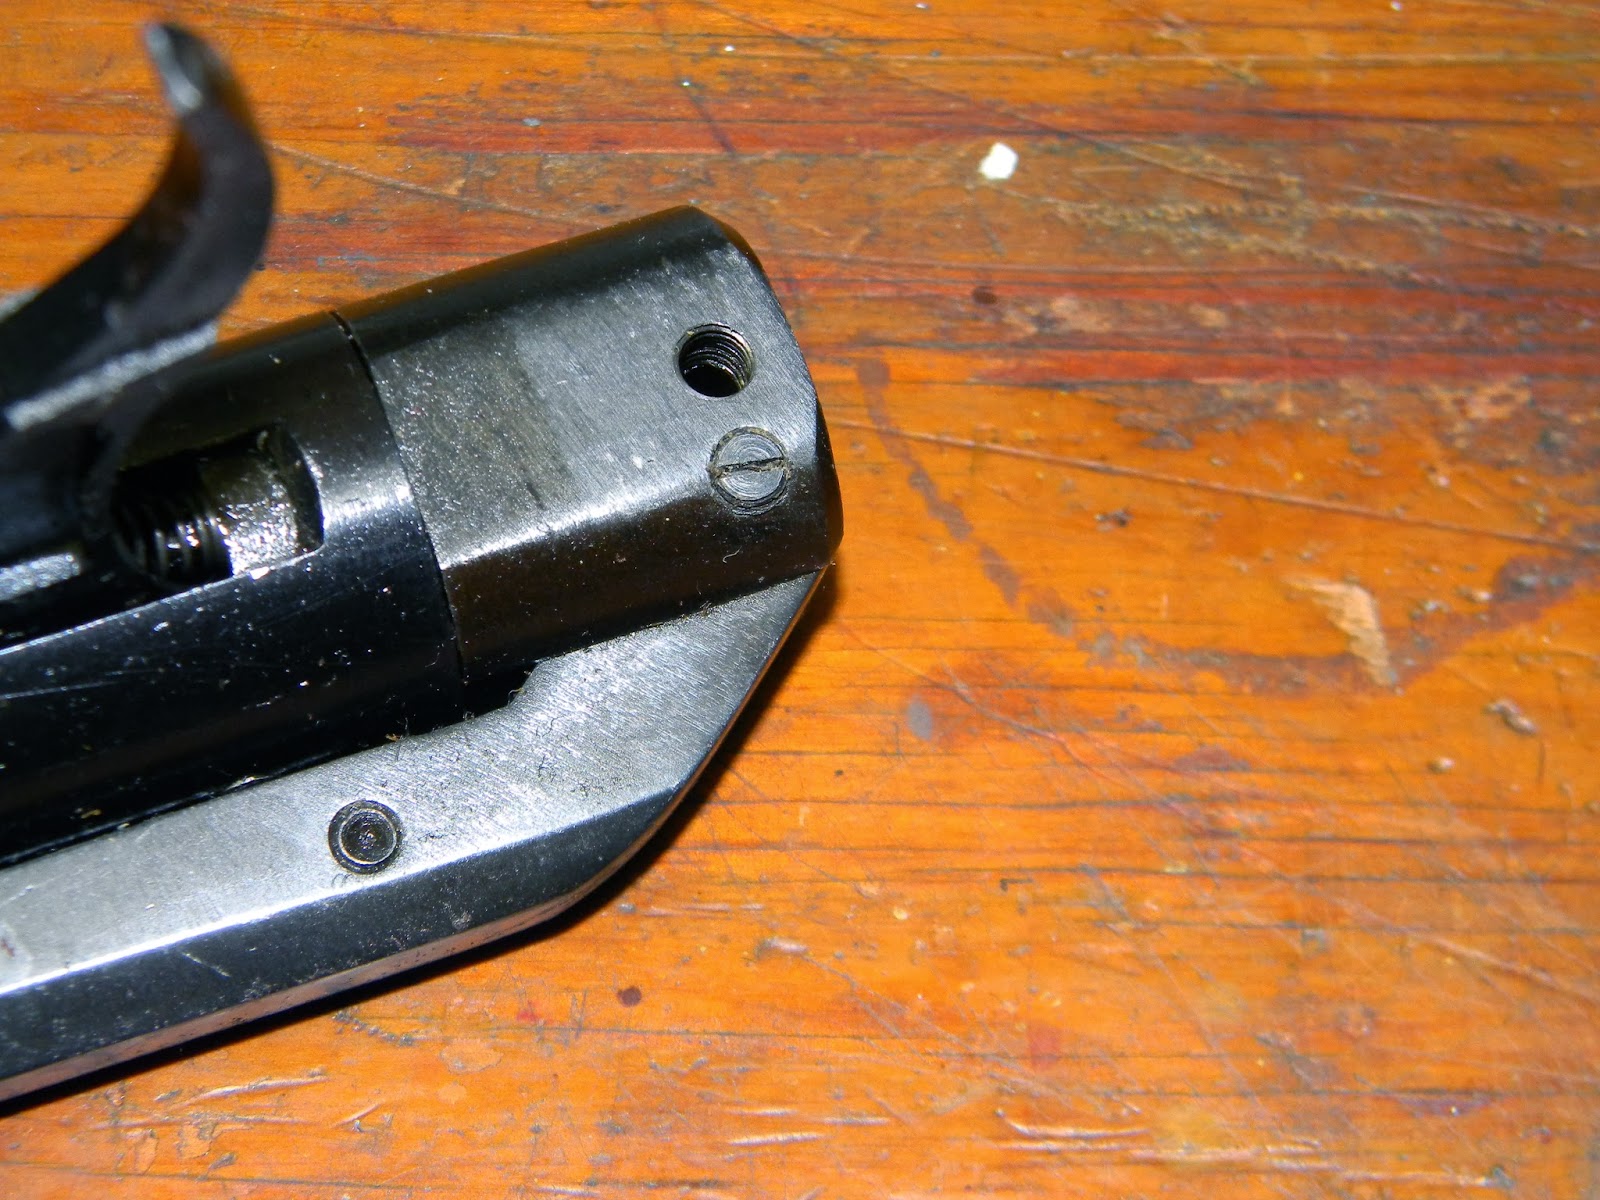
Here's the other end of the compression tube.  I thought that the transfer port was on the large side at 0.156" diameter.  Going to sleeve it down to 0.125". 


Found a 5C collet.


Finally, an excuse to use my horizontal/vertical collet holder.


To make this easy, I set this up on the mill and used a 5/32" (that's about 0.156") drill bit to line up the drill chuck with the hole.


Then changed to a #8 drill bit and opened up the hole to 0.199".   


And tapped the hole M6 x 1mm.  Now, it's a simple matter to make different sized transfer ports.


Had a piece of M6 threaded aluminum.  Through drilled it to  0.125"


Cut it to length and slit the end for a screwdriver blade.  Here its been installed with a low strength loctite.   It's really just a hollow setscrew.  Like I said, simple.


Went through the mainspring box and found what looks like a good candidate. (The bottom spring)


Installed the sliding compression tube.


Then the piston.


Followed by the anti-bear trap  mechanism.


Then the spring. 


Used the mainspring compressor to press in the end cap.  A drift lines up the holes and acts as a slave pin.


Installed the cross pin--don't forget the trigger blade.


The piston rod safety.


Dug out the misc. spring box...


and found a lighter trigger spring.


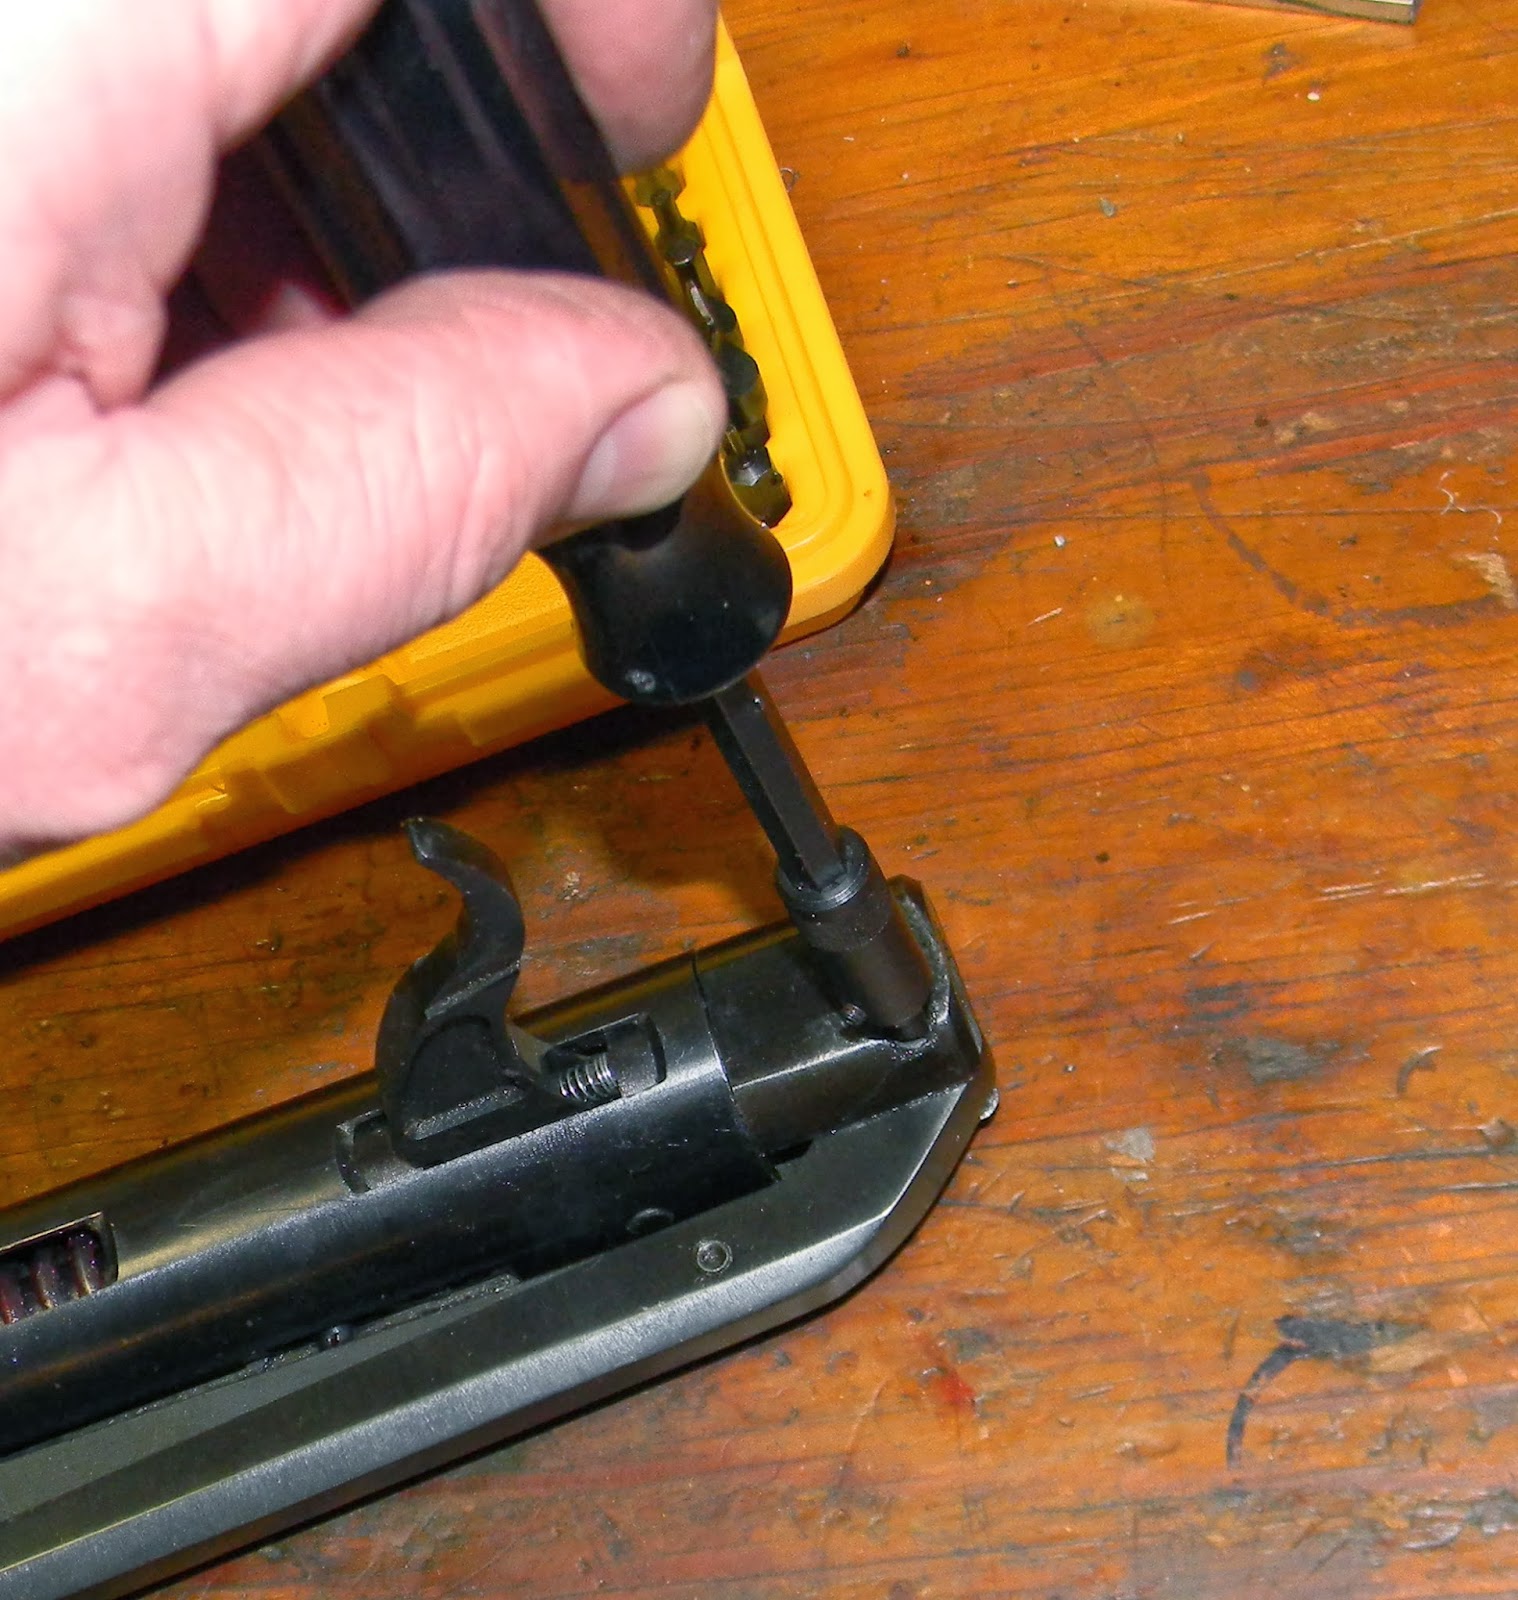
Reinstalled the cocking lever,


and hit the parts bins again to find some sights.


This'll clamp to the dovetail.


This is not at all what I was hoping to see down range.  And these are the GOOD targets.


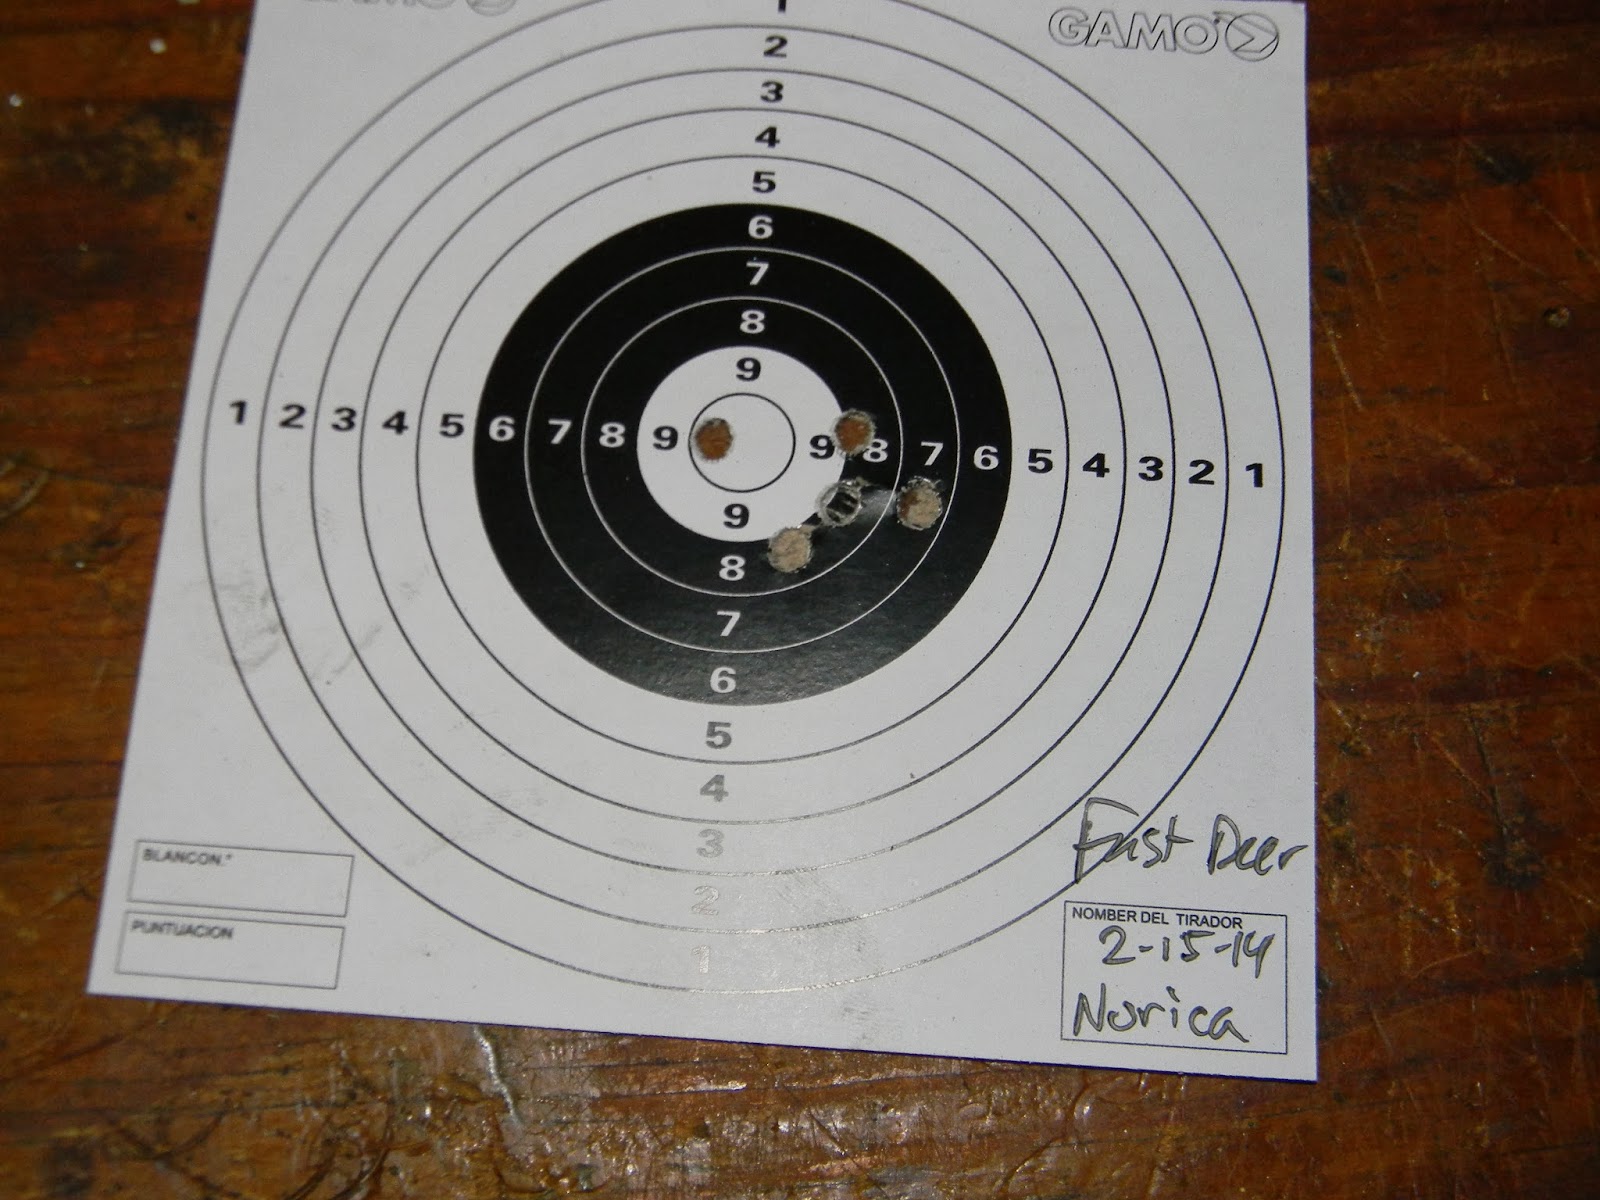
RWS Hobbys, Noricas, H&N--even the 5.6mm Eley Wasp pellets all failed to produce a single credible group.  A quick re-crown also didn't make a whit of difference.  Pulled the open sights and installed a scope.  No dice.  This gun simply won't group.

The only good news I've salvaged is the velocity after the compression tube hone is remarkably consistent:  398, 402, 402, 397, 404, 399, 402 with .22 cal Hobby pellets.  Low powered, but consistent. My almost identical power plant BAM B3-1 puts the same Hobby pellets out in the mid 550's.  So what gives?  Well, the bore on this Fast Deer is on the large size and does little to engrave the rifling onto the pellet.  My gut feeling is the pellet is so loose in the oversize bore, it's half way down the barrel before the piston has a chance to build full compression.   I'm pretty comfortable saying that the only fix to both the accuracy and velocity issues is a new barrel.  Sorry, but I'm calling it quits and shelving this one for the time being.  Too much effort, not enough reward. 

Here's what's on deck:  My Marauder has developed a slow leak.  About 500 psi over the course of a month.  That's up next.  Followed--hopefully--by a .25 cal Webley (Hatsan) Patriot that needs some love.

Sunday, February 9, 2014

The KL-3B Fast Deer -- Part 2

The Fast Deer repair continues.

Well, the interior of the Fast Deer's compression tube wasn't so hot.  The ridges and valleys around the cylinder wall were several thousandths deep.  Can't imagine how the piston compression could be consistent from shot to shot with gaps like that.   Lacking any other evidence at the moment, I've got to assume that these surface imperfections are causing the 240+ fps velocity variation.


We have a couple machines at work for precision honing IDs.  This is one of our horizontal hones from Sunnen.


Interchangeable mandrels hold varying diameters of abrasive stones.  Each is expandable within a small range.  I believe mandrels are available from as small as 0.060" up to 6.500".    Bob, our honing department specialist, was kind enough to get me set up and give me some basic instruction so I wouldn't hurt myself--or break his machine. 


The compression tube is slid over the mandrel which is expanded inside the bore until it just starts to kiss the inside.  The work can be hand held or affixed to a support.  RPM, diameter of the mandrel and stroke are all adjustable on the fly.   Honing is done with a flood of oil on the part.  (turned off for the pic)  Here, the mandrel is bottomed in the tube.


And almost withdrawn.


Didn't quite take the tube to 100% clean up.  Just wanted to take the worst of the gouges out.   Here's a shot fresh from the hone. Bore still covered in oil.


Here's the tube again before the honing.


And after.  A fingernail barely feels the scratches now.  It looks worse than it feels.  The fine scratches trap and hold lubricant--a good trait of a piston bore. 


More in a couple days.

Sunday, February 2, 2014

The KL-3B Fast Deer -- Part 1


Nick sent me this a long while back. A Fast Deer KL-3B sidelever from Norinco in the semi-rare .22 caliber.  I've been reluctant lax getting to it as I assumed it's pretty much identical to the BAM B3-1 (also sent by Nick) covered in depth here. 


There are some minor differences between the two guns, but more to the point, there are different problems.  Before tearing into the rifle, I test fired the gun across the chronograph with RWS .22 caliber Hobby pellets.  478, 257, 277, 258, 493, 249 fps...  Ouch.  Well, what's a 244 fps variation across six shots between friends?  A far cry from the 7 fps velocity spread I found with the B3-1.


The KL-3B isn't too horrific looking, but the trigger and trigger guard look positively huge compared to the rest of the gun.  I believe I've used the word, "cartoonish".  The rotating safety on the right side looks like the launch switch for a rocket from 1966.  No sights were included. 


I actually love the flat bottom of the forend.  It's a great place to rest the rifle on an open hand or the top of the knuckles.


Stock is way too glossy.  Looks like it's sprayed in plastic. 


Did I mention the sidelever?  The lever mechanism is a serious piece of milled steel.  This is the single best made part on the entire rifle. 


On with the show.


Removed the rear trigger guard and  forward mounting screws.


Action lifts right out.  Insane looking safety stays in the stock.


It functions as a trigger block.


The front mounting block is dovetailed to the breech.  Trust me--this is not the cheapest way to do this.


Ratcheting anti-bear trap safety.


Mainspring is dry.


The trigger is a "direct-sear" type.  It latches right to the piston without an intermediate lever.  Probably breaking in the neighborhood of nine pounds.  OK, OK, maybe more.


Back to the show.


Removed the screw holding the cocking lever to the end cap.


 And the lever pulls right off.


Behind the cocking lever is a secondary anti-bear trap device that captures the piston when the cocking lever is open.  The screw stud must be removed.


Look at that incredible cocking lever.  Great profiles from the mill.  The side lever on Diana Mod. 75 10-meter match rifles aren't in this league.


Put the action in the spring compressor and drove out the cross pin with a brass drift.


With the pin clear, the giant trigger and supremely heavy trigger spring pull out.


And the spring compressor is backed off...


...allowing the end cap to come free.  Note the stud removed a few steps above.


The end cap has a built-in spring guide. 


Mainspring is canted.


The ratcheting anti-bear trap mechanism up close.  It has to be removed in order to withdraw the piston and sliding compression chamber.


The front pin was stuck.  Had to tap it out with a thin punch.


 With the last pin out...


...the ratchet plate is pivoted up and out.


Tab fits into the compression tube.


Finally,  the sliding compression tube and piston are free.


Note the flat on the side of the cocking rod.  The secondary anti-bear trap safety rides in this flat when the cocking lever is open.  This is a nice design.


Some contact marks on the piston body.


Piston seal is leather.   Looks to be in good shape. 


The inside of the compression tube is not good.   It's badly scored.  This is just a poorly finished part.  Never mind that it's just the key component in the entire power plant...


The long striations are likely to blame for the erratic velocity numbers.  The seal isn't consistently closing off those voids.  This could be a small problem. 

More in a few days.